7
USB CONNECTIVITY
Connect a USB A-B type lead (as illustrated) from the DAC USB to a USB output
on your PC. The standard Windows
‘
found new hardware
’ dialogue will be
displayed on your PC in the bottom right hand corner of the screen.
USB A-B lead (not supplied)
The DAC will be recognised as ‘USB AUDIO DAC’. Installation should be
automatic as no driver disc is required. After a short period
‘your new
hardware is installed and ready to use’
should appear to confirm that
connection and installation has been successful.
It is recommended to switch off any other system sounds emitted by the PC via
the control panel. The DAC will automatically become the default for your PC
whilst connected. Once disconnected the previous default will be restored. If
this does not happen you can manually reset as follows :
Windows XP
- Control panel/Sounds and audio devices/Audio/Sound Playback
Windows Vista/Windows 7
- Control Panel/Hardware and Sound/Manage Audio
Devices/select ‘USB AUDIO DAC’ from list.
Mac OS
- System Preferences/Sound Output/Select Audio USB DAC.
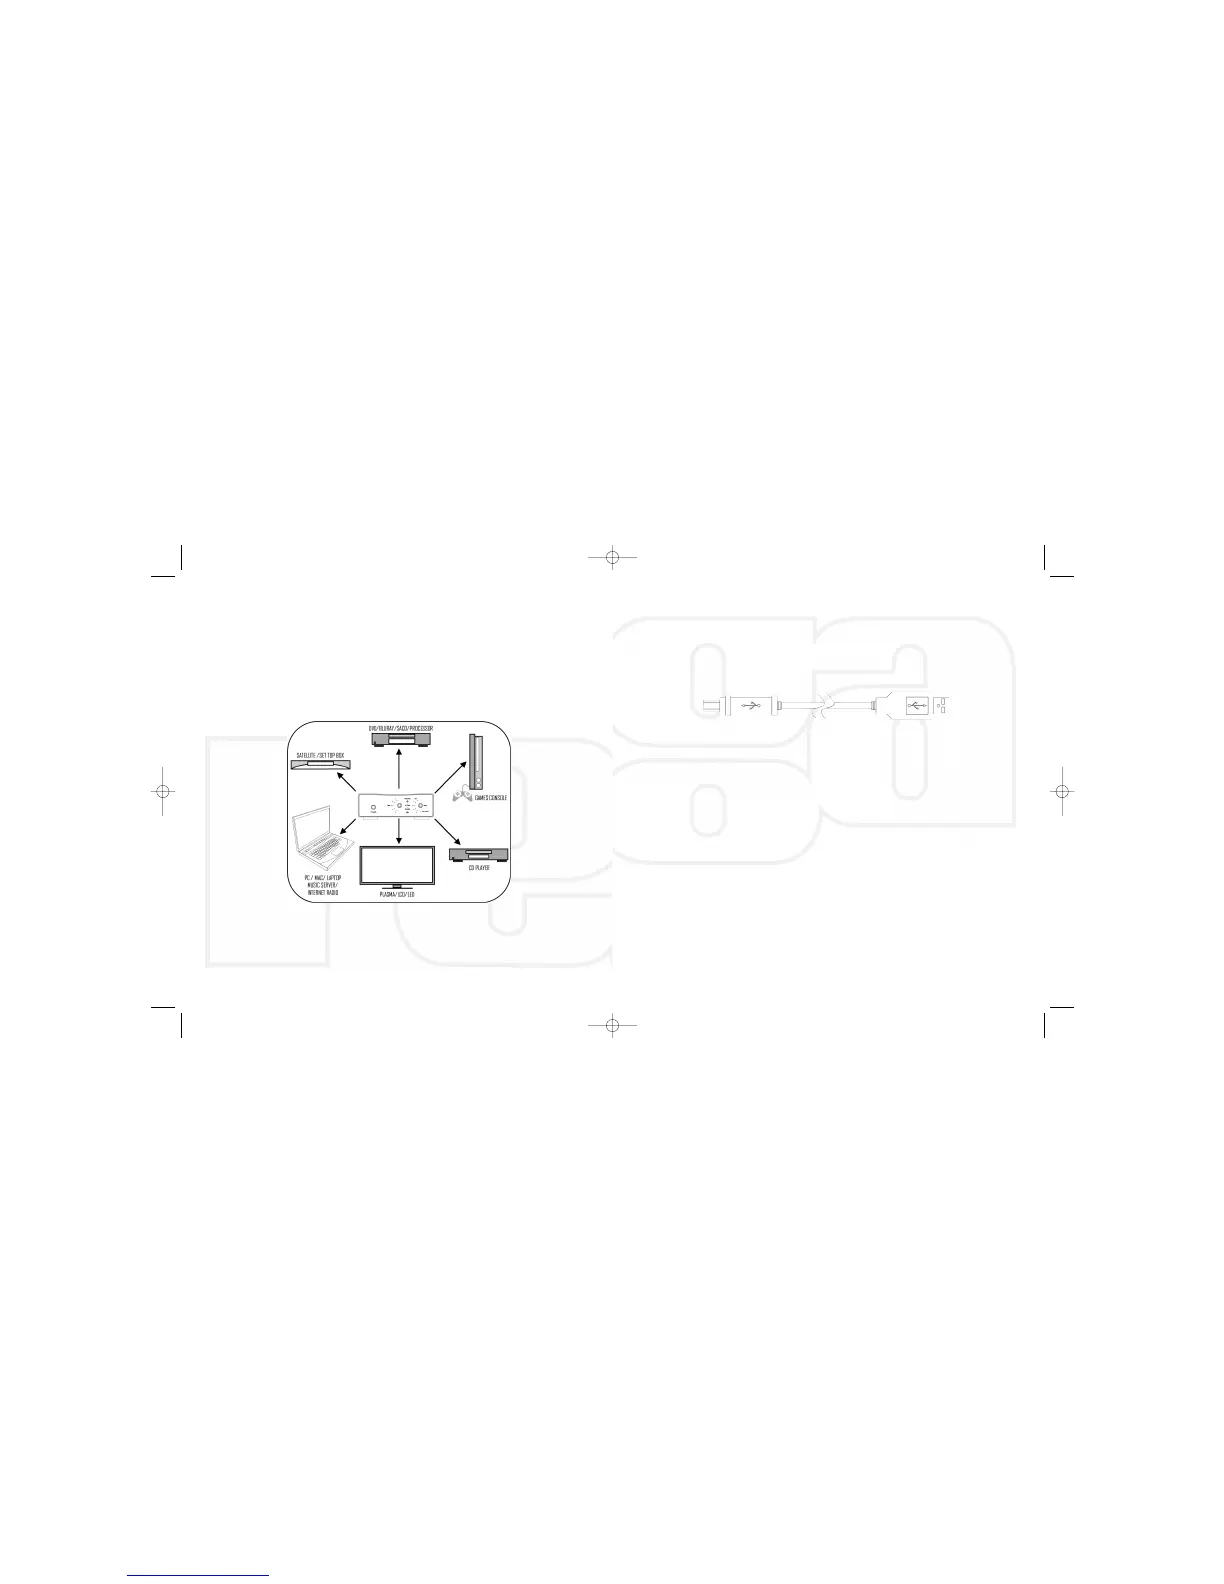
CONNECTIVITY (examples)
1 USB A-B/ 2 OPTICAL/3 CO-AXIAL
This page offers ‘suggested connectivity’, with so many products offering a
number of options it is important to check the manual of the product your are
connecting, for the appropriate or optimum output connection and settings
required to operate properly.
Note: This unit only accepts two-channel PCM digital audio. You cannot connect
a Dolby Digital 5.1/7.1 or a DTS signal as they will not be recognised. If you wish
to connect a DVD or similar device, please ensure that the sound output of your
player is set to two-channel PCM.
8