10
3
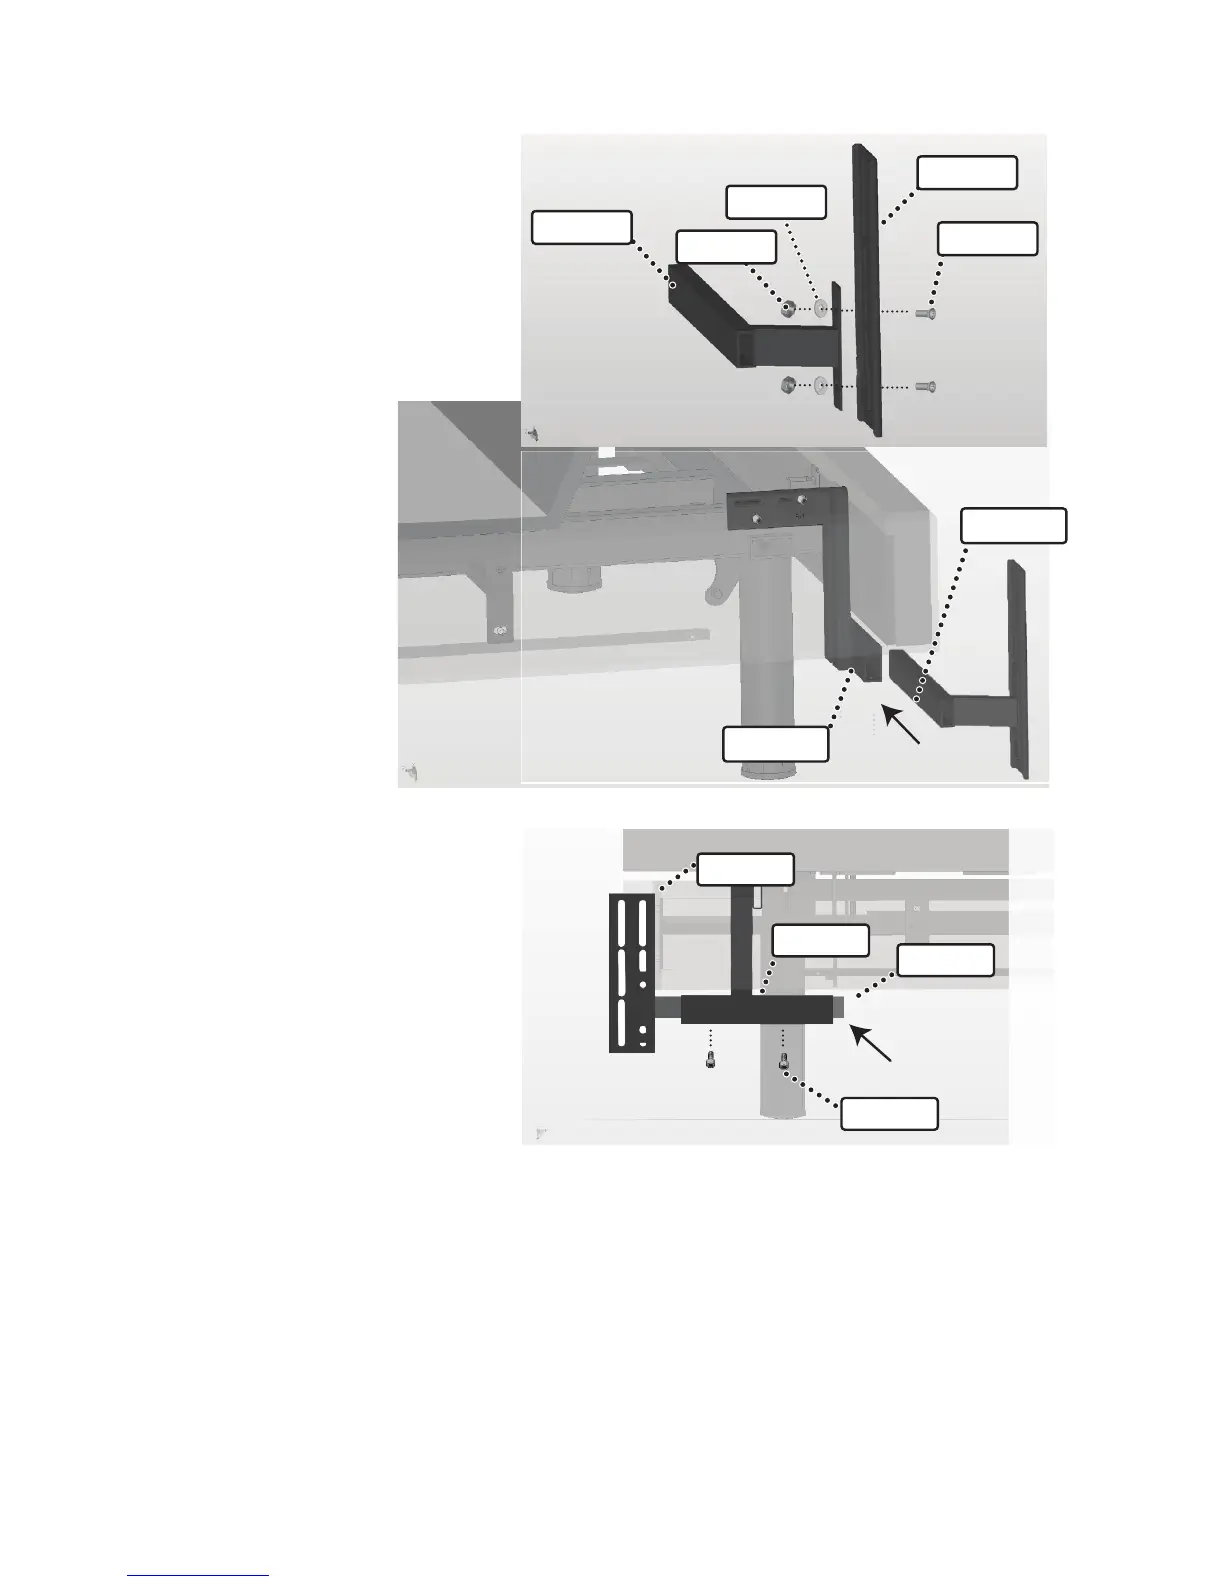
Attach the headboard
attachment plate (Part C)
to the horizontal shaft
(Part B) using the two at
head self locking screws
(Part E), two washers (Part
G) and two nuts (Part F)
provided with the kit.
5
Adjust the position of
the headboard
attachment plates (Part
C) to the right or the left
of the bed as desired by
moving the horizontal
shaft (Part B) left and
right in the horizontal
tting of the bed
attachment (Part A).
Once positioned
correctly tighten screws
(Part D) to hold in place.
To adjust the position of the headboard attachment plates (Part C)
vertically, loosen nuts and screws from step 3. Tighten when the
appropriate height for your headboard is met.
Install the headboard using the line of 3 oval holes on the outside
of the headboard attachment plate.
WARNING: The end of the horizontal shaft (Part B) must always
extend beyond the end of the horizontal tting of the bed
attachment! (Part A) (See Fig. 5 Arrow)
Assembly - Headboard Bracket
4
Insert, from the
outside of the bed,
the horizontal shaft
(Part B) into the
horizontal tting of
the bed attachment
(Part A).
PART C
PART B
PART D
Fig. 5
PART A
PART B
Fig. 4
PART A
PART C
PART B
PART E
PART F
PART G
Fig. 3