3
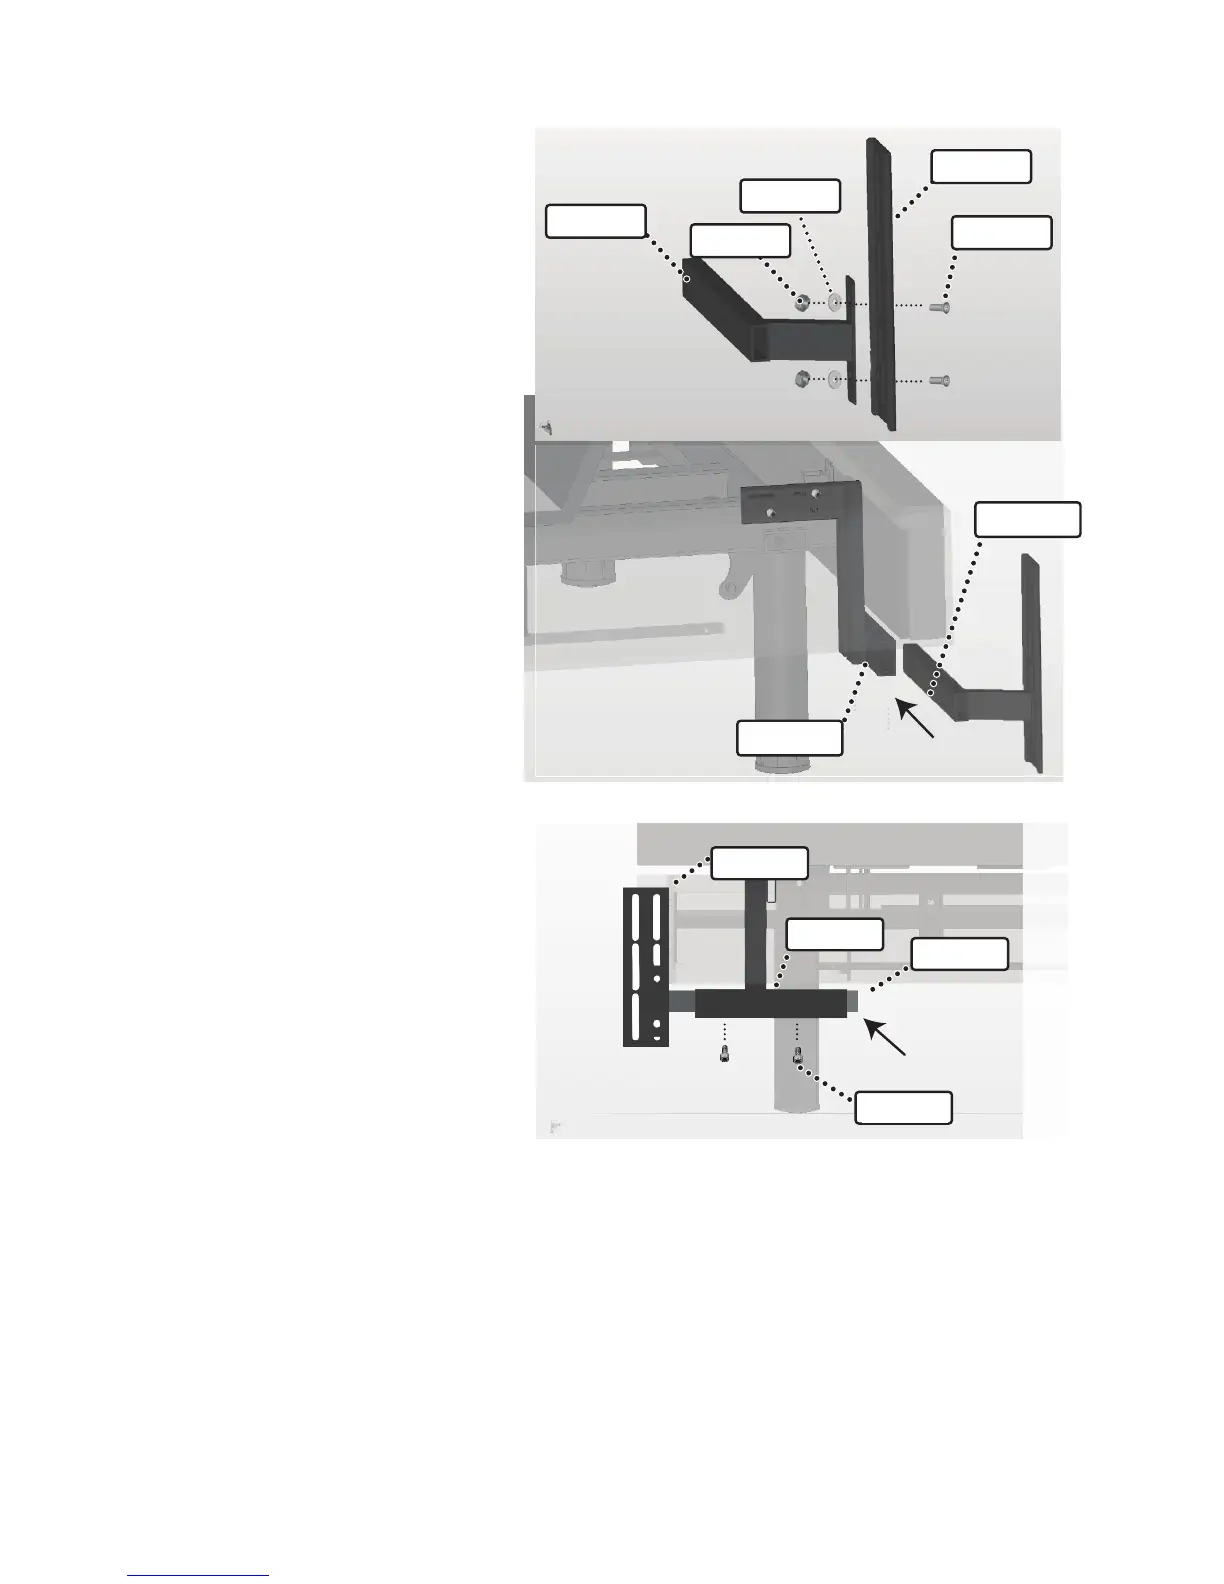
Attach the head board
attachment plate (Part C)
to the horizontal shaft
(Part B) using the two at
head self locking screws
(Part E), two washers (Part
G) and two nuts (Part F)
provided with the kit.
5
Adjust the position of
the head board
attachment plates (Part
C) to the right or the left
of the bed as desired by
moving the horizontal
shaft (Part B) left and
right in the horizontal
tting of the bed
attachment (Part A).
Once positioned
correctly tighten screws
(Part D) to hold in place.
To adjust the position of the head board attachment plates (Part C)
vertically, loosen nuts and screws from step 3. Tighten when the
appropriate height for your head board is met.
Install the head board using the line of 3 oval holes on the outside
of the head board attachment plate.
WARNING: The end of the horizontal shaft (Part B) must always
extend beyond the end of the horizontal tting of the bed
attachment! (Part A) (See Fig. 5 Arrow)
Assembly - Head Board Bracket
4
Insert, from the
outside of the bed,
the horizontal shaft
(Part B) into the
horizontal tting of
the bed attachment
(Part A).
PART C
PART B
PART D
Fig. 5
PART A
PART B
Fig. 4
PART A
PART C
PART B
PART E
PART F
PART G
Fig. 3
PARTE B
PARTE G
PARTE F
PARTE B
PARTE A
PARTE A
PARTE C
PARTE B
PARTE D
PARTE E
PARTE C
3
Adhiera la placa de sujeción
del cabecero (Parte C) al eje
horizontal (Parte B) usando los
dos tornillos de autobloqueo
del cabezal (Parte E), dos
arandelas (Parte G) y dos
tuercas (Parte F) que vienen
con el kit
4
Introduzca, desde afuera de la
cama, el eje horizontal (Parte
B) en la colocación horizontal
de la sujeción de la cama
(Parte A).
5
Ajuste la posición de las placas
de sujeción del cabecero (Parte
C) a la derecha o izquierda
de la cama según desee,
moviendo el eje horizontal
(Parte B) a la derecha e
izquierda en la colocación
horizontal de la sujeción de
Ensamblaje - Soporte del Cabecero
la cama (Parte A). Una vez posicionado correctamente, ajuste los tornillos (Parte
D) para mantenerlo en su lugar. Para ajustar la posición de las placas de sujeción del
cabecero (Parte C) en forma vertical, afloje las tuercas y tornillos del paso 3. Ajuste
cuando se alcance la altura adecuada para su cabecero. Instale el cabecero utilizando
la línea de 3 orificios ovalados en la parte exterior de la placa de sujeción del cabecero.
ADVERTENCIA: El extremo del eje horizontal (Parte B) debe siempre extenderse más
allá del extremo de la colocación horizontal de la sujeción de la cama (Parte A) (Ver la
flecha de la Fig. 5).