9
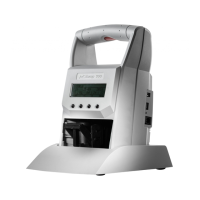
jetStamp 1025
1. Preparation and Taking into Operation
1.1. Commissioning
The rechargeable batteries must be charged completely before the first use.
The charging time is approx. 3 hours. The rechargeable batteries are charged when the
green charge display
goes out.
Only connect the device to the PC after the PCset graphic software has been installed,
otherwise the installation of the device drivers will fail!
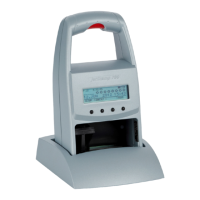
Inserting rechargeable batteries Fig.
B
+
C
+
Always replace all rechargeable batteries at once. Date, time and counter reading of the
numbering machine are retained when the rechargeable batteries are removed.
f Open the flap for battery and print cartridge compartment
.
f Push battery compartment locking
upwards until the locking can be opened.
f Open battery compartment
, ensure correct polarity and insert batteries.
f Close battery compartment
.
f Close flap for battery and print cartridge compartment
.
Charge the rechargeable batteries Fig.
B
f
Connect the power supply unit of the device to the socket for power supply unit
. Green
charging indicator
is lit. The charging process is completed as soon as the charging
indicator goes out.
Inserting printing cartridge Fig.
B
+
E
+
C
Depending on ink type used, dierent Protective Nozzle Seals are required.
Use sealing of the enclosed printing cartridge.
f Switch the unit on via the ON/OFF button
.
The operating status LED
lights up green.
f Press function key for print cartridge
. Print carriage
moves to the right into the
change position.
f Open flap for battery and print cartridge compartment
.
f Push the print cartridge locking
slightly upwards and open it.
f Remove the print cartridge
from the packaging and remove the dust cover (see operat-
ing instructions for the print cartridge P5).
f Place the unit on a firm surface.
f Hold pressure cartridge locking
in place.
G
 Loading...