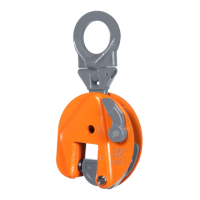
7 DISASSEMBLING/ASSEMBLING CU-(H), CSEU, CUR, CBU CLAMP MODELS
- Open the clamp to its full extent
- Remove the tension spring (9) in the
case of the 0,75, 1, 1,5, 2 & 3 first
- Remove the retaining pin (10) in the
cam assembly (2).
- Remove the retaining pin (10) and the
cam pin (7).
- Take the retaining pin (10) out of the
connecting piece (18) and remove
the link pin (17).
- Remove the lifting shackle (16).
- Push the connecting piece (18) in until
the shackle pin (6) can be removed
through the mounting hole.
- Remove the connecting piece (18)
and the cam assembly (2).
- Disassemble the lever (4) by removing
the retaining pin (10) and take the
lock assembly (3) out of the clamp.
- Remove the pivot (8) using a socket
and ring spanner.
- Clean all parts with a standard
degreasant.
- Grease all shackle pins with bearing
grease.
- Oil the spring if necessary.
- Assemble all the parts in reverse order.
- Always insert new original retaining
pins (10) and do so with the aid of a
hammer, com
- bination pliers and pin punch.
- Always fit a new pivot bolt (11) and
nut (12).
- Always use original REMA components when replacing parts.
- Remove any burr with a file.
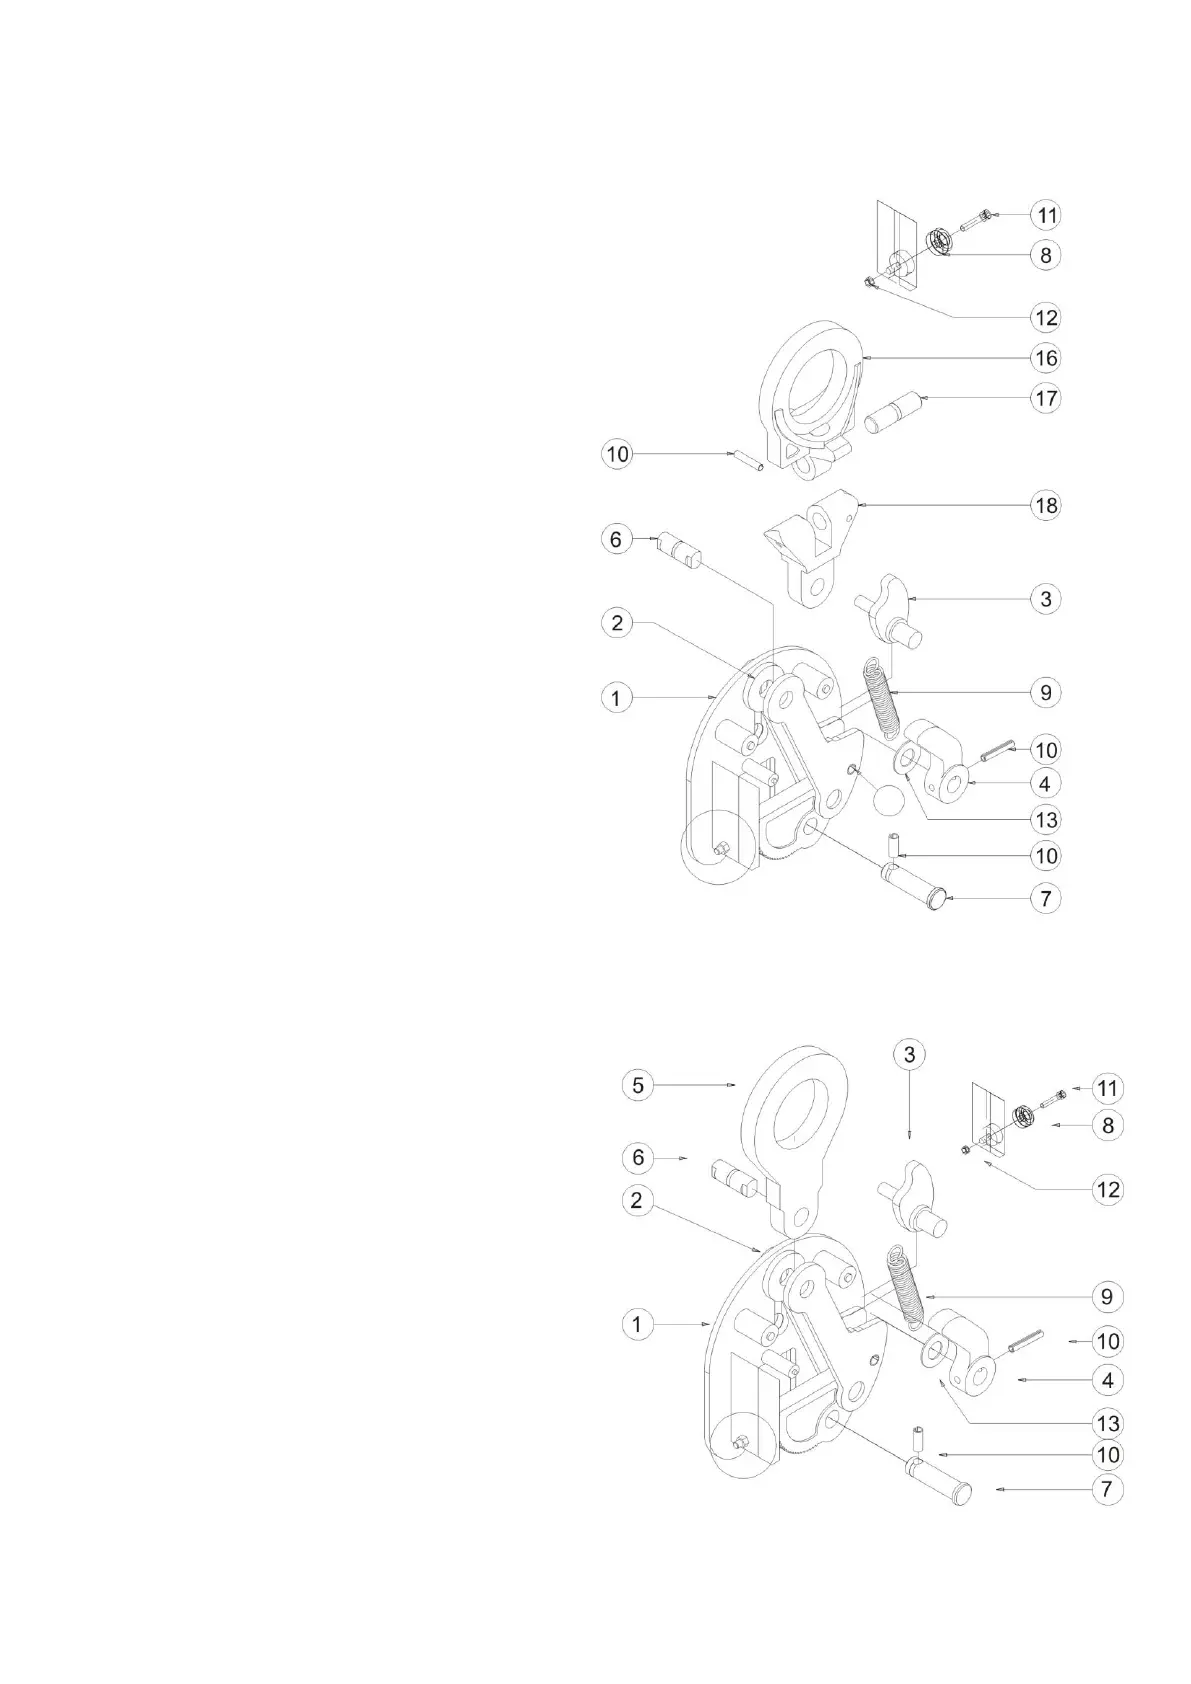
7 DISASSEMBLING/ASSEMBLING CS-(H),CBL
CLAMP MODELS
- Open the clamp to its full extent.
- Remove the tension spring (9); in the
case of 0,75, 1, 1,5 , 2 & 3 first remove the
retaining pin in the cam assembly (10).
- Remove the retaining pin (10) and the
cam pin (7).
- Push the lifting shackle (5) in until the
shackle pin (6) can be removed via the
mounting hole.
- Remove the lifting shackle (5) and the
cam assembly (2).
- Dismantle the lever (4) by removing the
retaining pin (10) and take the lock
assembly
- (3) out of the clamp.
- Remove the pivot (8) using a socket and
- ring spanner.
- Clean all parts with a standard
degreasant.
 Loading...