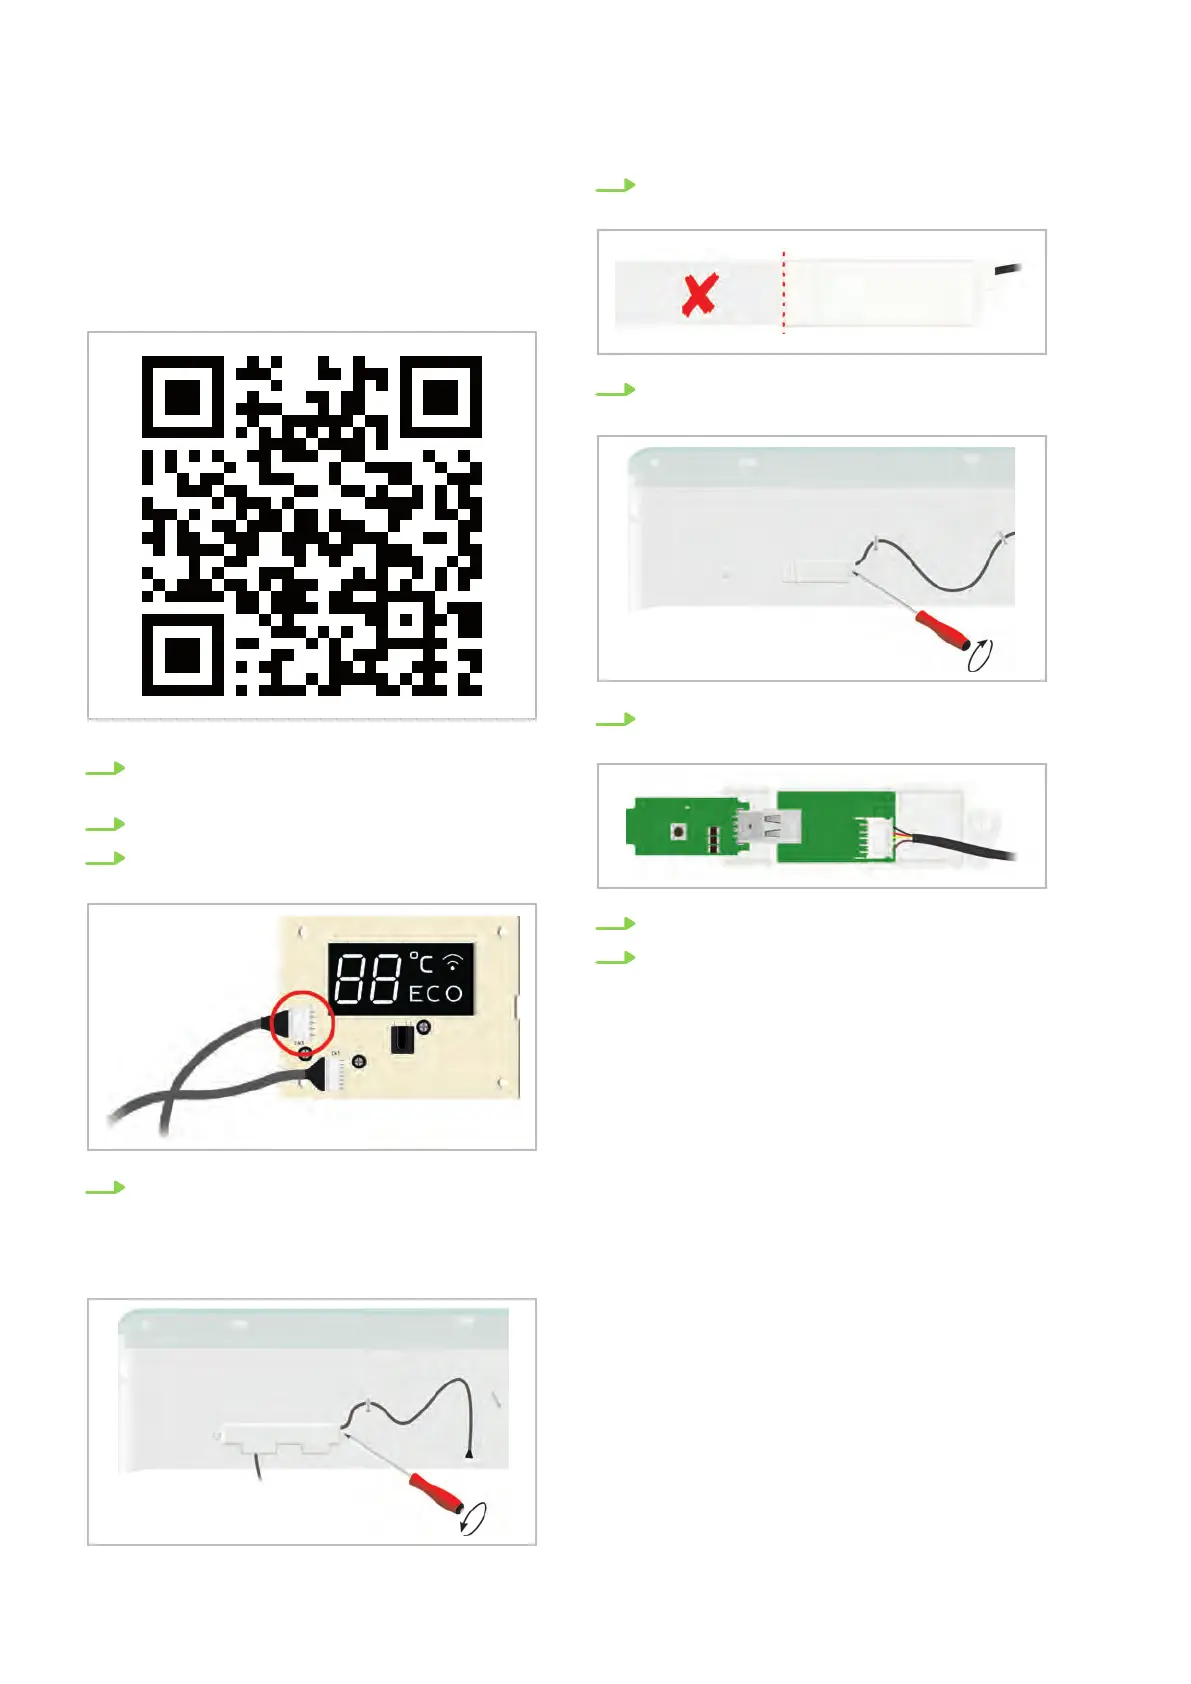
ML and MXW (up to 08/2021)
The standard adapter board is replaced by the
interface board. The circuit board is attached to the
left-hand side of the rear panel of the ML and
MXW series units. The installation can be carried
out as follows:
1. Disconnect the system from the power
supply
.
2. Open the unit cover
.
3. Use a screwdriver to lever out the cover of
the display board at the protrusion provided.
4. Remove the adapter board plug from contact
CN3. Then plug the connector of the Wi-Fi
interface board onto the now free contact
CN3 and reattach the display board with the
holder to the panel.
5. Loosen the Phillips screw and remove the
adapter board.
6. Shorten the interface board at the predeter-
mined breaking point.
7. Attach the remaining part of the interface
board to the panel and fix it with the screw
.
8. Insert the Wi-Fi stick into the interface.
9. Close the unit cover
.
REMKO Wi-Fi stick Smart-Control
12
 Loading...