35
Make sure to insert the front control panel in the correct way.
Do not press the front control panel against the unit too hard. You can put it back just by pressing slightly
on the device.
When you store the front control panel, please put it into the supplied protective cover.
b) Installation in the Radio Slot
• Remove the front control panel.
• Carefully remove the plastic frame in the front of the system by bending it slightly to the outside and pulling it off
from the unit.
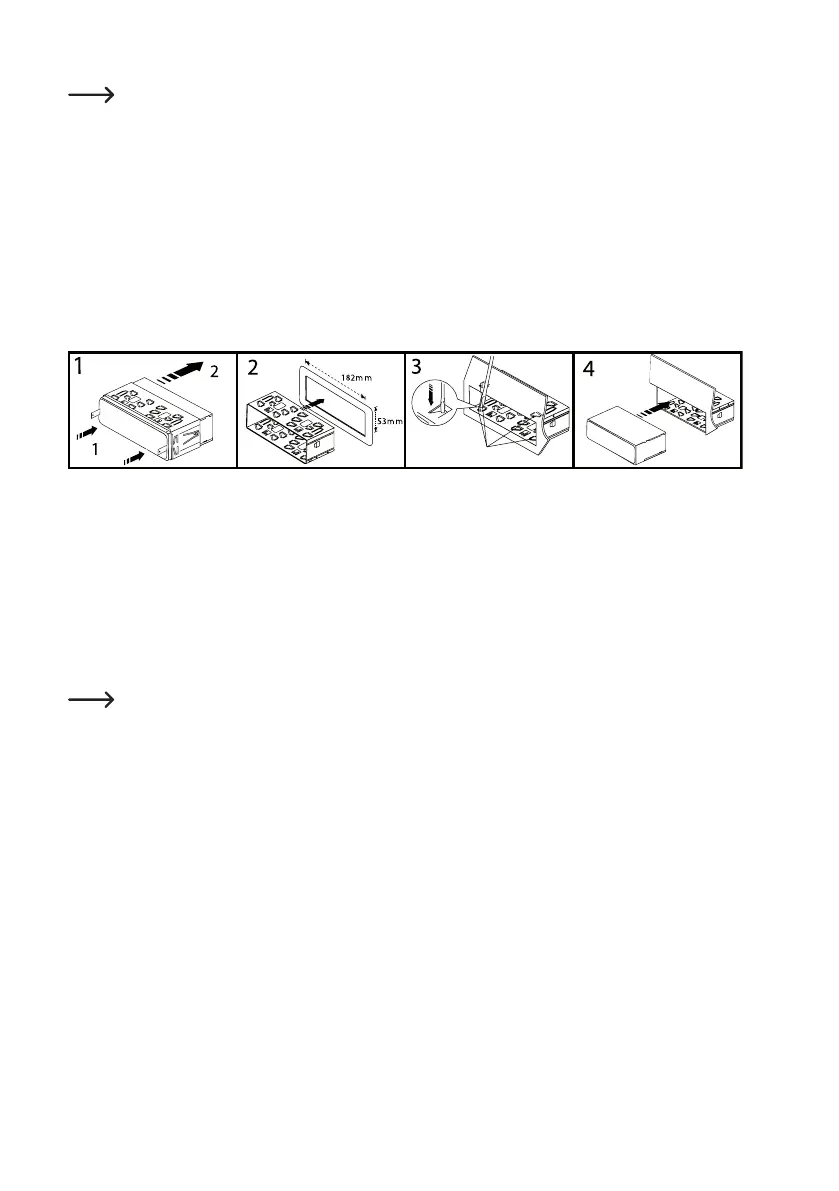
• Unlocktheinstallationframewiththetwounlockingkeys(gure1,item1).
• Removetheinstallationframetowardsthebackofthesystem(gure1,item2).
• Inserttheframeintotherespectivecut-outinthevehicle(gure2).
• Benddownsomeclipsintheinstallationframeuntiltheframeissecurelyfastenedintherecess(gure3).
• When you have made all the electrical contacts (see "Electric Connection") insert the SD tuner into the frame until
itlocksin(gure4).Ensurethatthedeviceispushedintotheinstallationframetherightawayaround(thecontacts
for the front control panel must be at the bottom).
• Push the plastic frame at the device front onto the device again.
Keep the two unlocking keys. You will need them for a later removal of the device.
• Additionally protect the device from vibrations with the enclosed bolt, which you can attach to the back of the unit.
• In most vehicles, such a safety fastening is provided for. If this is not the case in your car, fasten the device with a
punched metal strip.