English English5 6
Charge the Camera
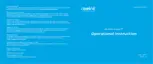
Step 3 Launch the Reolink App, click the “ ” button in the top right corner to add the camera.
Scan the QR code on the device and follow the onscreen instructions to nish initial setup.
NOTE: This device supports 2.4 GHz and 5 GHz Wi-Fi networks. It is recommended to connect the
device to 5 GHz Wi-Fi for a better network experience.
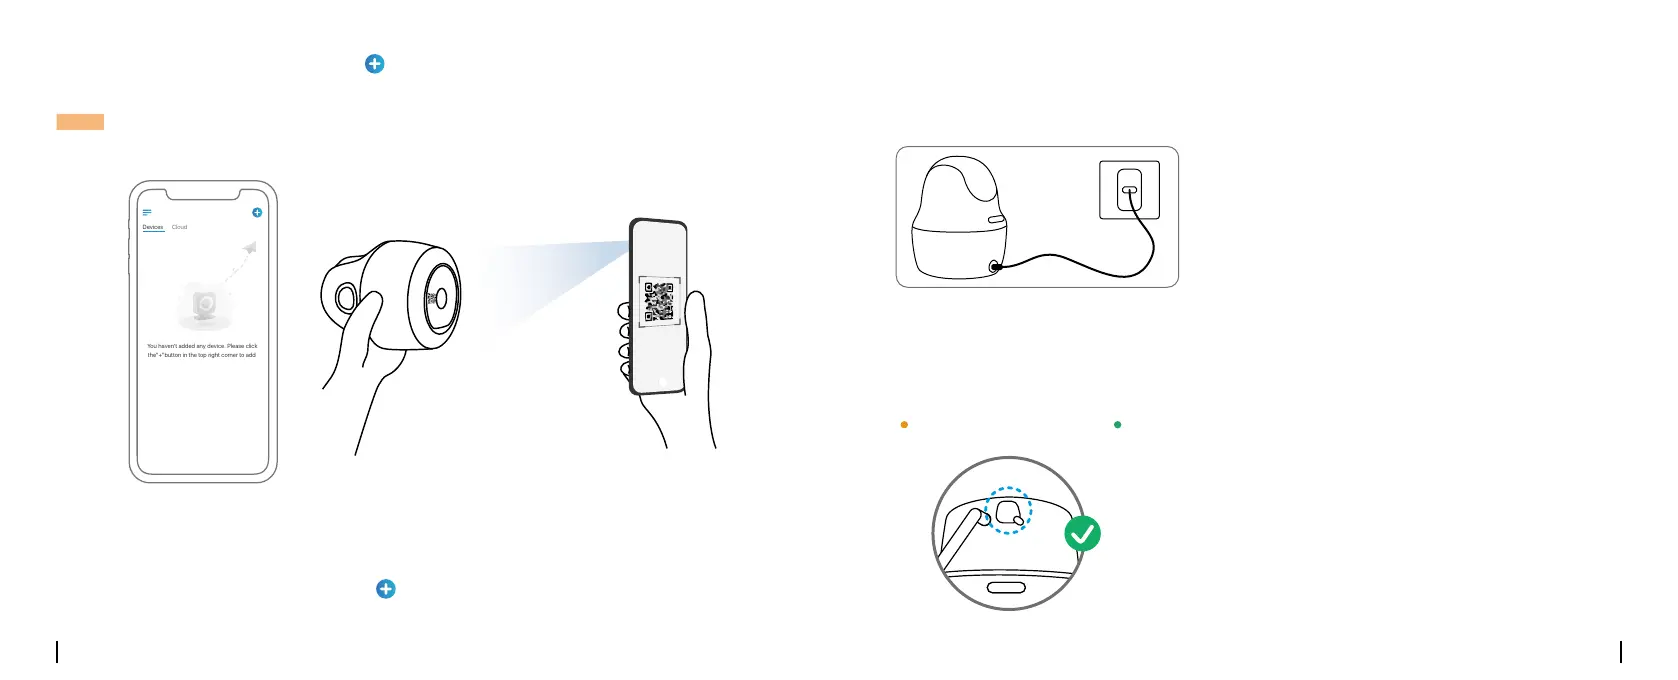
Charge the battery with a power adapter.
(not included)
For better weatherproof performance, please
always cover the charging port with the rubber
plug after charging the battery.
Step 2 Launch the Reolink Client, click the “ ” button, input the UID code of the camera to add it
and follow the onscreen instructions to nish initial setup.
Step 1 Download and install the Reolink Client: Go to https://reolink.com > Support > App&Client.
Set up the Camera on PC (Optional)
You haven't added any device. Please click
the"+"button in the top right corner to add
Orange LED: Charing Green LED: Fully charged
Charging Indicator:
It’s recommended to fully charge the battery before mounting the camera.

 Loading...