English English19 20
Install the E1 Outdoor Camera
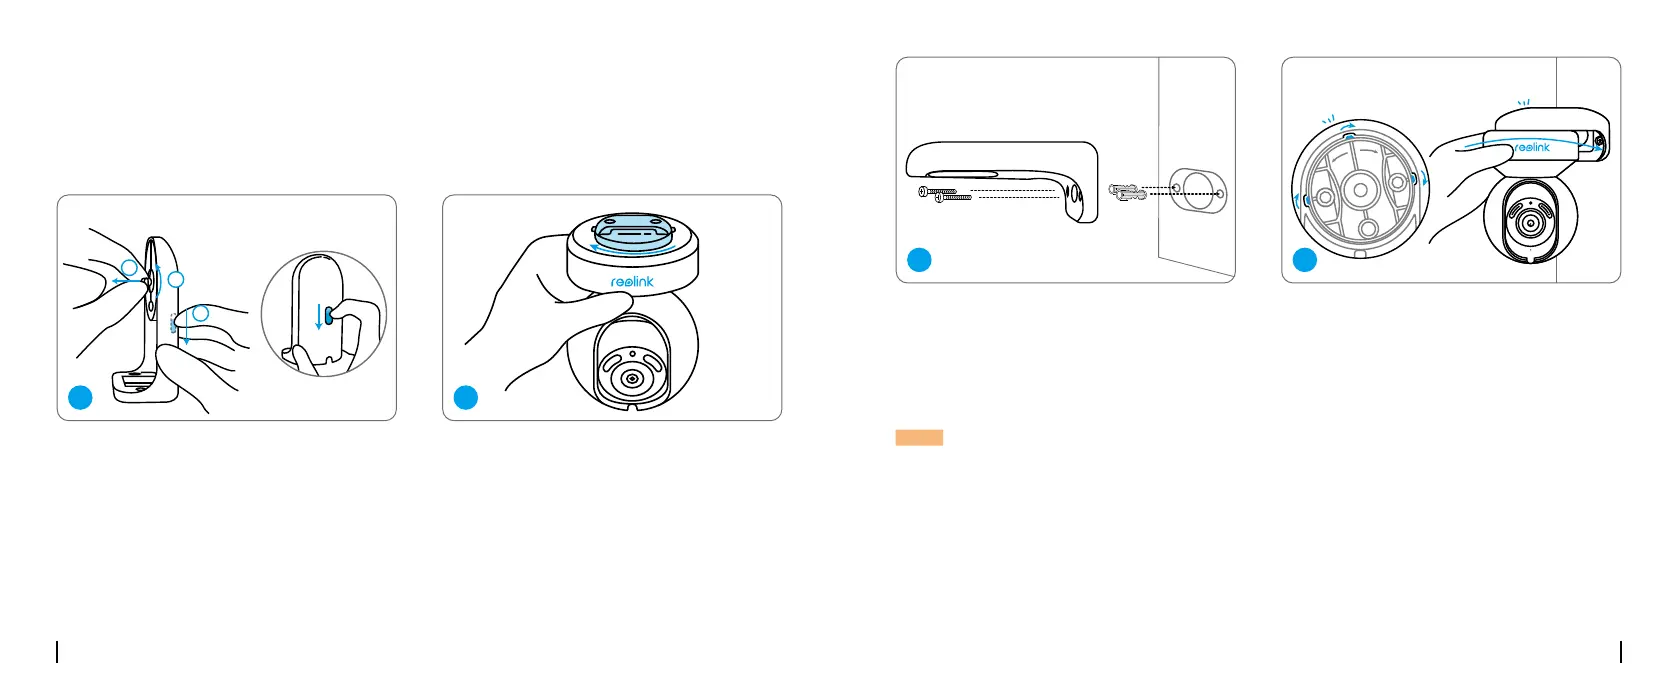
Mount the Camera to the Wall
For outdoor use, E1 Outdoor must be installed upside down for better waterproof performance.
Pull the button of the security mount and
unscrew the bracket to separate the two
parts.
Drill holes in accordance with the mounting
template and screw the security mount to
the wall.
Screw the bracket to the bottom of the camera.
Choose a proper direction of the camera
and then align the bracket to the security
mount and lock the camera in place by
turning anti-clockwise.
You haven't added any device. Please click
the"+"button in the top right corner to add
You haven't added any device. Please click
the"+"button in the top right corner to add
You haven't added any device. Please click
the"+"button in the top right corner to add
You haven't added any device. Please click
the"+"button in the top right corner to add
NOTE: Use the drywall anchors included in the package if needed.
1 2
3 4
 Loading...