EasyManuals Logo

Reolink Go PT Quick Start Guide

Reolink Go PT
11 pages
To Next Page IconTo Next Page
To Previous Page IconTo Previous Page
Page #8 background imageLoading...
Page #8 background image
English English13 14
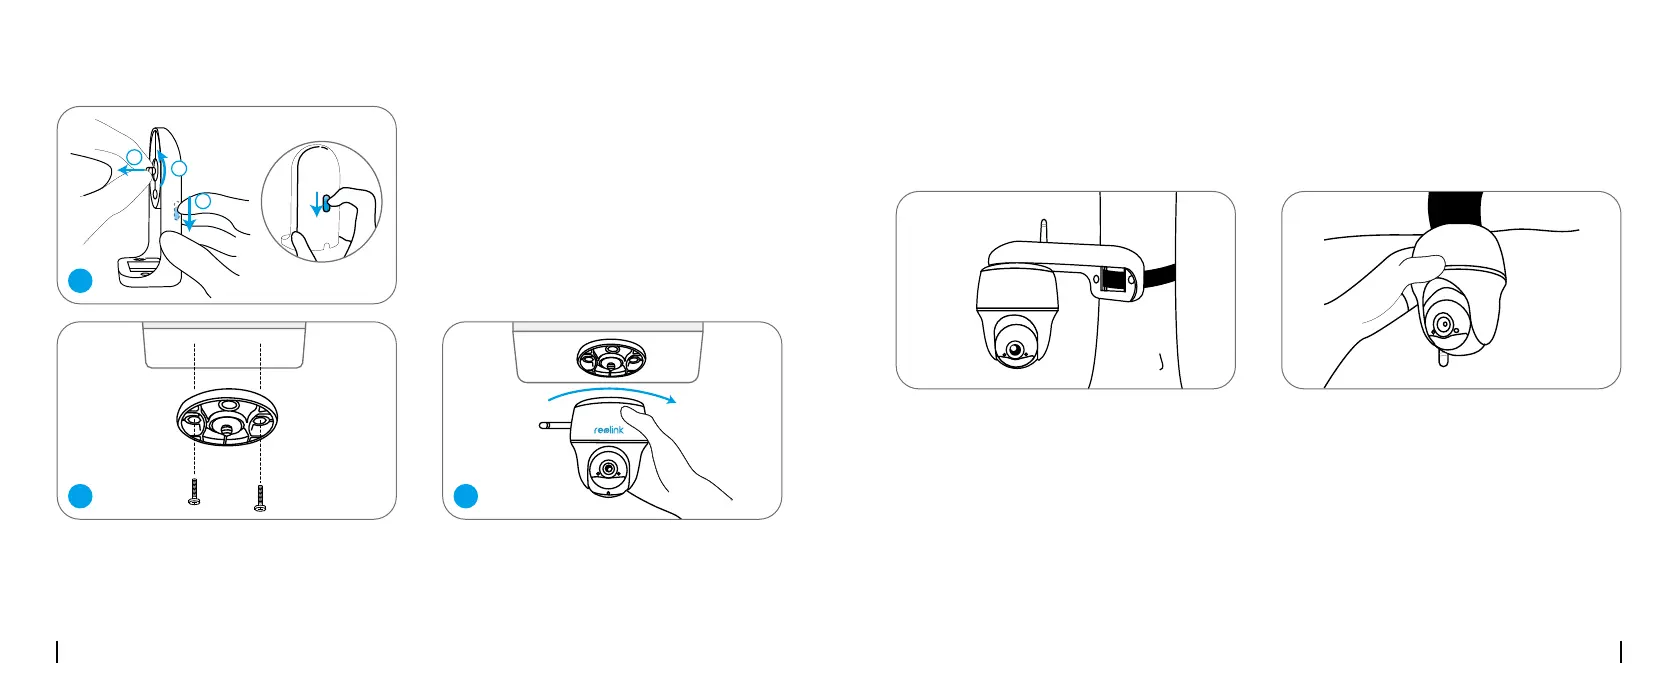
Pull the button of the security
mount and unscrew the bracket to
separate the two parts.
Mount the Camera to Ceiling
1
2
3
Install the bracket to the ceiling. Align the camera with the bracket and turn the
camera unit clockwise to lock it in position.
1
2
3
You are allowed to strap the camera to a tree with both the security mount and ceiling bracket.
Thread the provided strap to the plate and fasten it to a tree. Next, attach the camera to the
plate and you are good to go.
Install the Camera with Loop Strap

Other manuals for Reolink Go PT

Questions and Answers:

Question and Answer IconNeed help?

Do you have a question about the Reolink Go PT and is the answer not in the manual?

Reolink Go PT Specifications

General IconGeneral
Pan & TiltPan: 355°, Tilt: 140°
Connectivity4G LTE
AudioTwo-way audio
Color Night VisionNo
PIR Detection DistanceUp to 10 meters
RecordingMotion-triggered recording
Operating Temperature-10°C to 55°C (14°F to 131°F)
Resolution1080p
Power SourceRechargeable battery
StoragemicroSD card (up to 128GB)
Weather ResistanceIP65
Image SensorCMOS sensor
Video Resolution1080p (1920x1080) at 15 frames/sec
Lensf=4.0mm
AlertsPush Notifications, Email Alerts

Related product manuals