English English9 10
1
2
3
VGAHDMIUSB
AUDIO
OUT
DC 48V
ON
2 4 6 8
1 3 5 7
OFF
LAN
eSATA
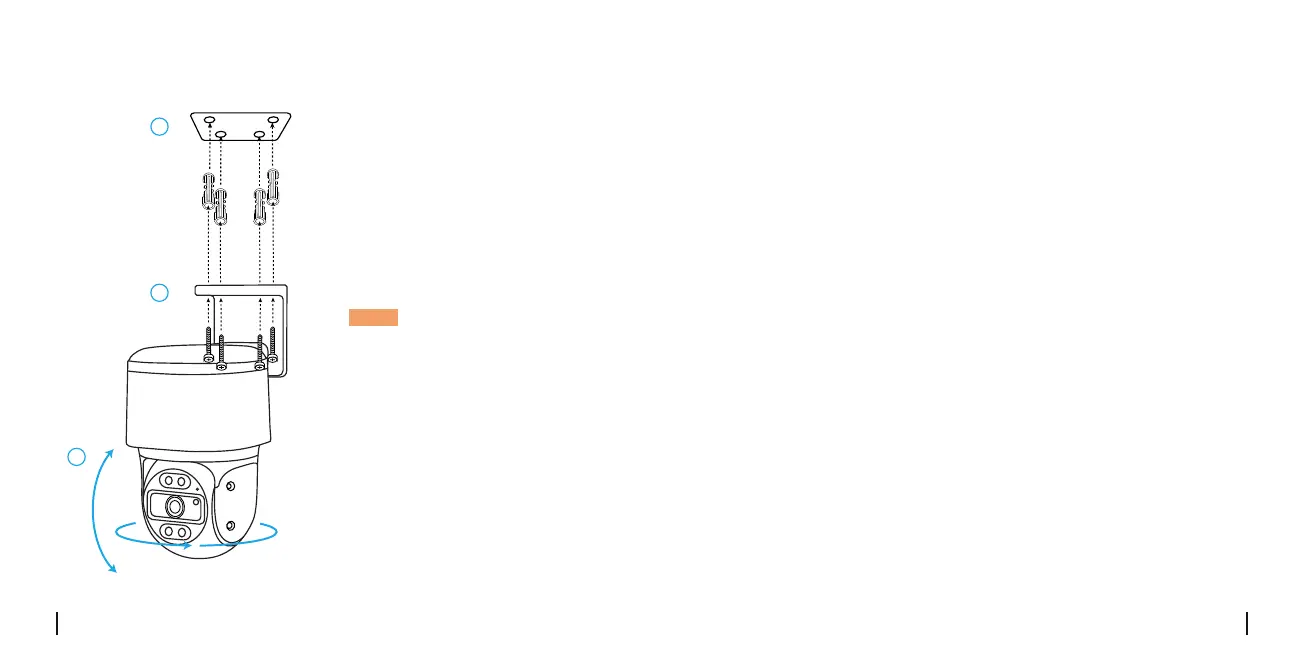
Mount the Camera to Ceiling
1.Drillholesinaccordancewith
themountingholetemplate.
2.Installthemountbasewith
screwsincludedinthepackage.
3.Toadjustthecameradirection,
youmaycontrolthecamerato
panandtiltviaReolinkAppor
Client.
NOTE:Usethedrywallanchors
includedinthepackageif
needed.
Troubleshooting
•Makesureyourcameraispoweredonproperly.ThePoEcamerashould
bepoweredbyaPoEswitch/injector,aReolinkNVRora12Vpower
adapter.
•IfthecameraisconnectedtoaPoEdeviceaslistedabove,connectitto
anotherPoEportandcheckagain.
•TryagainwithanotherEthernetcable.
Ifyourcameraisnotpoweringon,pleasetrythefollowingsolutions:
Camera is not powering on
Ifthepicturefromthecameraisnotclear,pleasetrythefollowing
solutions:
•Checkthecameralensfordirt,dustorspiderwebs.Pleasecleanwitha
soft,cleancloth.
•Pointthecameratoawell-litarea.Thelightingconditionwillaectthe
picturequalityalot.
•Upgradethermwareofyourcameratothelatestversion.
•Restorethecameratofactorysettingsandcheckitagain.
Picture is not clear
 Loading...