9
RBC16SS3
OPERATION
PLACEMENT / MOUNTING
Repco chargers are designed for indoor, out of
weather use only. The position selected for the
charging of the battery must be cool, dry, clean
and well ventilated, away from flammable goods
and ignition sources.
Note - When utilised in caravans, motorhomes,
4WD’s or similar, the charger should be placed
or mounted in a well-ventilated location, and
protected from rain, water, or moisture at all times.
Connection to the mains supply must be in
accordance with National wiring rules and
regulations.
To minimise TV/Radio interference, position the
charger well away from the TV, Radio, Antenna,
and the Antenna Cable.
CHARGING INSTRUCTIONS
STEP 1 - BATTERY MANFACTURER
RECOMMENDATIONS
Before using the battery charger, study the battery
manufacturer’s recommendations, rates of charge,
and any particular conditions peculiar to the
battery being charged.
STEP 2 - CHECK THE ELECTROLYTE LEVEL
Prior to charging the battery, remove the vent caps
and check the electrolyte level.
Note - For batteries without cell caps, follow the
battery manufacturer’s maintenance and charging
instructions.
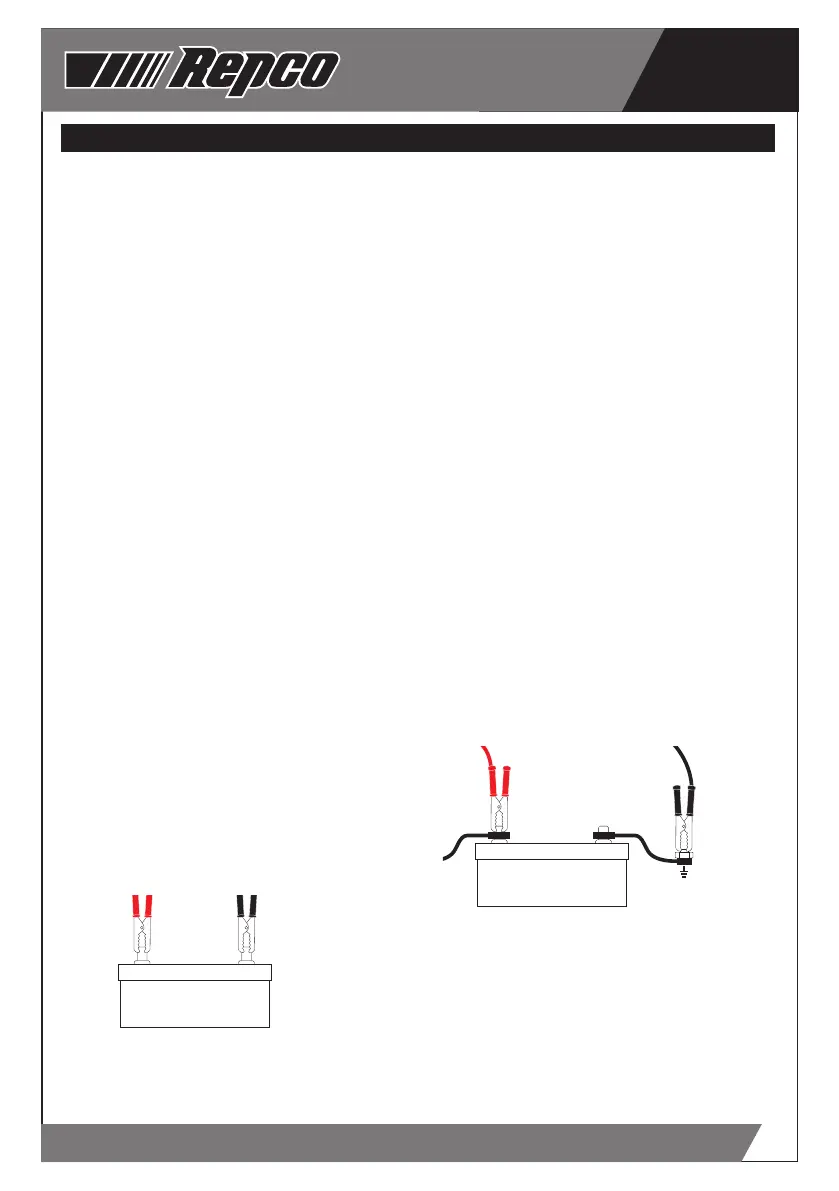
STEP 3A - CONNECTION WITH BATTERY OUT OF
THE VEHICLE
Connect the POSITIVE (RED) lead/battery-clamp
from the charger to the POSITIVE battery post.
Connect the NEGATIVE (BLACK) lead/battery-
clamp from the charger to the NEGATIVE battery
post.
+
-
Note - The POSITIVE terminal of a battery is
defined by the colour RED and may be represented
by POS, P or (+). The NEGATIVE terminal of a
battery is defined by the colour BLACK and may be
represented by NEG, N, or (-).
Wiggle or swivel the clamps several times - this
action ensures integrity of the connection and
minimizes sparks/arcing.
STEP 3B - CONNECTION WITH THE BATTERY
MOUNTED IN THE VEHICLE
Determine if the vehicle is Positively (+) or
Negatively (-) earthed.
Note - The battery terminal NOT connected to
the chassis MUST be connected to the Battery
Charger first (1st). The second (2nd) clamp from
the Battery Charger must be connected to the
chassis, away from the battery and fuel lines.
Refer to the following guides for correct battery
clamp connection sequence:
Negatively Earthed (Most Vehicles)
Note - Negatively earthed vehicles usually have a
cable (usually BLACK or GREEN) connecting the
Negative battery terminal to the vehicle’s chassis.
Connect the POSITIVE (RED) lead/battery clamp
from the battery charger to the Positive (+) battery
terminal. Connect the NEGATIVE (BLACK) lead/
battery clamp from the battery charger to the
vehicle’s chassis - away from the fuel lines or
moving parts.
+
-
 Loading...