Note.
If you already have a planned route, tap and
to add the selected location to your
route.
iGo map Operation
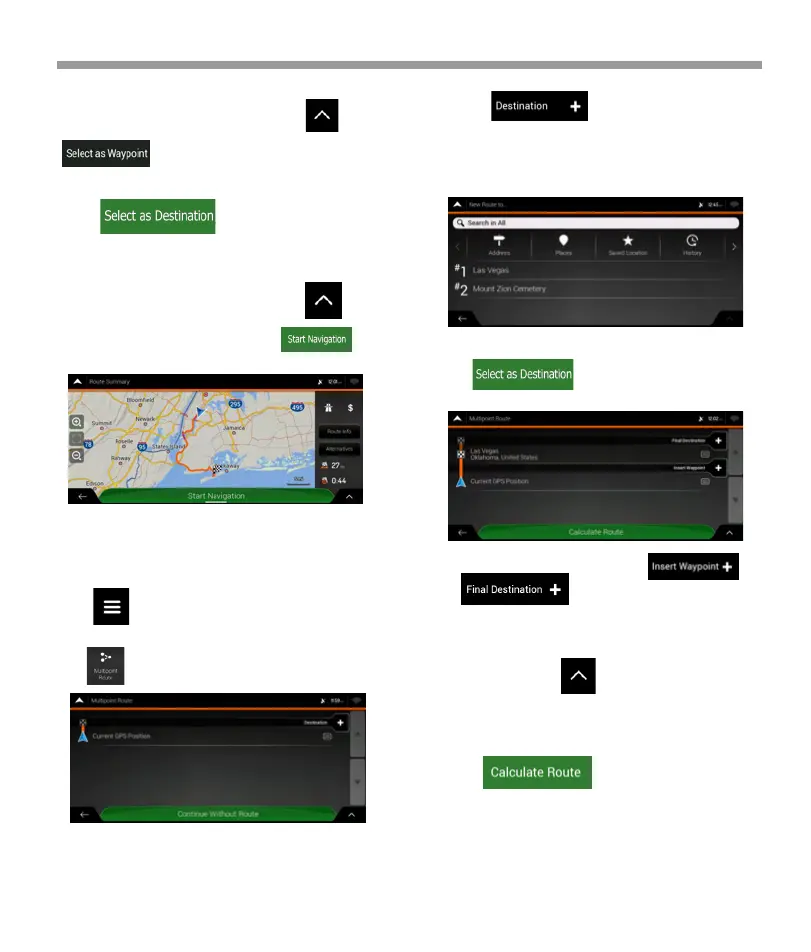
1. Tap on the Navigation view to access
the Navigation menu.
2. Tap .
4. Tap to confirm the destination,
4. Tap to select the destination.
5. The New Route to... screen appears, where you can
select the destination of the route the same way as
described in the previous sections.
6. When the selected location appears on the map,
tap and the list returns. If needed,
you can add further intermediate destinations.
7. To add more route points, tap or
tap to change the final destination.
The Add to Route... menu appears again, where you
can select the new route point the same way as you
have set the destination before.
8. (optional) Tap to optimize the whole
route or the order of waypoints. You can also delete
all the destinations.
9. When you have added all the route points,
tap and the planned route
is automatically calculated.
5. The route is calculated and the map appears
showing the entire route, where you can check route
information and route alternatives. Tap to
modify the route parameters, or tap to
start your journey.
3.1.9 Planning a Multipoint Route
To build your route destination-by-destination,
perform the following steps:
3. There is only one line in the list of route points, the
starting point of the route, which is normally the
current GPS position.
53
 Loading...