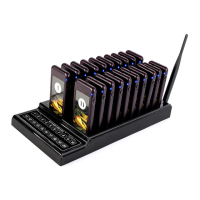
1. Connect the call button keypad to power, it executes the self-testing procedure. Then power icon
turns on.
2. Press and hold “Power” button for 3s on side of the receiver to power on, the receiver will vibrate
and sound 5 times, and then LED1 indicator flickers every 3s, the receiver enters standby status.
Plug the receiver to the charging slot, it vibrates and sounds 5 times and then the blue charging
LED on, the receiver enters charging status.
3. When client places an order, the service people give one receiver to him(her) and note down the
number.
4. While the order is ready, the service people press keypad to call the client (number), the
corresponding receiver gets the information and prompts vibration/buzzer/light for 5min. After that
only the 3 LED indicators flicker.
Press the “Power/Reset” button or plug back to charging slot to reset charging/standby status.
5. The client gives back the receiver to service people, the service people put the receiver to charging
slot and provide service.
6. While the receiver is in charging, press the number on keypad, the corresponding receiver LED
indicators will flicker 3 times to report its position.
Note:
1) In daily working, the receiver can be powered on all the time. If long time not use, power off the
receiver please.
2) For a long time the receiver is not used, charge it for a while before giving to the client.
3) The receiver must be paired to the keypad before using. About how to do pairing, please refer to
the pairing method below.
Pairing method
1. Paring – Short press the “Set” button, the LED1 indicator turns on, then press the call number on
the keypad. The receiver gets the signal and LED1 lamp turns off. The pairing is successful. If the
receiver does not gets any signal in 10 sec, it will quit pairing status automatically.
2. Deleting – Press and hold on the “Set” button for 5 sec, the LED1 indicator will be ON-OFF, then
release the button, all the paired call buttons will be deleted.
Note: to do the pairing or mode settings, should take off the transparent and number paper, the
settings button is covered below it.
Change number paper
Take out the transparent plexiglass cover in the front of the receiver, then put a number paper inside
the paper slot. And then put back the cover.
Note: While do the pairing operation, take out the cover and paper firstly.
4
Operation instruction