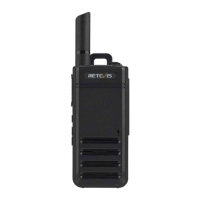
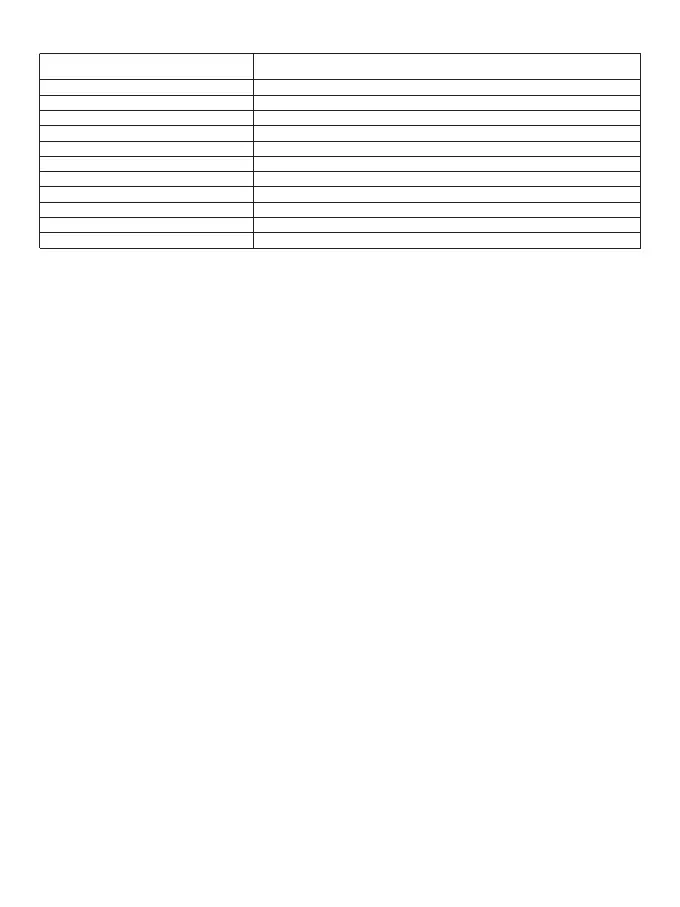
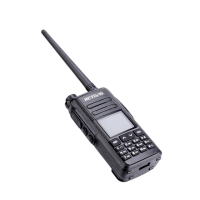
LED indicators
Optional Functions
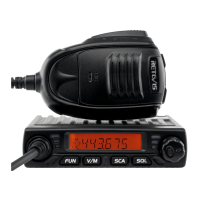
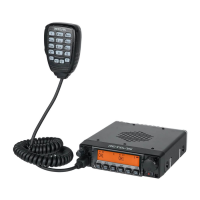
1. Power on / off
•In the off state, press and hold the power button for 3 seconds to turn on the radio and broadcast the current
channel number and the current battery level.
•In the on state, press and hold the power button for 3 seconds to switch off the radio and sound the off tone.
2. Volume adjustment
When the walkie-talkie is in standby or receiving state, short press the power button to adjust the volume of the
radio, and at the same time broadcast the current volume level. The volume can be cyclically adjusted to 0-5
levels
Note: when the volume level is 0, at this time the walkie-talkie reception for the mute mode.
3. Transmitting/receiving
•When the walkie-talkie is in standby, press and hold the transmit button (PTT) to transmit the signal of the
current channel and the LED lights up red.
•Release the transmit button (PTT) to receive the signal from the same channel, the speaker sounds the call and
the LED lights up green.
Note:
•When the walkie-talkie is transmitting, please keep the walkie-talkie in a vertical position and keep the
microphone at a distance of 2.5-5 cm from the mouth. When transmitting, please keep the walkie-talkie at least
2.5 cm from your head or body.
•During the use of the walkie-talkie, there is no need to perform multiple switch-on and switch-off actions,while
adjusting the volume to a level suitable for your hearing.
Before talking on the walkie-talkie:
1. Please set the transmitter and receiver to the same frequency point.
2. Please set the transmitter and receiver to the same CTCSS/DCS for the channel you want to talk to.
4. Channel selection
When the walkie-talkie is in standby mode, short press the [+] or [-] button to select the channel and broadcast
the current channel number.
5. CTCSS/DCS
This radio supports a total of 260 CTCSS/DCS. It can be set 50 CTCSS and 105*2 DCS (N and I phases) in the
programming software (CPS).
6. High / Low power
The user can set the power level of each channel to high or low. High power enables communication with radios
at relatively long distances; and the low power enables communication with radios at close distances.
•The power level of the channel can be set to high or low by the programming software (CPS).
•The power level of the channel can also be set to high or low by using the menu keys.
Steps:
• short press the menu button to cycle, select the power menu
Secondly, the transmit power is switched between high (2W) or low (0.5W) by short pressing the [+] or [-] button.
•short press the transmit button (PTT) to exit the setting and enter standby mode.
Note: Channels 8-14 power levels are set to low and cannot be changed.
7. Call Tone
Green light flashes slowly (5sec)
Green light flashes slowly (200ms)
Red light is always on
Green light is always on
Red light flashes quickly
Green light flashes quickly
Red light flashes quickly
Green light flashes quickly
Red and green lights flash alternately
Green light double flashing
Red light double flashing
Standby status
Scan Status
Being transmited
Being received
Programming software is being operated to read data from the radio
Programming software is being operated to write data to the radio
One-touch frequency transmit mode
One-touch frequency receive mode
Being charged
Fully charged
Low power condition
LED indicator Walkie-talkie working status
02