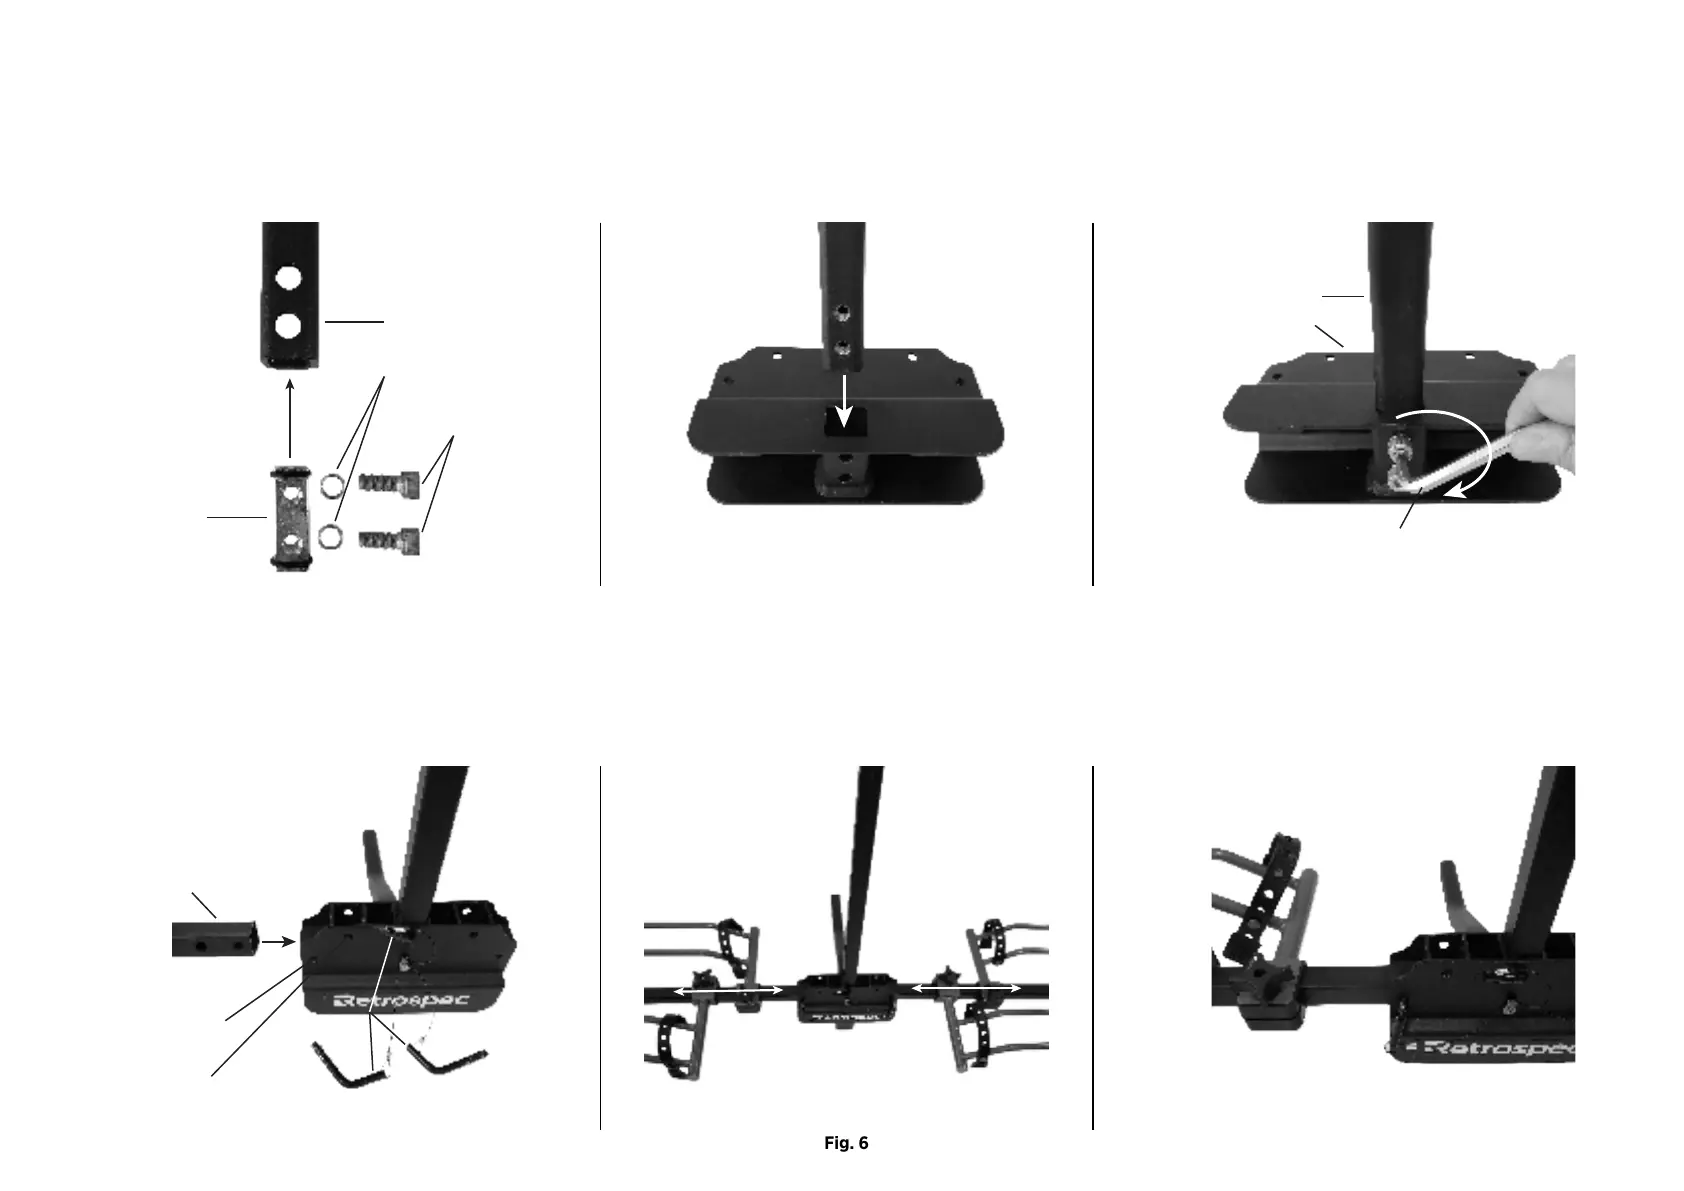
1. Align and insert 2-Hole Anti-Rattle Threaded Plug into Hitch Tongue (end with 2 closely spaced/same size holes (Fig. 2).
2. Align and insert the 2-Hole Hitch Tongue with Plug inserted into the Main Support Hub (Fig. 3).
3. Install the two 1 ¼” x 8mm hex head mounting bolts with lock washers into the bottom of the rack base and tighten firmly (Fig. 4).
STEP 2: HITCH TONGUE TO MAIN SUPPORT HUB
Fig. 2 Fig. 3 Fig. 4
1. Slide the two Wheel Tray Support Beams into the horizontal square slots, secure with Push Pins (Fig. 5).
2. Slide the Wheel Trays onto the beam making sure to alternate one pair to the left and one pair to the right of each other to allow for adjustment for individual bike wheel bases (Fig. 6 & 7).
STEP 3: WHEEL SUPPORT BEAMS
Fig. 5 Fig. 6 Fig. 7
Hitch Tongue
2 - Lock Washers
2 - 1 1/4” 8mm
hex head bolts
2 - Hole Anti-Rattle
Threaded Plug
1 1/4” Hitch Tongue
Main Support Hub
8mm hex wrench
Tighten
Insert Push Pin
Horizontal/for use
Wheel Tray
Support Beam
Insert Push Pin
Vertical/for stow
Push Pins