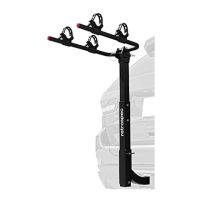
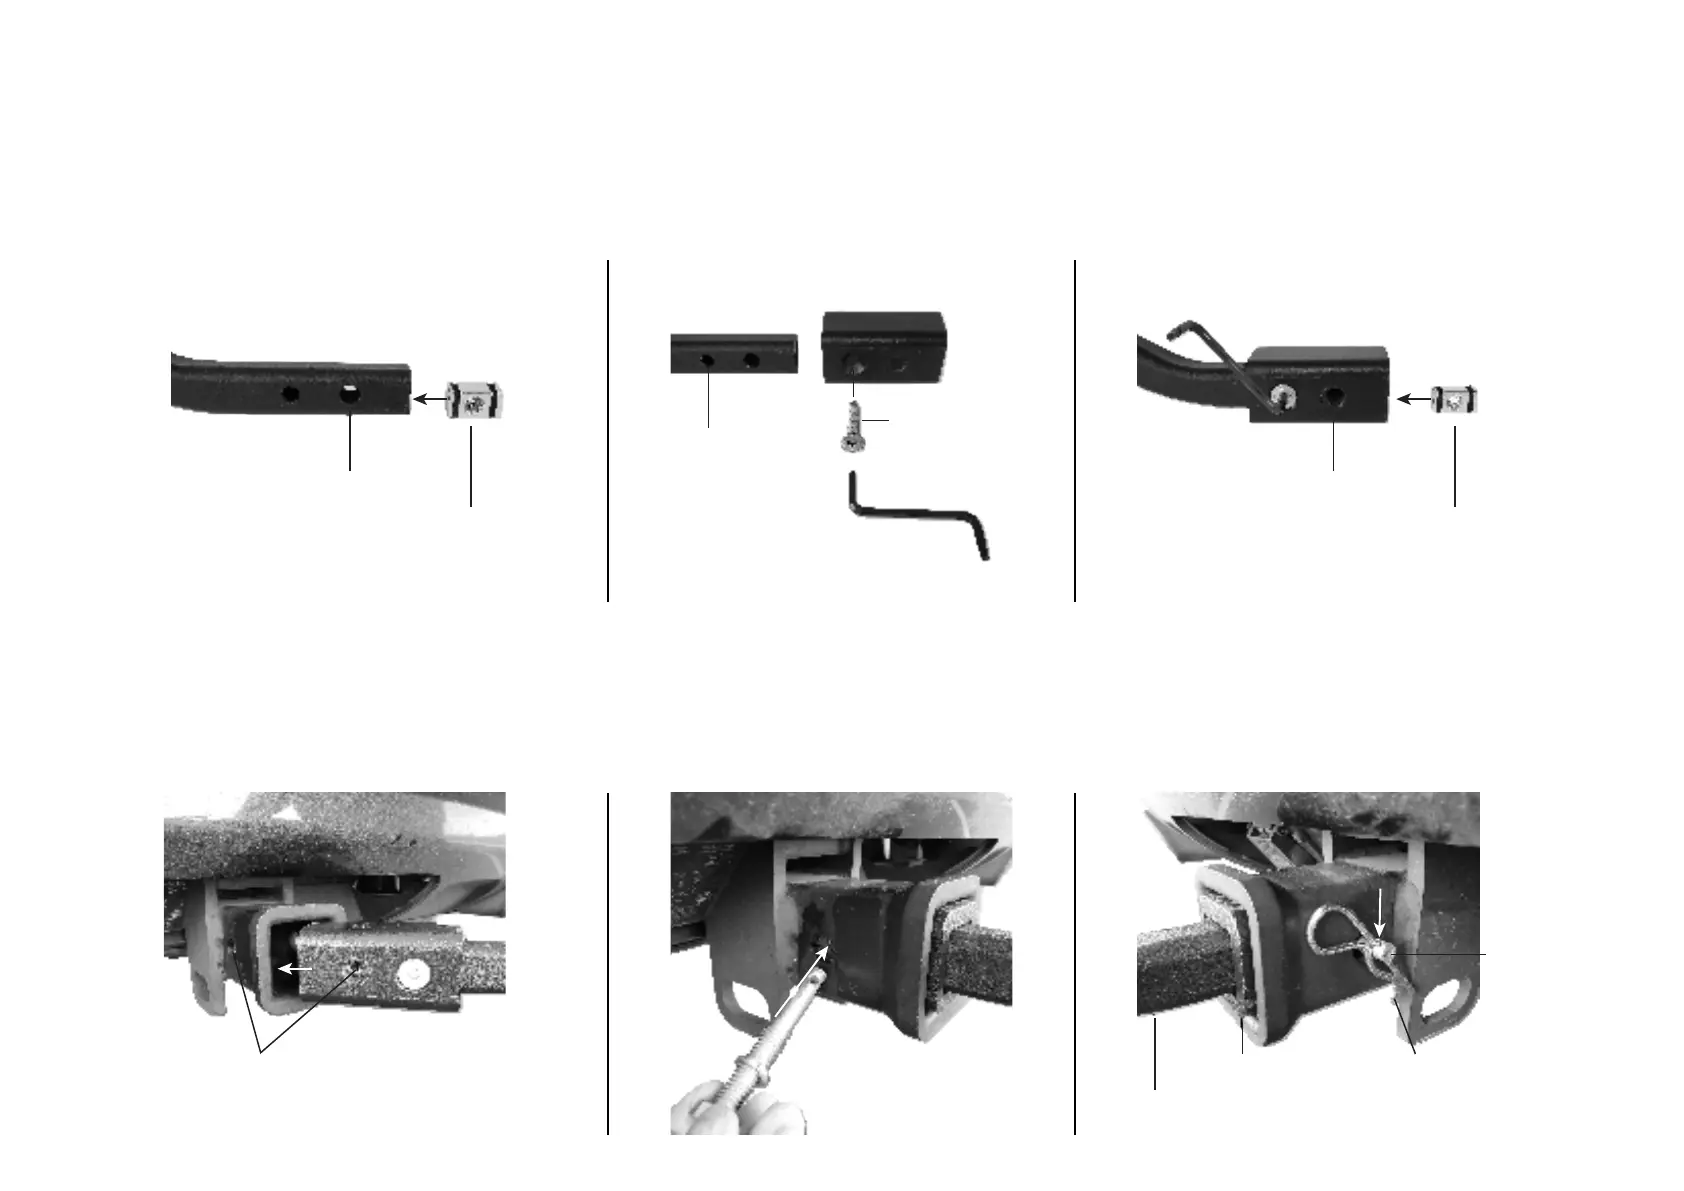
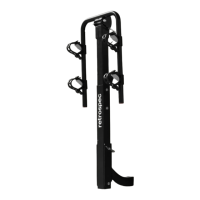
1 ¼” RECEIVER:
1. Rack is factory-ready for installation into 1 ¼” (Class II) vehicle hitch receiver.
2. Align and insert 1-Hole Anti-Rattle Threaded Plug to large hole at end of
Hitch Tongue (similar to STEP 2) (Fig. 8).
2” RECEIVER:
1. Align and install 2” length x 6mm hex head Flush-Mount Bolt through 2” Adapter Sleeve into
smaller/second hole from end of the Hitch Tongue. Tighten firmly (Figs. 9 & 10).
2. Align and insert 1-Hole Anti-Rattle Threaded Plug to large hole at end of Hitch Tongue
(similar to STEP 2) (Fig. 10).
STEP 4: RECEIVER ADAPTER
Fig. 8 Fig. 9 Fig. 10
1. With 1-Hole Anti-Rattle Threaded Plug installed and aligned, insert rack onto vehicle by sliding the Hitch Tongue into the hitch receiver (Fig. 11).
2. Insert 3 ½” half-thread Anti-Rattle Hitch Bolt (19mm) with lock washer into receiver and tongue and tighten securely (Fig. 12).
3. Insert Hairpin Cotter Pin through hole on other side of hitch bolt (Fig. 13).
Fig. 11 Fig. 12 Fig. 13
STEP 5: RACK ON VEHICLE
Hitch Tongue 1 1/4”
Hitch Tongue 1 1/4”
Align to this hole
1-Hole Anti-Rattle
Threaded Plug
Align to this hole
2” Adapter Sleeve
6mm Flush-Mount
Bolt
Align to this hole
1-Hole Anti-Rattle
Threaded Plug
Insert and align
Vehicle Hitch
Receiver (2”)
Hairpin Cotter Pin
Hitch Tongue 1 1/4”
2” Receiver Adapter
3 1/2” half-threaded
Anti-Rattle Hitch Bolt