Disassembly, Assembly and Repair Instructions
28
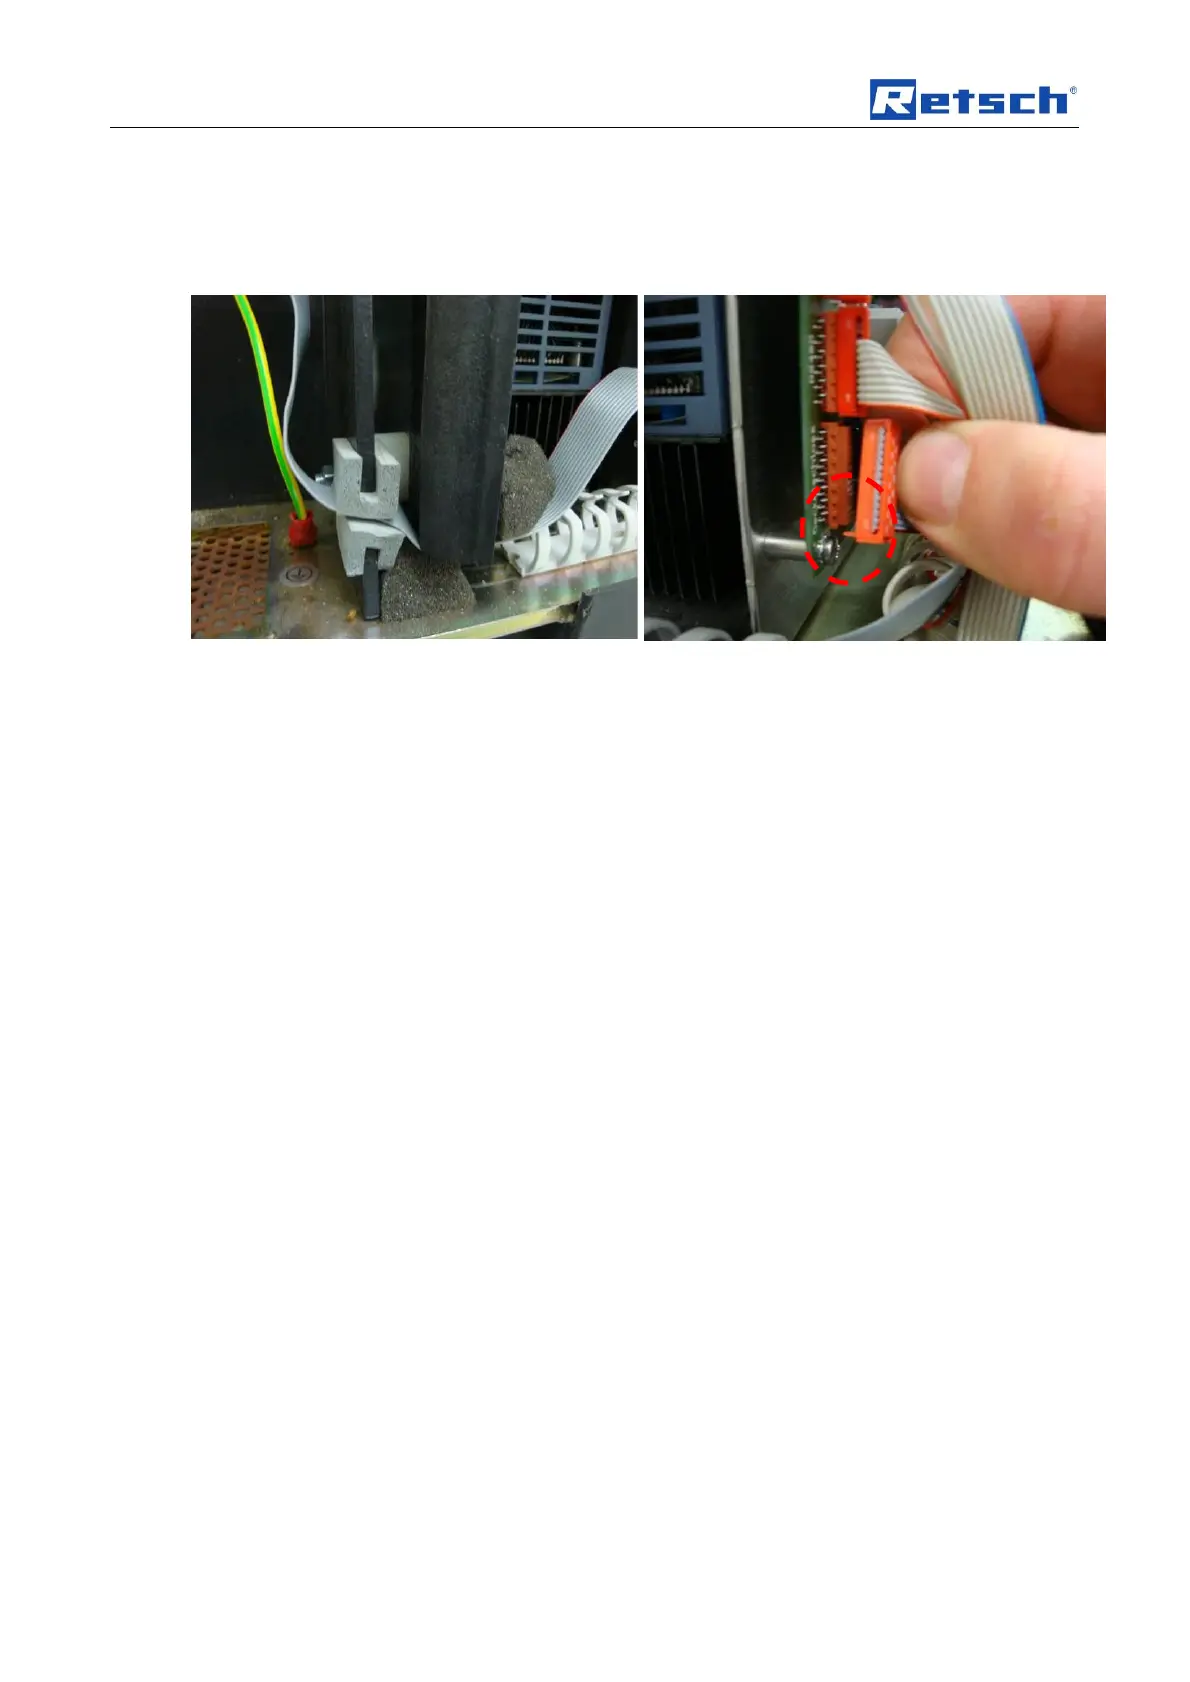
Put the protective conductor onto the protective
conductor contact and guide the ribbon cable
through the opening intended for it.
Insert the lock connector into the control
PCB. Note, the pin nose must engage into
the hole intended for it.