47
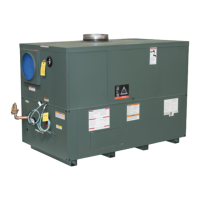
TM063 701, 702 & 703 Series Boiling Water Unit Service Instructions
Revision D: Feb 2017
This document is stored and maintained electronically by Service. All printed copies not bearing this statement in RED are deemed “uncontrolled”
Tap (Procedure 2B) 701 Tap, timer fascia replacement
1. Isolate power and water supplies to BWU.
2. Operate tap lever until water ceases to flow from tap.
3. Follow procedure 1 to remove jacket surround
4. Lift the tap lever, remove 2 retaining screws then the complete timer fascia and
timer from the unit. Disconnect the ribbon connector and place timer fascia aside.
5. With the tap lever still raised, unscrew the tap union in an anticlockwise direction to
remove tap.
6. Complete reassembly in reverse order of above.
WARNING:- When refitting the jacket surround, ensure that boiling water outlet tube is
positioned correctly in spout.
Tap components (Procedure 3A) 702 & 703 Series
Note: To replace diaphragm only; follow steps 1 – 6, fit new diaphragm, then complete
reassembly in reverse order ensuring tap lever is in the up position when tightening cap.
1. Isolate power and water supplies to BWU.
2. Operate tap lever until water ceases to flow from tap.
3. Leave tap lever in up position.
4. Using a pair of multigrips (Eco) or spanner (Commercial), gently
unscrew cap in an anticlockwise direction until cap thread has
cleared tap body thread.
5. Pull cap away from body. Cap will come away from body with lever,
spindle, spring and tap seal attached.
6. Remove tap seal by pulling away from spindle.
7. To remove tap lever, spindle and spring; place tap spindle on
a flat surface and push down on cap to compress spring.
Whilst spring is compressed hold tap lever in a horizontal
position and slide out backwards from spindle.
8. To remove spindle and spring; pull spindle away from cap then pull
spring away from spindle.
9. Complete reassembly in reverse order of above.
Note: Large diameter end of spring locates in cap. Tap lever locates
in slots in spindle head. Ensure tap lever is in the up position when
tightening cap.
10. Check for leaks.
Tap components (Procedure 3B) 701 series
Note: To replace tap seal only, follow steps 1–6 of procedure 2B.
Remove tap seal by pulling it away from spindle.
1. Fit new tap seal and refit tap. Ensure tap lever is in the up
position when tightening cap.
2. Complete reassembly in reverse order of above.

 Loading...