41
sense flame if L1 and L2 are reversed.
See Figure 42.
Make all electrical connections in
accordance with the latest edition of the
National Electrical Code ANSI/NFPA70
and local codes having jurisdiction.
These may be obtained from:
National Fire Protection
Association, Inc.
Batterymarch Park
Quincy, MA 02269
CSA - International
178 Rexdale Blvd.
Etobicoke (Toronto), Ontario
Canada M9W, 1R3
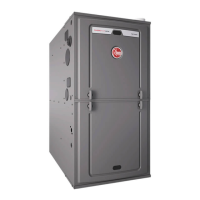
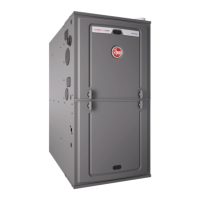
THERMOSTAT
The room thermostat must be com-
patible with the integrated furnace
control on the furnace. Generally, all
thermostats that are not of the “current
robbing” type are compatible with the
!-*
!+'$,!'&*$1
ST-A0804-01
!-*
$!&.'$,'&&,!'&+
-,$,*'&!'&,*'$+'&,*'$'*
I
677
ELECTRICAL WIRING
,-*&'$,*!('/*,
-+'0'*+*.!(&$
'*%#!&&1
$,*!$'&&,!'&+
!$-*,''+'&-+
$,*!$+ '#*+-$,!&
!&(*+'&$!&"-*1'*,
, !&,%-+, .&
-&!&,**-(,*'-&
'*!&,', $,+,
!,!'&', &,!'&$
$,*!$'&+!
&('*!&&,
&!&$,*!$'
+'*$'$'+
, ,(($1'&',-++
(!(!&+&$,*!$
*'-&*'-&+*/!+
(*'.!!&, "-&,!'&
'0!$-*,''+'&
-+$,*!$+ '#
*+-$,!&!&(*+'&$
!&"-*1'*,
, !+-*&!+)-!((
/!, $'/*''*+,1
+/!, '&',!+$, !+
+/!, !$-*,''$$'/
, !+/*&!&&*+-$,!&
$,*!$+ '#(*+'&$
!&"-*1'*,
!%('*,&,The furnace must be
installed so that the electrical
components are protected from water
(condensate).
Before proceeding with the electrical
connections, be certain that the
voltage, frequency and phase
corresponds to that specified on the
furnace rating plate. For single
furnace application, maximum over-
current protection is 15 amperes.
Use a separate fused branch
electrical circuit containing a properly
sized fuse or circuit breaker. Run this
circuit directly from the main switch
box to an electrical disconnect that is
readily accessible and located near
the furnace. Connect from the
electrical disconnect to the junction
box on the left side of the furnace,
inside the blower compartment. For
the proper connection, refer to the
appropriate wiring diagram located on
the inside cover of the furnace control
box and in these instructions.
&', -($'/%'$+'&$1
The electrical junction box may be
moved to the right side if necessary.
A knockout is provided. Seal the
opposite hole with plug provided.
&', L1 (hot) and L2 (neutral)
polarity must be observed when
making field connections to the
furnace. The ignition control may not
!
/*&!&
!
/*&!&
!
/*&!&
integrated furnace control. The low
voltage wiring should be sized as
shown.
&',Do not use 24 volt control
wiring smaller than No. 18 AWG.
&',An isolation relay can be
added to prevent any compatibility
problems that may occur. Use a
single-pole, single-throw relay with a
24-volt AC coil. The contacts should
be rated for .5 amps minimum at 24
volts. See Figure 45.
Install the room thermostat in
accordance with the instruction sheet
packed in the box with the thermostat.
Run the thermostat lead wires inside
the blower compartment and connect
to low voltage terminals as shown on
the wiring diagram. Never install the
thermostat on an outside wall or
where it will be influenced by drafts,
concealed hot or cold water pipes or
ducts, lighting fixtures, radiation from
-,$,*'&!'&,*'$+'&,*'$'*
!&.&+1+$!%,'&,*'$+! % ',+-*
 Loading...