33
INSTALLATION INSTRUCTIONS
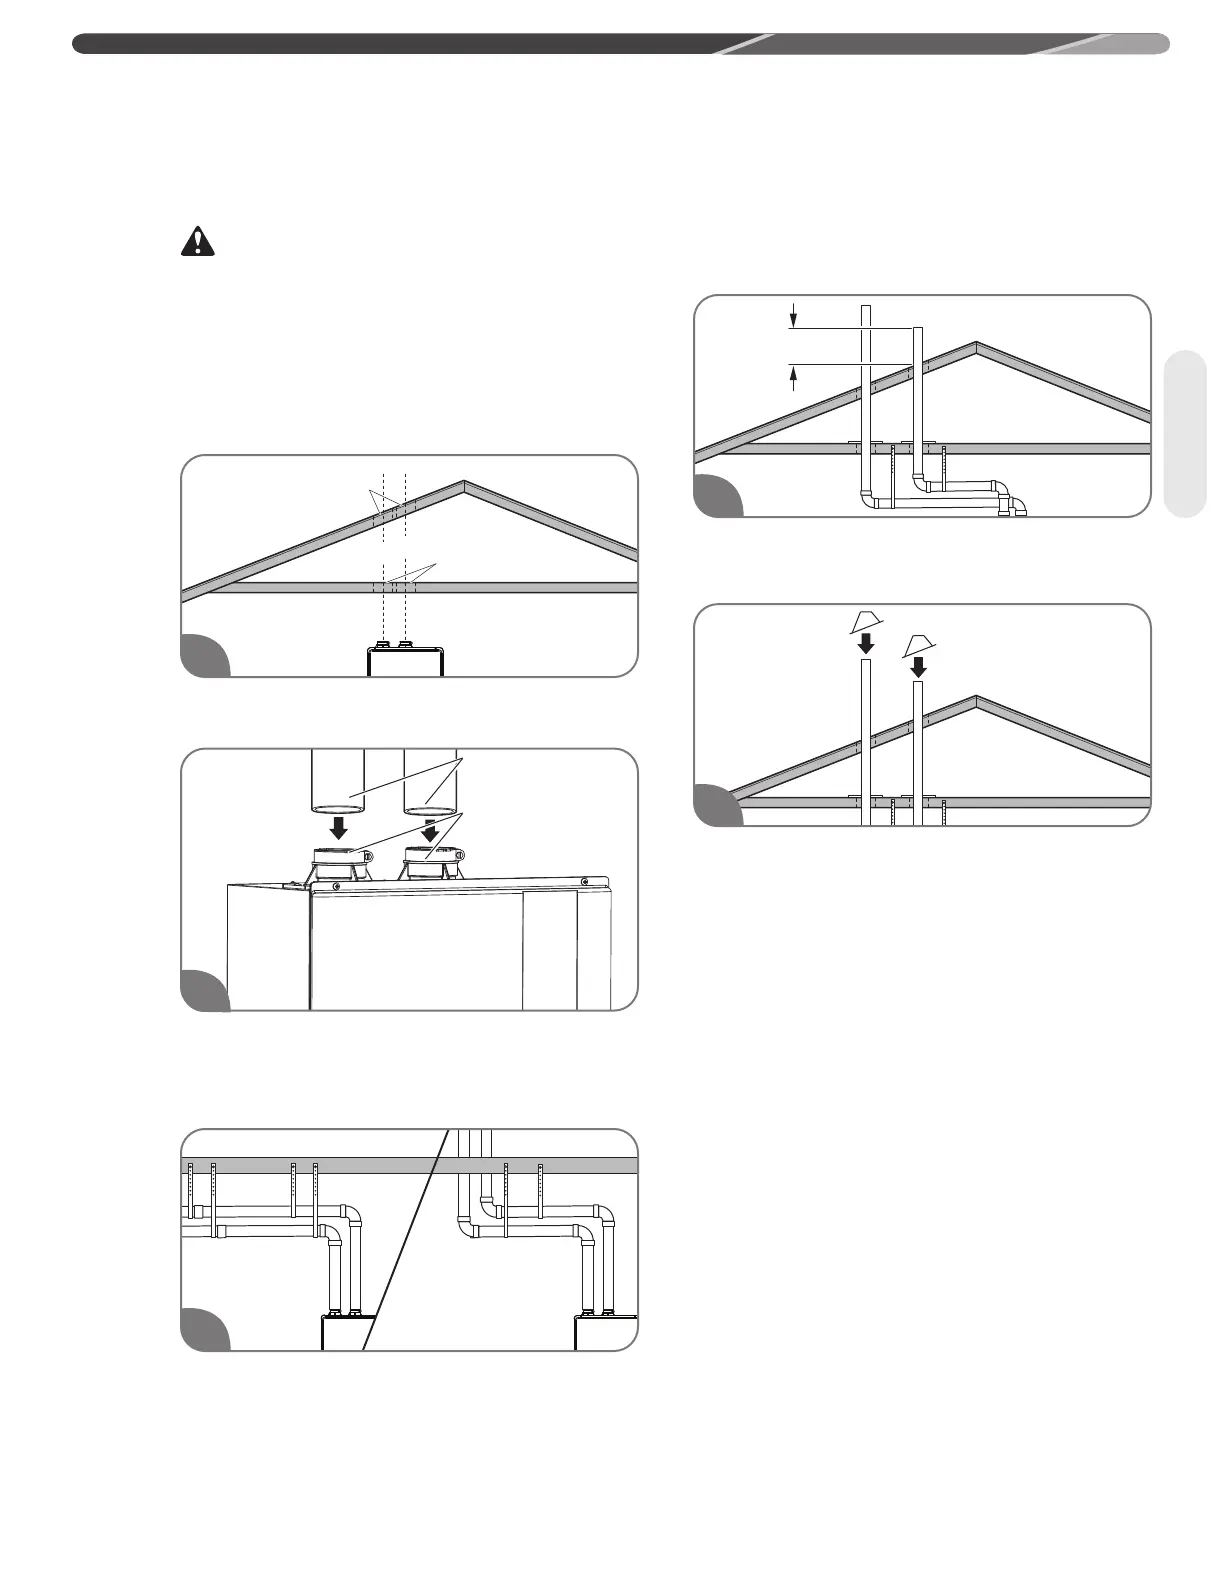
Vertical Vent Installation
WARNING:
Improper vent installation can result in death, personal
injury, product damage, and/or poor performance.
NOTICE:
Only Rheem-approved AND ULC S636 approved termination
and parts must be used during installation.
Maintain the recommended air space clearance to
combustible materials and building insulation.
Cut a hole through the roof and interior ceiling to
accommodate the vent pipes.
Insert a 2" PVC pipes slowly into an air intake
connector and a flue connector located on top of the
water heater until they stop. Tighten 2 locking bands
to secure 2" PVC pipes.
Support vertical and horizontal runs as described on
page 23. Vertical supports are required every 4 ft. (1.2
m) along a vertical pipe route, after every transition to
vertical, and after every offset elbow.
NOTICE:
Free-standing vent pipe that penetrates a roof/ceiling
requires another means of support from a second location.
Determine the vent terminal height and install the
vent pipe accordingly. Refer to “Vertical Vent Terminal
Location” for clearance requirements.
Install adequate flashing where the vent pipe passes
through the roof.
Hole
Through Roof
C
L
Hole
Through Ceiling
C
L
1
4
5
3
Venting
2
2” PVC pipes
Locking bands
 Loading...