Do you have a question about the Rhino-Rack 570 and is the answer not in the manual?
Details on roof rack load limits and distribution over crossbars.
Critical advice for fitting, usage, and potential warranty voidance.
Essential checks and advice for secure loading and bolt connections.
Notes on how vehicle handling changes when carrying a roof load.
Guidance on mounting to utility vehicles to prevent damage to cabin/canopy.
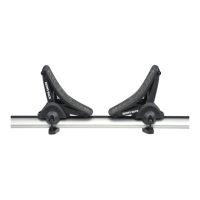
List of parts and quantities for the 570 model.
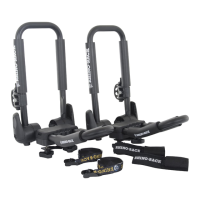
List of parts and quantities for the 580 model.
Advice on washing and cleaning roof racks before fitment.
Initial attachment of cradle components to one side.
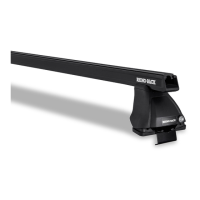
Placing the fitted cradles onto the vehicle's crossbars.
Using the provided Allen key to tighten all screws securely.
Adjusting the outer cradle edge to facilitate easier side loading.
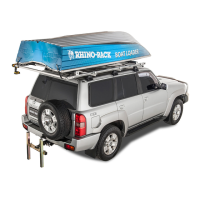
Placing the kayak onto the cradles and adjusting for a secure fit.
Ensuring the loaded kayak is correctly aligned longitudinally with the vehicle.
Passing and pulling straps under crossbars to secure the kayak.
Demonstrates how to loop the securing straps under the crossbars.
Instructions for utilizing bow and stern tie-down straps for added security.
Inserting T-bolts into the channel and tightening the dials.
Placing the locking covers onto the fitted components.
Adjusting the outer cradle edge to facilitate easier side loading.
Placing the kayak onto the cradles and adjusting for a secure fit.
Ensuring the loaded kayak is correctly aligned longitudinally with the vehicle.
Passing and pulling straps under crossbars to secure the kayak.
Demonstrates how to loop the securing straps under the crossbars.
Instructions for utilizing bow and stern tie-down straps for added security.
| Model | 570 |
|---|---|
| Weight | 44 lbs |
| Material | ABS Plastic |
| Load Capacity | 100 kg |
| Finish | Black |