Maintenance Section 5-8
FM100 02/04
MAINTENANCE
© 2004 Alamo Group Inc.
MAINTENANCE
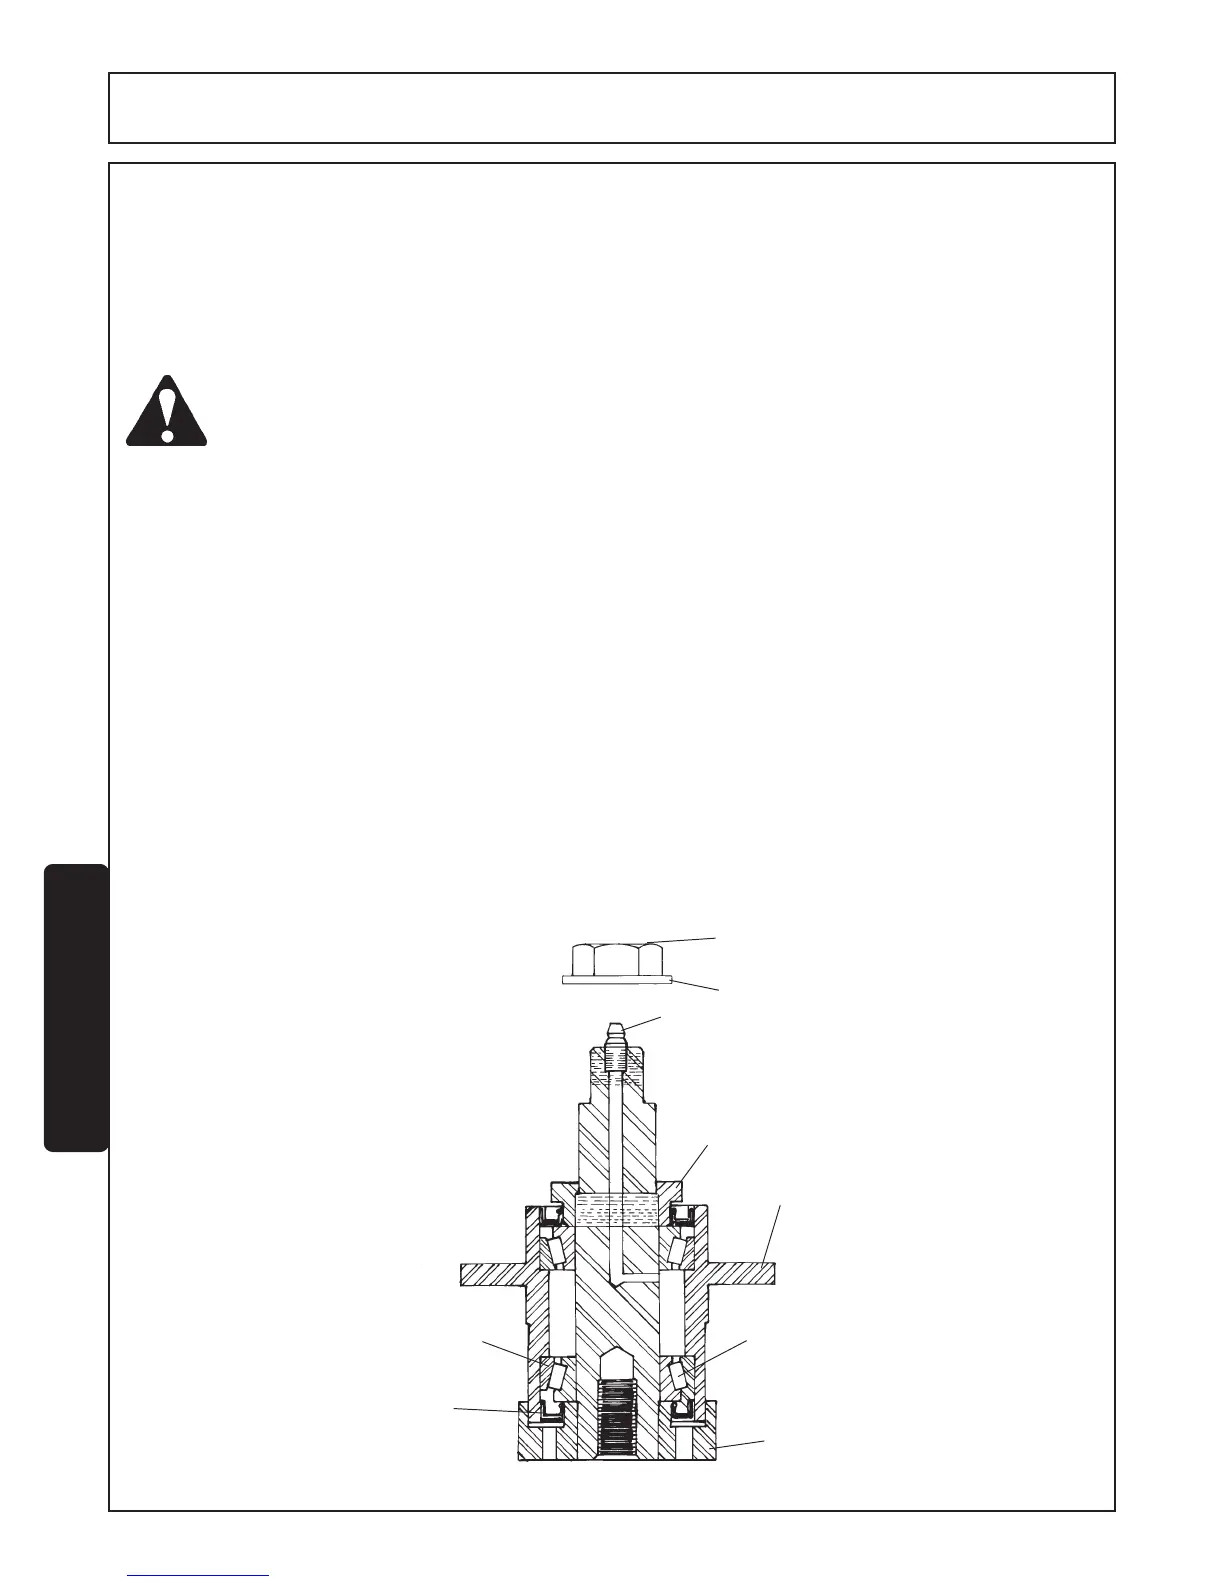
BLADE SPINDLE SERVICE INSTRUCTIONS Figure 9
DISASSEMBLY
1. Remove adjusting nut #3. Install nut #8 on end shaft.
2. Support spindle housing #2 under flange and drive out shaft assembly #1.
CAUTION ! Use soft wood block on top end of shaft to protect grease fitting.
3. Remove bearing cups from housing. Remove lower bearing from shaft assembly using pry bars to move bearing
up shaft. Once bearing has been moved 3/8" - 1/2" up shaft, lay flat bars on either side of the shaft and support
across vice or other convenient means. Remove bearing by driving as described in step #2.
4. Clean all parts and reassemble with new parts can proceed.
ASSEMBLY
1. Press bearing cups in spindle housing.
2. Insert bearing cone in bottom of housing and press in bottom seal #6.
3. Insert shaft assembly #1 through bottom seal and bearing. Press or lightly drive shaft until it bottom against
bearing.
4. Turn spindle over and sit on blade mount washer. Install top bearing and seal. NOTE: Direction of seal lip on
top side.
5. Install top adjusting nut #3. Adjust nut to give bearing end play of .002" - .006". Apply Loctite 242 to nut.
6. Grease spindle, until grease is forced out top seal lip.
4
7
8
3
2
4
1
5
6
FIGURE 9
 Loading...