EasyManua.ls Logo

RHINO TM84 - User Manual

RHINO TM84
156 pages
Print Icon
To Next Page IconTo Next Page
Loading...
©2011 Alamo Group Inc.
TM60/72
TM84/100
Published 02/11 Part No. 00779788C
OPERATOR’S MANUAL
RHINO
®
1020 S. Sangamon Ave.
Gibson City, IL 60936
800-446-5158
E-mail: parts@servis-rhino.com
REAR DISCHARGE
60, 72, 84, 100 FINISHING MOWERS
This Operator's Manual is an integral part of the safe operation of this machine and must
be maintained with the unit at all times. READ,
UNDERSTAND, and FOLLOW the Safety
and Operation Instructions contained in this manual before operating the equipment. C01-
Cover
$0.00

Table of Contents

Questions and Answers

  • D
    Dr. Eddie CurryAug 14, 2025
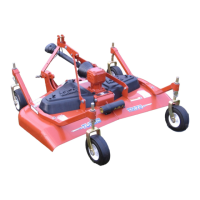
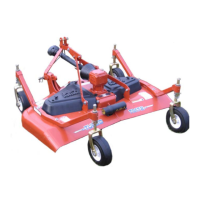
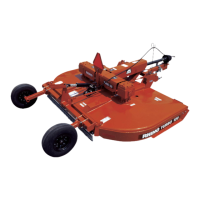
    Why is my RHINO TM84 streaking?
    • N
      Nicholas ThompsonAug 14, 2025
      If your RHINO Lawn Mower is experiencing streaking, several factors could be the cause. You might be mowing too fast, so try slowing down. The blade speed could be too slow; ensure the PTO is operating at 540 RPM. Other potential causes include worn or dull blades (sharpen uniformly or replace with Genuine RHINO Blades), a loose drive belt (tighten it), a glazed or slipping belt (apply belt dressing or replace with a special RHINO belt), or a blade loose on the spindle (tighten the blade bolt securely to 85 ft. lbs. using left-hand threads). Also, check if the conditions are too wet for mowing; if so, allow the grass to dry before mowing.
  • J
    Julia MunozAug 17, 2025
    What to do if the belt is slipping on my RHINO TM84 Lawn Mower?
    • A
      Anthony DavisAug 17, 2025
      If your RHINO Lawn Mower belt is slipping, it may be due to several reasons. The belt might be loose, glazed, or have oil on it. Try replacing it with a special RHINO belt, using belt dressing, or cleaning it, respectively.
  • M
    Mary HernandezAug 20, 2025
    Why is my RHINO Lawn Mower vibrating so much?
    • J
      Joshua MillsAug 20, 2025
      If your RHINO Lawn Mower is experiencing heavy vibration, it could be due to several reasons. Make sure that you do not exceed 540 PTO rpm because the blade speed might be too high. Check the blades for damage, wear, or imbalance; replace broken or bent blades with genuine RHINO blades, and grind worn or unbalanced blades uniformly or replace them. Also, inspect the sheave for bends or breaks and replace the parts if needed. Finally, check for any trash caught on the blade and clean it off.
  • W
    Whitney SimmonsAug 25, 2025
    How to fix belt slippage on my RHINO TM84?
    • S
      Scott ScottAug 25, 2025
      If your RHINO Lawn Mower is experiencing belt slippage, it could be due to mower overloading. Reduce tractor ground speed while maintaining full PTO rpm, or cut the material twice: make one high pass and then mow at the desired height. Also, check for oil on the belt from over lubrication; be careful not to over lubricate, clean any lubricant from the belt and pulley with a clean rag, and replace an oil-soaked belt. Additionally, ensure the belt isn't hung up or rubbing; check for free travel in pulleys and belt guides, and inspect under the mower and around blade spindle shafts for any foreign material, cleaning it all away.
  • B
    Brooke HuntAug 27, 2025
    What to do if my RHINO Lawn Mower discharges too much material?
    • R
      rogerslisaAug 27, 2025
      If your RHINO Lawn Mower is discharging material excessively, it might be due to the material being too high and too much. Reduce ground speed while maintaining 540 rpm at the tractor PTO, or make two passes over the material. For the first pass, raise the mower, and for the second, lower it to the desired height, cutting at 90° to the first pass. Also, raise the rear of the mower enough to allow material to discharge, but not so high that other issues occur. Other potential causes include a slipping belt (tighten or replace with a special RHINO belt) or wet grass (allow the grass to dry before mowing). Additionally, ensure you aren't using a slow ground speed on the tractor while keeping the engine running at full PTO rpm; cutting lower can help.
  • D
    Derek MelendezAug 30, 2025
    Why does my RHINO Lawn Mower have frayed edges on the cover?
    • R
      Rhonda WagnerAug 31, 2025
      If you notice frayed edges on the cover of your RHINO Lawn Mower, it could be due to a misaligned or rubbing belt. Re-align the belt or guide, ensuring the belt guide doesn’t rub any other part while running. It could also be caused by pulley misalignment. Inspect to ensure the belt is running in the center of the backside idler and shim the idler as necessary to align it.
  • B
    Benjamin PerezSep 3, 2025
    Why is the belt rolling over on my RHINO Lawn Mower?
    • G
      guzmanalanSep 3, 2025
      If the belt on your RHINO Lawn Mower is rolling over, it could be due to pulley misalignment (re-align), a damaged belt (replace the belt), carrier RPM being too low (inspect all pulley grooves for rust, paint, or weld spots and remove them), or a worn pulley groove (replace the pulley).
  • J
    Judy Jennings PhDSep 6, 2025
    What causes a damaged belt on my RHINO Lawn Mower?
    • S
      Sean SmithSep 6, 2025
      A damaged belt on your RHINO Lawn Mower can be caused by rollover, high shock loads, or installation damage. Replace the belt.
  • C
    Cristian WhiteSep 10, 2025
    Why did the belt break on my RHINO Lawn Mower?
    • S
      sheila24Sep 10, 2025
      Belt breakage on your RHINO Lawn Mower can occur due to high shock loads. Avoid abusive mowing and hitting the ground or large obstructions. It can also happen if the belt comes off the drive. Check the drive alignment for foreign material in the grooves and ensure proper tension, avoiding hitting solid objects or the ground. Also, check the broken belt for damage by laying it flat on the floor; if the belt does not lie flat (has humps or twists), which indicates broken or stretched cords, it must be replaced.

Summary

SAFETY SECTION

General Safety Instructions and Practices

General safety rules and precautions for operating the mower and tractor.

Operator Safety Instructions and Practices

Specific safety rules for the operator to follow during use.

Equipment Operation Safety Instructions and Practices

Safety guidelines for operating the mower and tractor safely.

Connecting or Disconnecting Implement Safety Instructions and Practices

Safety procedures for attaching and detaching the mower.

Transporting Safety Instructions and Practices

Safety guidelines for safely transporting the tractor and mower.

Maintenance and Service Safety Instructions and Practices

Safety precautions for performing maintenance and service.

Decal Location

Diagram showing the location of important safety decals on the mower.

Decal Description

Explains the meaning and purpose of various safety decals.

Federal Laws and Regulations

Overview of relevant federal laws and employer responsibilities for safety.

INTRODUCTION SECTION

Attention Owner;Operator

Important instructions for the owner/operator before starting machine operation.

ASSEMBLY SECTION

DEALER SET-UP INSTRUCTIONS

Instructions for dealers on setting up the mower for the owner.

A-FRAME ATTACHMENT FOR TM60-72-84

Steps for attaching the A-frame to specific mower models.

A-FRAME ATTACHMENT FOR TM100

Steps for attaching the A-frame to the TM100 mower model.

CASTER WHEEL ATTACHMENTS

Instructions for attaching caster wheel assemblies to the mower.

DRIVELINE ATTACHMENT - TO GEARBOX

Procedure for connecting the driveline to the gearbox.

OPERATION SECTION

RHINO TM60;TM72;TM84 and TM100 FINISHING MOWER OPERATION INSTRUCTIONS

General instructions for operating the finishing mower.

Standard Equipment and Specifications

Details specifications for different mower models.

OPERATOR REQUIREMENTS

Outlines the necessary qualifications and PPE for operators.

TRACTOR REQUIREMENTS

Specifies tractor capabilities and features needed for safe operation.

GETTING ON AND OFF THE TRACTOR

Safe procedures for mounting and dismounting the tractor.

STARTING THE TRACTOR

Procedures and checks before starting the tractor engine.

CONNECTING THE MOWER TO THE TRACTOR

Safety and procedures for connecting the mower to the tractor.

CUTTING HEIGHT ADJUSTMENT

How to adjust the mower's cutting height safely.

DRIVELINE ATTACHMENT

Procedures for attaching the driveline securely.

PRE-OPERATION INSPECTION AND SERVICE

Essential checks and service before each mower use.

DRIVING THE TRACTOR AND IMPLEMENT

Guidelines for safely driving the tractor with the mower attached.

OPERATING THE TRACTOR AND IMPLEMENT

Comprehensive guidelines for operating the tractor and mower.

DISCONNECTING THE MOWER FROM THE TRACTOR

Safe steps for disconnecting the mower from the tractor.

MOWER STORAGE

Proper procedures for storing the mower at the end of the season.

TRANSPORTING THE TRACTOR AND IMPLEMENT

Safe practices for transporting the tractor and mower.

TROUBLESHOOTING GUIDE

Common problems and their solutions for mower operation.

MAINTENANCE SECTION

Lubrication

Lubrication points and frequency for the mower.

GEARBOX

Gearbox oil level check and lubricant information.

GAUGE WHEEL ASSEMBLIES

Greasing instructions for gauge wheel pivots and hubs.

DRIVELINE LUBRICATION

Lubrication of U-joints and telescoping PTO shaft.

BLADE SPINDLE LUBRICATION

Daily lubrication procedure for blade spindles.

BLADE SERVICING

Inspecting and replacing mower blades.

BLADE SHARPENING

Proper technique for sharpening mower blades.

BLADE REMOVAL

Steps for safely removing mower blades.

BLADE INSTALLATION

Steps for safely installing mower blades.

BELT ADJUSTMENT PROCEDURE

Information on belt tension for this mower.

BELT REMOVAL;INSTALLATION

Procedure for removing and installing mower belts.

STORAGE

Suggestions for preparing the mower for storage.

PROPER TORQUE FOR FASTENERS

Torque specifications for various fasteners.

GEARBOX SERVICING

Tools and procedures for gearbox disassembly and assembly.

GEARBOX DISASSEMBLY

Step-by-step instructions for disassembling the gearbox.

PARTS INSPECTION

Guidelines for inspecting mower parts.

OUTPUT SHAFT INSTALLATION

Procedure for installing the output shaft.

INPUT SHAFT INSTALLATION

Procedure for installing the input shaft.

ASSEMBLY COMPLETION

Final steps for gearbox assembly.

BLADE SPINDLE INSTRUCTIONS

Assembly and disassembly procedures for blade spindles.

RHINO LIMITED WARRANTY

LIMITED WARRANTIES

Details the warranty coverage for mower components.

REMEDIES AND PROCEDURES

Explains the process for making warranty claims.

LIMITATION OF LIABILITY

Disclaimers and limitations on manufacturer liability.

MISCELLANEOUS

Legal venue and other warranty terms.

RHINO TM84 Specifications

General IconGeneral
Cutting Width21 inches
Cutting Height1.25-3.75 inches
Mulching CapabilityYes
Wheel Size8 inches
Fuel Tank Capacity1.6 quarts
Warranty2 years

Related product manuals