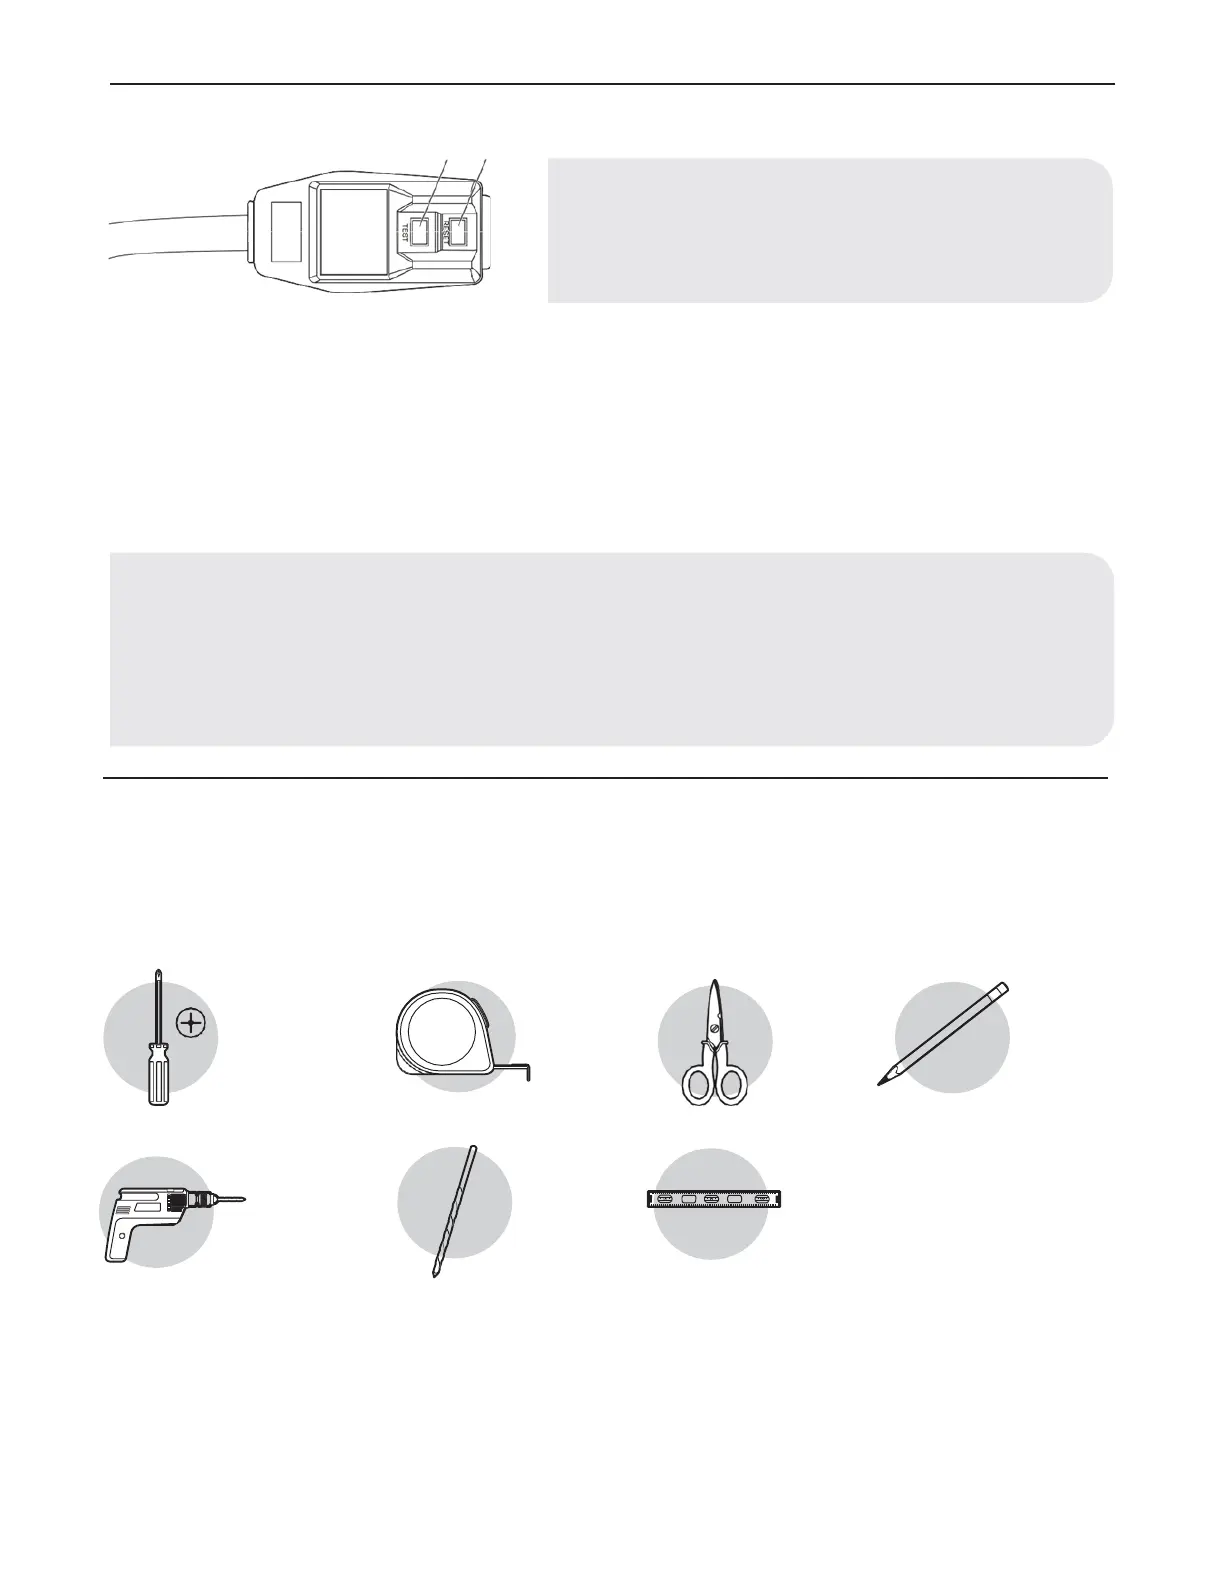
POWER SUPPLY CORD
To test your power supply cord:
1. Plug power supply cord into a grounded 3-prong outlet.
2. Press RESET (2) (on some devices, a green light will turn on).
3. Press TEST (1) and listen for click. The RESET button will trip and on some devices, a green light will turn off.
4. Press and release RESET (2) and listen for click. The RESET button will latch, and on some devices, a green light will turn on. The
power supply cord is ready for operation.
PLANNING INSTALLATION
Gather the required tools and parts before starting installation. Read and follow the instructions provided with any tools listed here.
TOOLS REQUIRED
Philips
screwdriver
Cordless drill
Tape
measure
1/8 in. bit
Scissors
Level
Pencil
NOTE: Your air conditioner’s device may differ from the one shown.
This room air conditioner is equipped with a power supply cord required
by UL. This power supply cord contains state-of-the-art electronics that
sense leakage current. If the cord is crushed, the electronics detect leakage
current and power will be disconnected in a fraction of a second.
NOTE:
• The power supply cord must be replaced if it fails to trip when the test button is pressed or fails to reset.
• Do not use the power supply cord as an off/on switch. The power supply cord is designed as a protective device.
• A damaged power supply cord must be replaced with a new power supply cord obtained from the product manufacturer and must
not be repaired.
• The power supply cord contains no user serviceable parts. Opening the tamper-resistant case voids all warranty and performance
claims.
 Loading...