Registering Folders
81
4
G
GG
G
Press [Specify Other Auth. Info] on
the right side of Folder Authenti-
cation.
Note
❒ When [Do not Specify] is selected,
the SMB User Name and SMB
Password that you have
speci-
fied in Default User Name/Pass-
word
(Send) of File Transfer
settings applies. For details, see
Network Guide.
H
HH
H
Press [Change] under Login User
Name.
I
II
I
Enter the login user name, and
then press [OK].
Reference
p.135 “Entering Text”
J
JJ
J
Press [Change] under Login Pass-
word.
K
KK
K
Enter the password, and then press
[OK].
Note
❒ You can enter up to 128 charac-
ters for the password.
L
LL
L
Press [
OK
].
M
MM
M
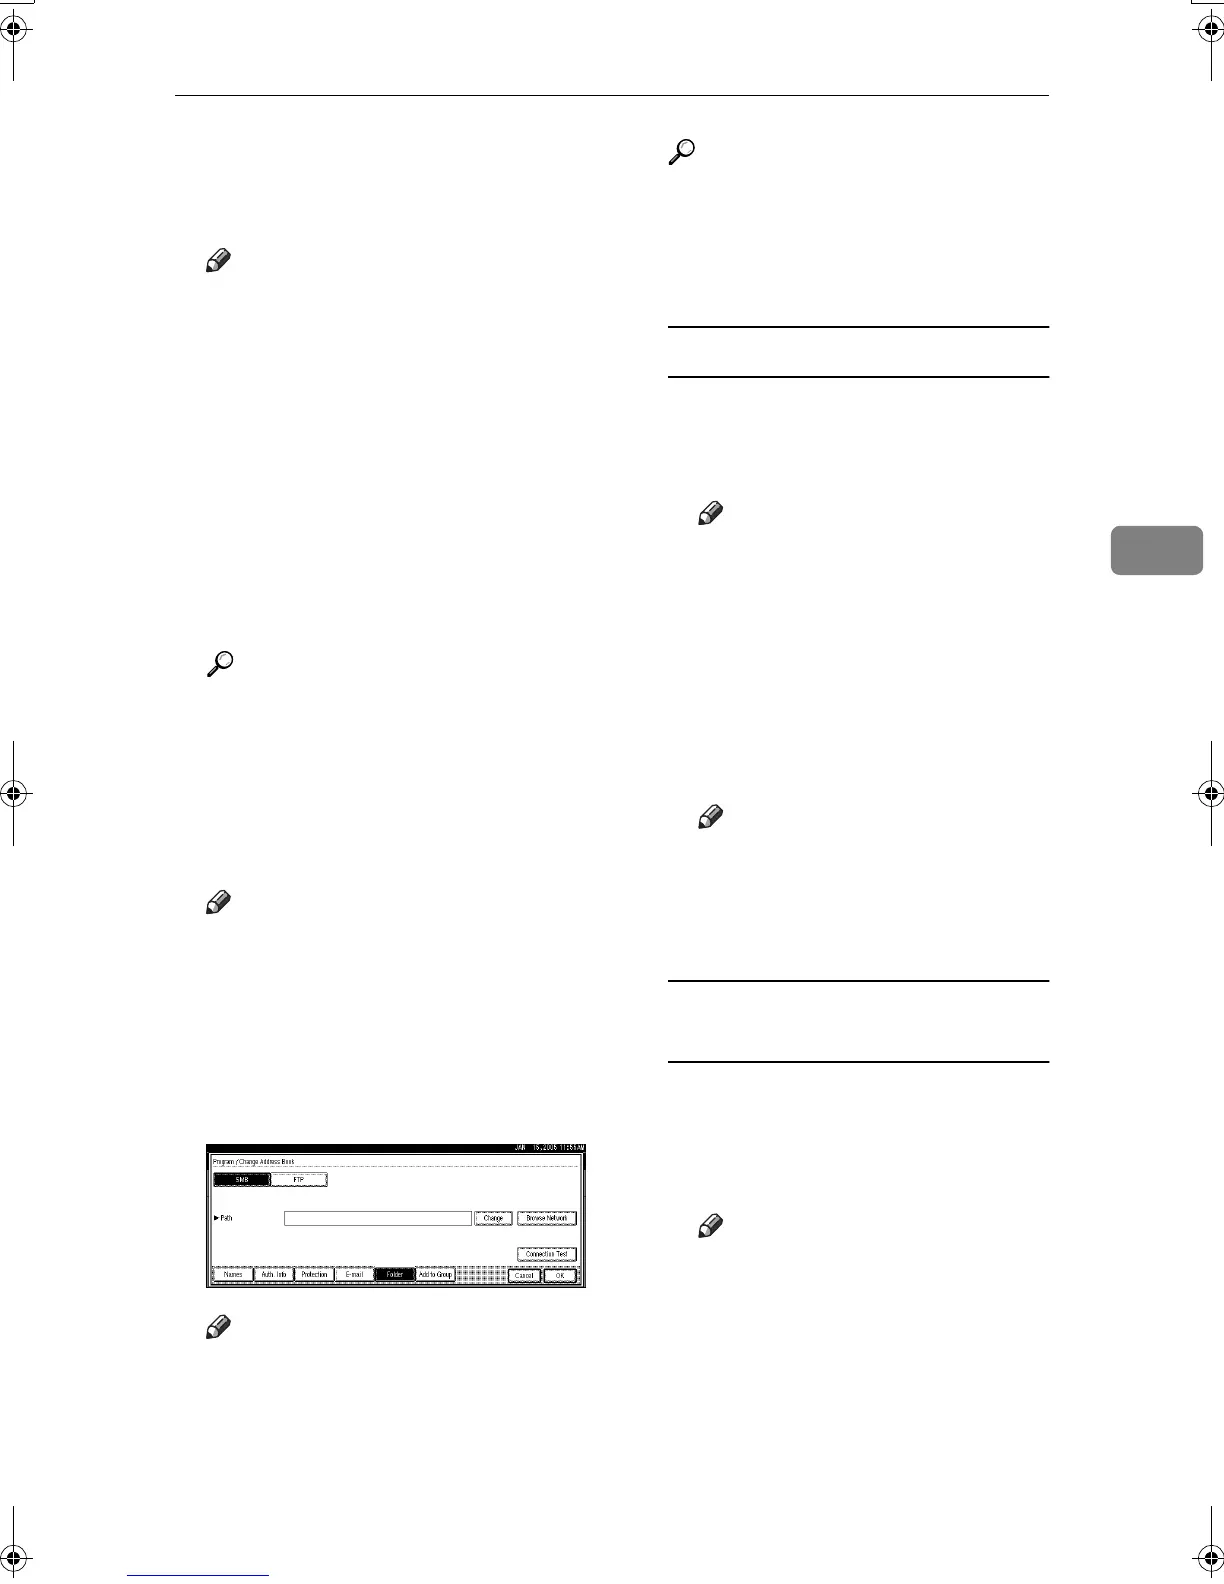
Press [Folder].
N
NN
N
Confirm that [SMB] is selected.
Note
❒ To specify a folder, you can ei-
ther enter the path manually or
locate the folder by browsing
the network.
Reference
p.81 “To locate the folder manu-
ally”
p.81 “Using Browse Network to
locate the folder”
To locate the folder manually
A Press [Change] under Path.
B Enter the path where the folder
is located.
Note
❒ Enter the path using this for-
mat: “\\ServerName\Share-
Name\PathName”.
❒ You can also enter an IP ad-
dress.
❒ You can enter a path using
up to 128 characters.
C Press [OK].
Note
❒ If the format of the entered
path is not correct, a message
appears. Press [Exit], and
then enter the path again.
Using Browse Network to locate
the folder
A Press [Browse Network].
The client computers sharing
the same network as the ma-
chine appear.
Note
❒ If you have already specified
your user name and pass-
word in steps F to L, the
Browse Network display
only lists client computers
you are authorized to access.
B Select a client computer.
Shared folders under it appear.
MartiniC2_ENzen_F_pre_FM.book Page 81 Tuesday, July 27, 2004 1:24 PM





 To Next Page