Do you have a question about the Ricoh 500 and is the answer not in the manual?
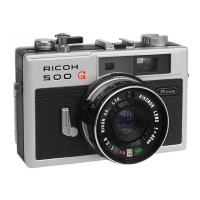
Identifies and describes the external components and controls of the Ricoh 500 camera.
Step-by-step guide for opening the camera, inserting film, and closing the back cover.
Instructions for engaging film, advancing it, setting film type, and cocking the shutter.
Explains the camera's automatic exposure system and the LIGHT VALUE indicator.
How to set shutter speed and aperture using the light value and depth of field scales.
How to use the viewfinder, its bright-frame, and parallax compensation.
Step-by-step guide to focusing the camera using the Duo-lever control.
Outlines the sequence of actions required to take a photograph.
Instructions for setting and using the self-timer for delayed exposures.
How to capture rapid sequences of images using the triggermatic-action lever.
Connecting and setting the RICOH flash unit for M and X synchronization.
Information on using optional lens hoods and filters for image enhancement.
Guidelines for cleaning, storing, and protecting the camera from damage.
The Ricoh 500 is a precision-built camera designed for ease of use and consistent exposure, making it suitable for both casual photographers and those seeking reliable performance. Its primary function is to capture images on 35mm film, offering a blend of mechanical ingenuity and user-friendly features. The camera is equipped with a range of controls that allow for manual adjustment while simplifying the exposure process through its unique LIGHT VALUE system.
The core function of the Ricoh 500 is to record photographic images onto 35mm film. It operates as a mechanical camera, meaning it relies on physical mechanisms rather than electronic components for its primary operations. The camera's lens, often a fixed focal length, is designed to project an image onto the film plane. The shutter mechanism controls the duration of light exposure, while the diaphragm (aperture) regulates the amount of light passing through the lens.
A standout feature is the camera's "LIGHT VALUE" system, which acts as a mechanical brain to compute the correct exposure. Instead of manually setting both shutter speed and aperture separately, the user sets a single LIGHT VALUE indicator. This system automatically adjusts the corresponding shutter speed and aperture to achieve the desired exposure, simplifying the process for photographers. This is particularly beneficial for those who might find the traditional interplay of shutter speed and aperture complex. The camera also includes a film counter to keep track of exposures and prevent double exposures or skipped frames.
For low-light conditions or creative lighting, the Ricoh 500 supports flash photography. It features a cordless flash contact on the accessory shoe, allowing for direct attachment of a compatible flash unit like the RICOH FLASH UNIT BC-605. The camera offers both "M" and "X" synchro settings, providing versatility for different types of flash bulbs or electronic flash units. The synchro mechanism ensures that the flash fires in perfect synchronization with the shutter opening, crucial for proper flash exposure.
The camera also incorporates a self-timer function, enabling the photographer to be included in group shots. When activated, the self-timer provides an approximate 8-second delay before the shutter releases automatically, allowing time for the photographer to position themselves.
Operating the Ricoh 500 involves a systematic approach to ensure optimal results. Film loading is a key initial step, requiring careful placement of a 35mm film cartridge into the chamber. The film's leader is then engaged in the take-up spool slot, and perforations must be properly aligned with the sprocket teeth. After closing the back cover, the film counter is advanced from "S" (Start) to "1" by repeatedly releasing the shutter and operating the triggermatic-action lever. This process ensures that the initial frames, which might be exposed during loading, are bypassed.
The triggermatic-action lever is a distinctive usage feature, allowing for rapid film advancement and shutter cocking with a single pull. This mechanism is designed for quick sequence shots, enabling the capture of multiple images in a short period, potentially up to 10 shots in 10 seconds, especially when the lens is set to f/8 and the distance scale is at the red mark. This rapid action is a significant advantage for capturing fleeting moments.
Focusing is achieved through the Duo-lever focusing controls, which are operated by the right index finger while holding the camera with both hands. The viewfinder incorporates a bright-line frame that shows the exact field of view to be photographed, with automatic parallax compensation. Within the viewfinder, a tinted square displays a "double" image when the subject is out of focus. The user adjusts the focusing lever until these two images merge, indicating sharp focus. The depth-of-field scale, visible on the lens barrel, helps photographers understand the range of distances that will appear sharp at a given aperture setting.
Setting the exposure is simplified by the LIGHT VALUE system. Users refer to a LIGHT VALUE TABLE, which provides recommended values based on film sensitivity (ASA/DIN) and lighting conditions (e.g., snow, shade, cloudy). Once the appropriate LIGHT VALUE is determined, it is set on the light value adjusting ring. The camera then automatically selects the corresponding shutter speed and aperture. If a specific shutter speed or aperture (for depth-of-field control) is desired, the user can turn the shutter speed setting ring, and the camera will automatically adjust the other parameter to maintain the correct exposure, as long as the light value remains constant. However, it's important to note that pushing the settings beyond f/2.8 or f/22 may lead to underexposure or overexposure, respectively.
When using flash, the synchro setting ring is adjusted to "M" or "X" depending on the flash type. The f-stop for flash photography is determined by dividing the flash unit's GUIDE NUMBER by the subject distance, ensuring correct exposure.
Proper care and attention are crucial for maintaining the Ricoh 500's precision and longevity. The lens, being the "life of the camera," requires delicate handling. It should not be touched unless dusty or smudged, and cleaning should involve a soft lens brush first, followed by a gentle wipe with a silicone cloth if necessary. Sudden temperature changes can cause the lens to cloud, so it's advised to allow the camera to acclimate to room temperature before use.
After use in wet or seaside environments, the camera should be cleaned to prevent damage. It is also recommended not to leave the shutter cocked for extended periods, as this can weaken the shutter spring. To preserve the camera's life, the synchro setting should generally be kept at "X," except when using "M" class flash bulbs. When storing the camera in its case, the distance setting should be at infinity.
For long-term storage, especially in moist atmospheres, the camera should be placed in a dry, cool box, potentially with a chemical substance to absorb moisture. These practices help protect the mechanical components and optical elements from environmental damage and wear, ensuring the camera remains in good working condition for years to come. The manual emphasizes that the camera is a precision instrument, and adherence to these maintenance guidelines is essential for its continued performance.
| Type | 35mm rangefinder camera |
|---|---|
| Shutter | Leaf shutter |
| Focus | Manual focus |
| Battery | None (selenium meter powered) |
| Lens | Riken Ricoh 45mm f/2.8 |
| Shutter Speed | 1/8 - 1/500 sec, B |
| Film Advance | Manual lever |