Installation
21
20028248
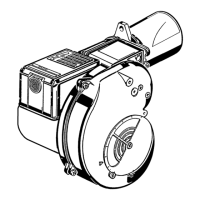
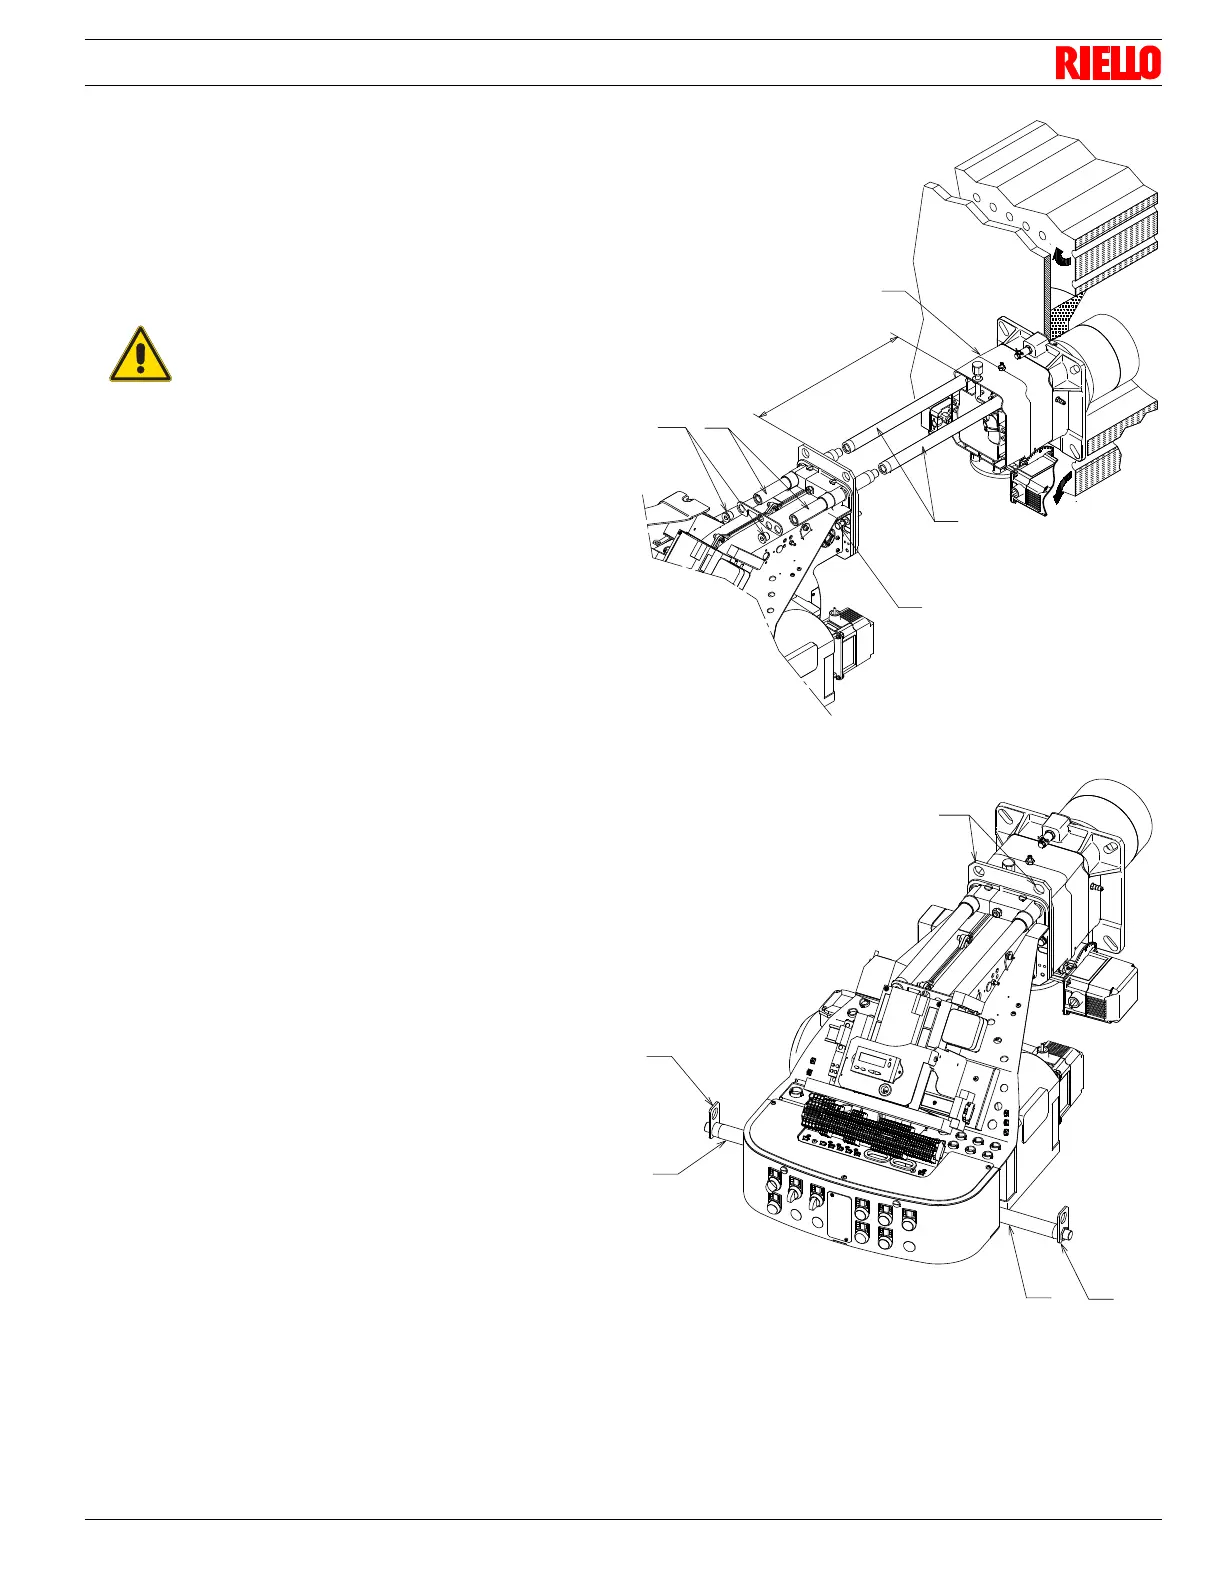
Once the combustion head adjustment is completed:
push the burner on the sliding bars 3) at approximately 4” from
the pipe coupling 4) - burner in the position shown in Fig. 17;
insert the electrode cable, then slide the burner as far as the
pipe coupling - burner in the position shown in Fig. 18;
unscrew the 2 screws 2) from the extension 5) and reposition
them as previously Fig. 18.
refit the screws 2) on the sliding bars 3);
fix the burner to the pipe coupling with the screws 1).
When fitting the burner on the two sliding bars,
it is advisable to gently draw out the high volt-
age cable until it is slightly taut.
Fig. 18
D10594
5) Extension sliding bars
6) Lifting rings