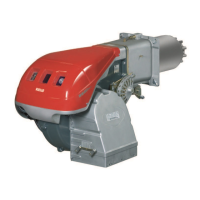
Do you have a question about the Riello RS 160/M BLU and is the answer not in the manual?
User's responsibility for training personnel, ensuring adherence to safety instructions, and reporting issues.
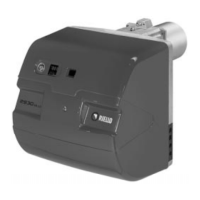
Details important notes, usage, installation details, technical data, and wiring for the RFGO-A22 control box.
Essential safety precautions to be observed during installation, including electrical disconnection and qualified personnel.
Instructions for adjusting the combustion head based on maximum output, with two adjustment methods described.
Safety precautions for gas supply, installation by qualified personnel, and types of gas feeding lines.
Detailed safety notes for electrical wiring, including power supply, earthing, cable sections, and omnipolar switches.
Emphasizes that the first start-up must be performed by qualified personnel and checks for correct device operation.
Steps for gas supply venting, adjusting pressure switches, and connecting test lamps for solenoid valves.
Details on servomotor adjustment for air damper and gas butterfly valve, including cam settings.
Procedure for powering the burner, setting the operating mode, checking fan rotation, and verifying solenoid valve status.
Describes the ignition process, potential lockouts, and steps to take if ignition fails, including increasing gas delivery.
Steps to set the maximum output by adjusting the air damper and gas butterfly valve via the servomotor.
Procedure for setting the minimum output and adjusting air for optimal combustion at this level.
Detailed procedures for final adjustment of air, maximum gas, and minimum gas pressure switches.
Procedure for adjusting the air pressure switch, including setting hysteresis and connection modes.
Procedure for adjusting the maximum gas pressure switch by turning the knob until the burner locks out.
Procedure for adjusting the minimum gas pressure switch and setting the switch to AUT position.
Describes burner start-up sequence, steady state operation, and behavior during ignition failure or flame loss.
Emphasizes that maintenance must be carried out by qualified personnel after disconnecting power and fuel supply.
Details how LED sequences indicate specific lock-out causes and provides general safety warnings for troubleshooting.
Table listing fault numbers, descriptions, and corresponding LED patterns indicating lock-out codes.
Detailed explanations of fault causes and suggested solutions for various error codes, starting from fault number 1.
Continuation of the table listing fault numbers, descriptions, and corresponding LED patterns.
Further fault explanations and suggested solutions, covering error codes from 5 to 19.
Continuation of the table listing fault numbers, descriptions, and corresponding LED patterns.
Further fault explanations and suggested solutions, covering error codes from 20 to 34.
Continuation of the table listing fault numbers, descriptions, and corresponding LED patterns.
Further fault explanations and suggested solutions, covering error codes from 35 to 63.