3
1.6 User Responsibility
The device and Ear specula are non-sterile. Do no use on
abraded tissue.
The otoscope with LED lighting is not suitable for eye exa-
mination.
There is a risk of eye damage!
Attention!:
The caution symbol indicates a potentially hazardous situ-
ation which may result in minor or moderate injury. It may
also be used to alert against unsafe practices.
The perfect and safe functioning of this instrument is only
guaranteed when original parts and accessories from Ries-
ter are used.
Cleaning frequency and practices must be consistent with
institutional policy for cleaning of non-sterile devices.
- We recommend disconnecting the power adapter of the
ri-former
®
Diagnostic Station from the power supply befo-
re cleaning or disinfection.
- Be careful when cleaning and disinfecting the ri-former
®
diagnosis Station so that no liquid penetrates into the in-
terior.
- Never put detachable parts of the ri-former
®
diagnosis
station and extension modules (spiral cable / handle / ins-
trument heads) in liquids!
- The ri-former
®
diagnostic Station / instrument heads are
supplied non-sterile. DO NOT use ethylene, oxide gas,
heat, autoclave, or other harsh methods to sterilize the
device.
- The devices / instruments have not been released for ma-
chine reprocessing and sterilization. This leads to irrepa-
rable damage!
- The disposable ear specula is only suitable for single use!
Any serious incident that has occurred in relation to the de-
vice should be reported to the manufacturer and the com-
petent authority of the Member State in which the user and/
or patient is established.
Attention!
User Responsibility
It is your responsibility to:
- Before each use, the user must check the integrity and
completeness of the ri-former
®
Diagnostic Station / Ex-
tension Module / Instruments head. All components must
be compatible with each other.
- Incompatible components can result in degraded perfor-
mance.
- Never knowingly use a defective device.
- Immediately replace parts that are broken, worn, missing,
incomplete, damaged or contaminated.
- Contact the nearest factory approved service center
should repair or replacement become necessary.
- Further, the user of the device bears sole responsibility
for any malfunction that results from improper use, faul-
ty maintenance, improper repair, damage or alteration by
anyone other than Riester or authorized service person-
nel.
Any serious incident that has occurred in relation to the de-
vice should be reported to the manufacturer and the com-
petent authority of the Member State in which the user and/
or patient is established.
2. UsingtheDeviceforthersttime
2.1 Scope of Supply
2.2 Device Function
The ri-former
®
Diagnostic Station was made with various instruments for
operating heads and modular components for non-invasive diagnosis.
3. Operation and Function
3.1 Attachment
Art. No.: 3650
ri-former
®
1 handle with clock 3,5 V/100-240 V
- User Manual
- Wall mounting material
- Drilling plan
Art. No.: 3652
ri-former
®
1 handle without clock 3,5 V/100-240 V
- User Manual
- Wall mounting material
- Drilling plan
Art. No.: 3650-300
ri-former
®
2 handle with clock 3,5 V/100-240 V
- User Manual
- Wall mounting material
- Drilling plans
Art. No.: 3652-300
ri-former
®
2 handle without clock 3,5 V/100-240 V
- User Manual
- Wall mounting material
- Drilling plans
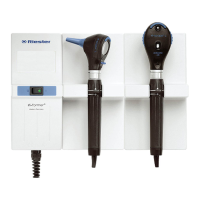
ri-former
®
Diagnostic Station
ri-former
®
Diagnostic Station
with Extension Module
1. ri-former
®
Diagnostic Station
2. Optional clock
3. ON- OFF Rocker switch with green control lamp
4. Application part / Handle with rheotronic®
5. Switching ring on the handle
6. Handle head
7. Extension Module
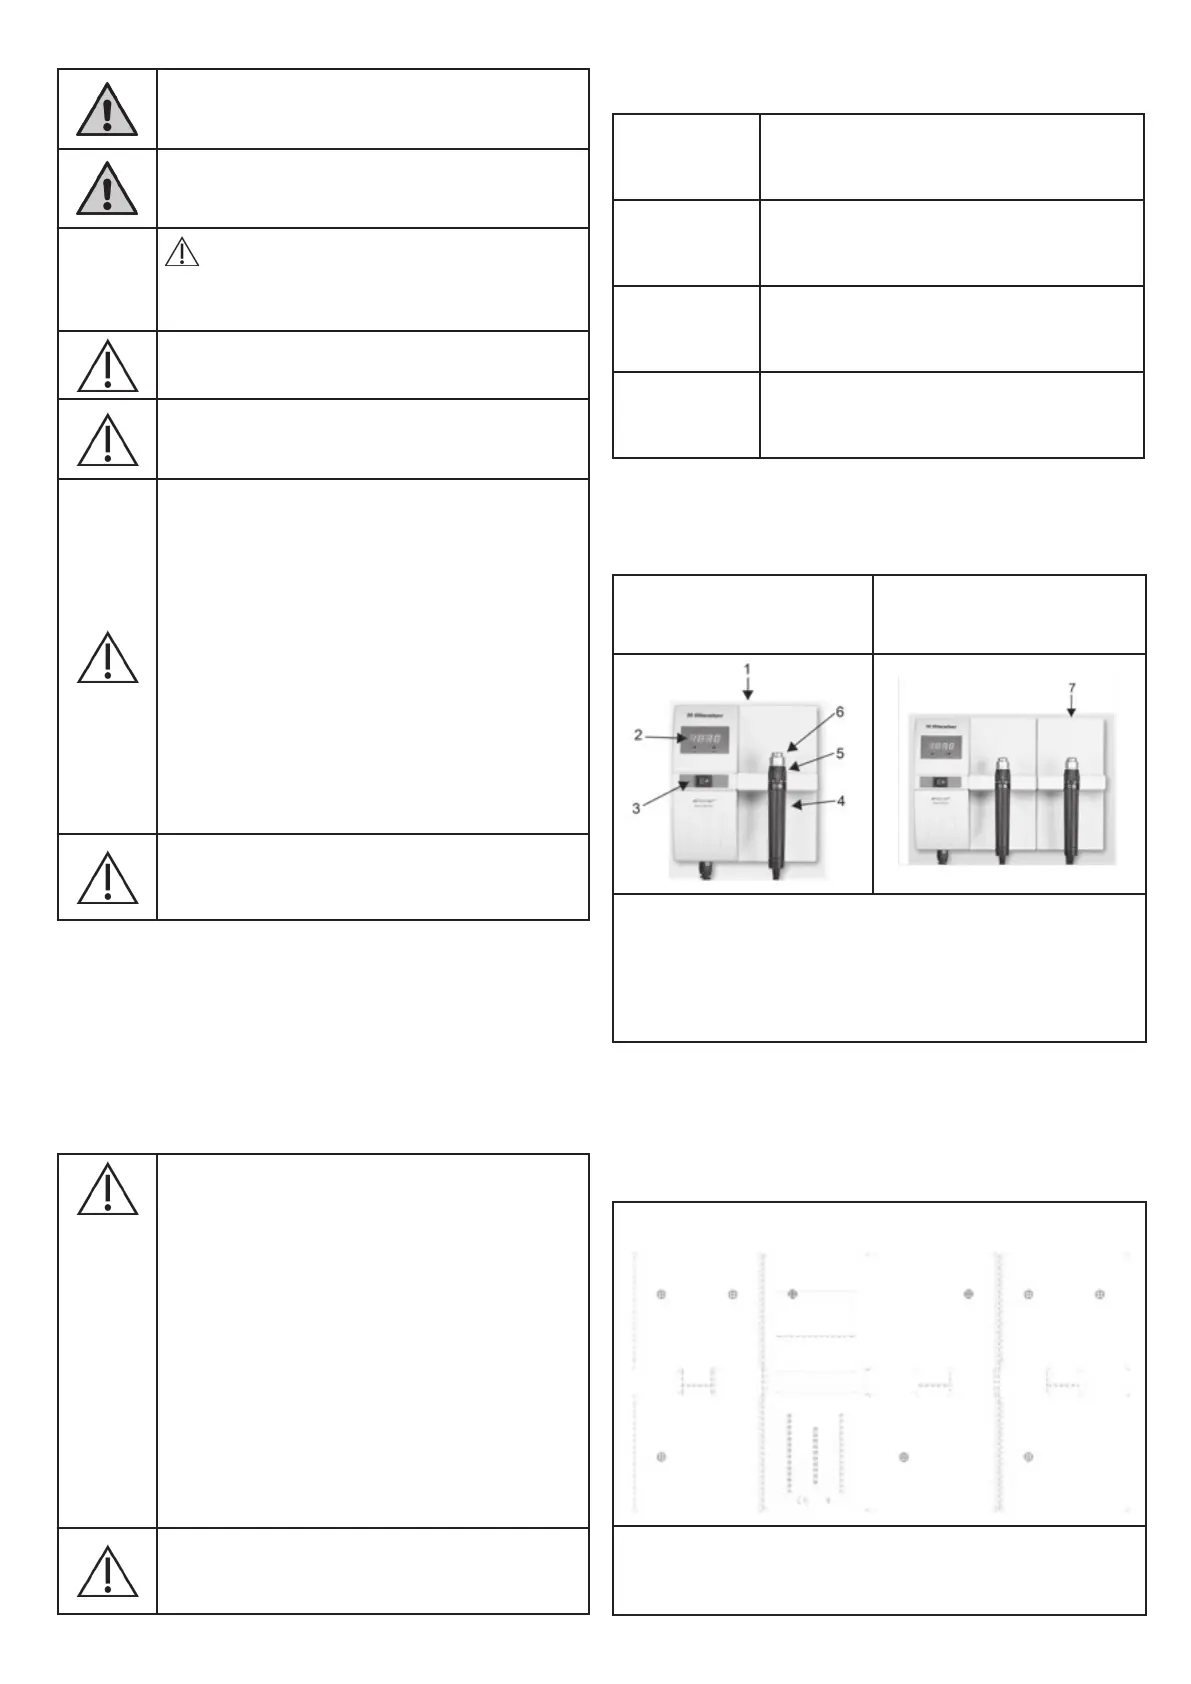
3.1.1 Drilling plan
3.1.2 Drilling instructions/drilling plan
The drilling instructions and the drilling plan are enclosed separately. Fol-
low the drilling instructions in order to drill the holes in the wall.