5
4. Cleaning and Disinfection
4.1 General Information
Cleaning and disinfection of medical products protects patients, users
and third parties, lead to value retention of medical products. Due to
productdesignandmaterialsusedthereisnopossibilitytodenethe
maximum limit of re-processing cycles. The lifetime of a medical pro-
duct is determined by its function and how it is used. Before sending
back defective products for repair, the following instructions should be
followed.
4.2 Cleaning and Disinfection
5. Technical Data
Attention!
- We recommend to remove the wall plug- in of the ri-for-
mer
®
Diagnostic Station.
- Take care when cleaning and disinfecting the ri-former
®
Diagnostic Station. The ri-former
®
Diagnostic Station
can be cleaned on the outside (with the exception of
the display glass cover) using a damp cloth until optical
cleanliness is achieved. Use disinfection products only
according to the manufacturer’s instructions. Only dis-
infectants with proven effectiveness according to natio-
nal guidelines should be used. After disinfection, please
wipe the instruments using a damp cloth in order to eli-
minate any remnants of the disinfectant.
- Never place the ri-former
®
Diagnostic Station and Ex-
tension Module or removable parts of the ri-former
®
Diagnostic Station (handle, cables, Instrument heads) in
liquids!
- The ri-former
®
Diagnostic Station is shipped non-ste-
rile. DO NOT use ethylene oxide gas, heat, autoclave or
any other harsh methods to sterilize the unit.
- The devices are not meant to undergo machine-proces-
sed maintenance and sterilization. This could lead to ir-
reversible damage!
- The single use ear specula is only single use suitable!
For all reusable devices, if there are any signs of material
degradation, the device should no longer be reused and
should be disposed/claimed following the procedure men-
tioned under Disposal / Warranty.
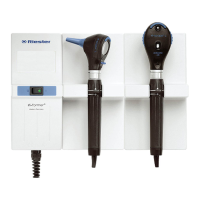
Technical Data
Medical device: Medical device for powering instruments
Electrical protection: Class II isolation equipment
Model
ri-former
®
Diagnostic Station
with
ri-former
®
Extension Module
Power supply
Input: 100 V-240 V AC / 50-60 Hz / 0,6 A
Output: 5 V DC / 3 A / 15 W
ri-former
®
Diagnostic Station
Input: 5 V DC / 3 A / 15 W
Output 1: 1 x 3.5 V dc / 700 mA
Output 2: 2 x 5 V dc / 2 x 1,15 A
ri-former
®
Extension Module
Input: 5 V DC / 3 A / 15 W
Output 1: 1 x 3,5 V dc / 700 mA
Output 2: 1 x 5 V dc / 1 x 1,15 A
Classication Application part type B
Operating conditions
0° C to + 40° C, 10% up to 85 %
relative humidity
Storage and transport
conditions
-5° C to + 50° C, 10% up to 85 %
relative humidity
Airpressure 700 bis 1050 hPa
Dimensions
ri-former
®
Diagnostic station:
200 x 180.5 x 75 mm
Weight ri-former
®
Diagnostic station: 800 g
Dimensions
ri-former
®
Extension Module:
200 x 100 x 75 mm
Weight ri-former
®
Extension Module: 500 g
Swith-on time ON: 1 Min / OFF: 5 Min
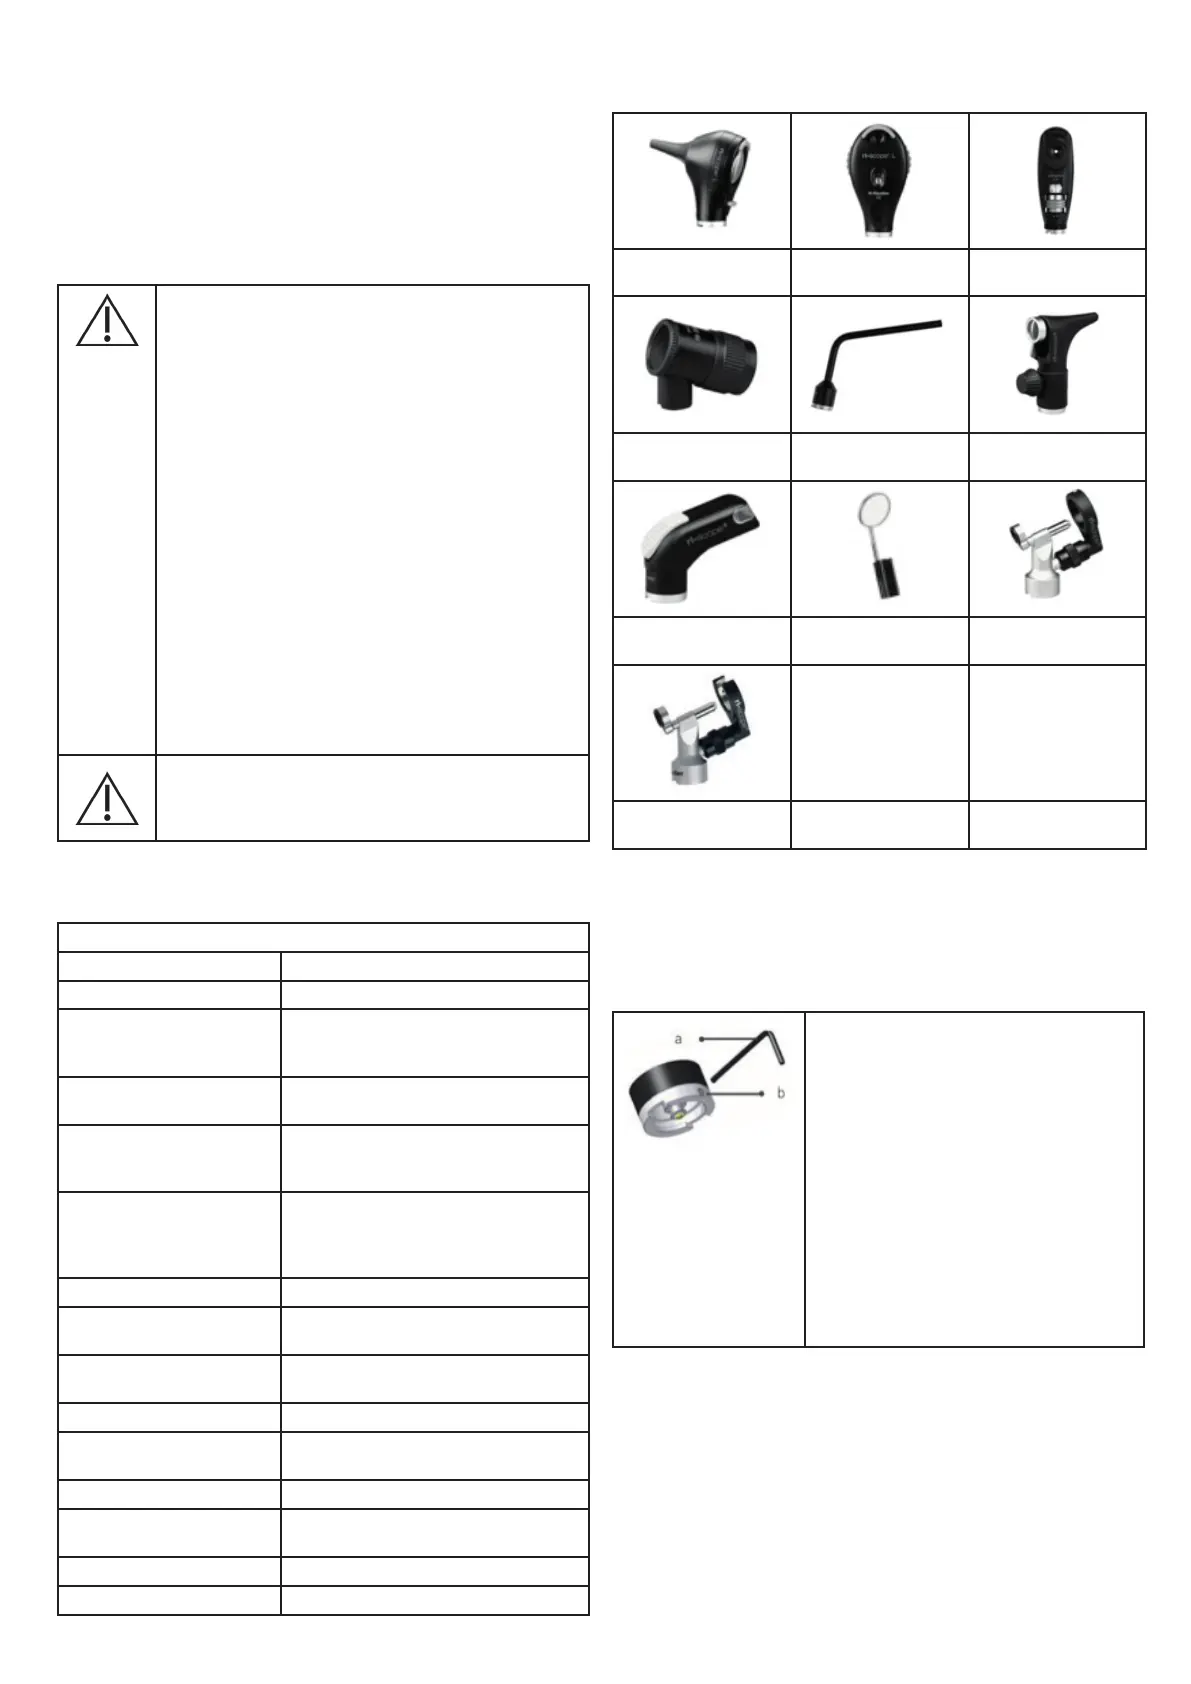
6. ri-scope®L Instrument heads
ri-scope Instrument heads
Putting the instruments heads into operation
Place the desired instrument head onto the attachment on the handle so that
the two recesses on the lower part of the instrument head sit on top of the
two projecting guide cams of the
battery handle. Press the instrument head lightly onto the handle and turn
the handle in a clockwise direction until it stops. To remove the head turn it
in a counter-clockwise direction.
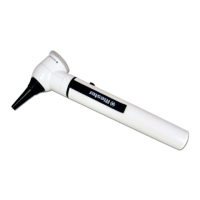
6.1 ri-scope®L otoscope
6.1.1 Intended use
The Riester otoscope described in these Operating Instructions is pro-
duced for illumination and examination of the auditory canal in combi-
nation with Riester ear specula.
6.1.2 Fitting and removing ear specula
Either Riester disposable ear specula (blue colour) or reusable Riester
earspecula(blackcolour)canbettedtotheotoscopehead.Thesize
of the ear specula is marked at the back of the specula.
L1 and L2 otoscopes:
ri-scope®L otoscope
ri-scope®L
ophthalmoscopes
Slit and spot
retinoscopes
Dermatoscope Bent-arm illuminator Nasal speculum
Tongue blade holder Laryngeal mirror
Operation otoscope for
human medicine
Operation otoscope for
veterinary medicine
Function
Place the desired instrument head onto the
attachment on the handle so that the two re-
cesses on the lower part of the instrument
head sit on top of the two projecting
guide cams of the battery handle. Press the
instrument head lightly onto the handle and
turn the handle in a clockwise direction until
it stops.
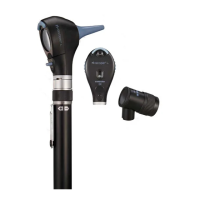
In order to activate the anti-theft security, turn
the Allen screw (b) using the Allen key (a) (in-
cluded with the instrument head) until it stops.
The instrument head can
now no longer be removed from the handle.
In order to deactivate the anti-theft security,
the Allen screw (b) has to be unscrewed again
using the Allen key (a).