8
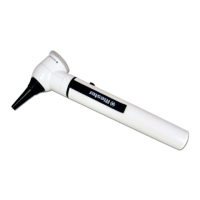
6.10 Operation otoscope for human medicine
6.10.1Intended use
The Riester operation otoscope described in these Operating Instruc-
tions is produced for illumination and examination of the auditory canal
and for insertion of external instruments into the auditory canal.
6.10.2 Placing and removing ear specula for human medicine
Place the desired specula on the black holder on the surgical scope so
thatthenotchonthespeculatsintotheguideintheholder.Fastenthe
specula by turning it clockwise.
6.10.3 Swivel magnifying lens for enlarging
There is a small 360 ° swivel magnifying lens on the surgical oscillo-
scopewithamagnicationpowerofabout2.5times.
6.10.4 Insertion of external instruments into the ear
The operating otoscope is designed so that external instruments can
be inserted into the ear.
6.10.5 Technical data of the lamp
Operating otoscope HL 2.5 V 2.5 V 680 mA ave. life 40 h
Operating otoscope XL 3.5 V 3.5 V 700 mA ave. life 40 h
7. Replacing the lamp
Otoscope L1
Remove the specula receptacle from the otoscope. Unscrew the lamp
counter clockwise. Tighten the new lamp clockwise and reattach the
specula receptacle.
7.1 Otoscopes L2, L3, ri-derma, lamp holder, nasal specula and tongue
blade holder
Remove the instrument head from the battery handle. The lamp is lo-
cated at the bottom of the instrument head. Pull the lamp out of the
instrumenthead usingyour thumband forenger ora suitabletool.
Insertthenewlamprmly.
7.2 Ophthalmoscopes
Remove the instrument head from the battery handle. The lamp is lo-
cated at the bottom of the instrument head. Remove the lamp from the
instrumenthead usingyour thumband forenger ora suitabletool.
Insertthenewlamprmly.
7.3 Retinoscope slit and spot
Remove the instrument head from the battery handle. The lamp is lo-
cated in a sleeve at the base of the instrument head. Remove the lamp
fromthe sleeveusingthethumbandindexngeror asuitabletool.
Insertthenewlamprmlyintothesleeveand
replace the sleeve back into the instrument head so that the base of the
lamptsintotheslotontheinstrumenthead.
8. Care instructions
8.1 General note
The cleaning and disinfecting of the medical devices serve to protect
the patient, the user and third parties and to maintain the value of the
medical devices.
Duetotheproductdesignandthematerialsused,thereisnodened
upper limit on feasible reprocessing cycles. The service life of medical
devices is determined by their function and careful handling.
Defective products must have completed the entire reprocessing pro-
cedure before being returned for repair.
8.2 Cleaning and disinfecting
The instrument heads and handles can be cleaned externally with a
damp cloth until visual cleanliness is achieved.
Wipe with disinfectant according to the instructions of the disinfectant
manufacturer. Only cleaning agents with proven efcacy should be
used under consideration of national requirements.
After disinfecting, wipe the instrument with a damp cloth to remove
possible disinfectant residue.
The contact plates (ri-derma) can be rubbed off with alcohol or a sui-
table disinfectant
8.3 Sterilisation
Reusable ear specula:
The ear specula can be sterilised at 134° C, with a 10 minute period in
the steam steriliser.
Single use ear specula:
For single use only!
9. Spare parts and accessories
A detailed list can be found in „Instruments for H.N.O.,“ Ophthalmologic
Instruments,whichyoucanndatwww.riester.de
https://www.riester.de/en/productdetails/d/ri-scoper-l-premium-ent-
and-ophthalmic-instruments/other-ri-scope-l-accessories/
10. Electromagnetic Compatibility accompanying Documents according
to IEC 60601-1-2
Theinstrument satisesthe requirementsforelectromagneticcom-
patibility. Please note that under the inuence of unfavorable eld
strengths, e.g. during the operation of wireless telephones or radio-
logical instruments, adverse effects on function cannot be excluded.
Theelectromagneticcompatibilityofthisdevicehas beenveriedby
test according to the IEC60601-1-2 requirements.
10.1 EMC (electromagnetic compatibility)
10.1.1
During installation and operation of the device, observe the following inst-
ructions:
10.1.2
Do not use the device simultaneously with other electronic equipment to avo-
id electromagnetic interference with the operation of the device.
10.1.3 Do not use or stack the device near, on, or under other electronic
equipment to avoid electromagnetic interference with the operation of the
device.
10.1.4
Do not use the device in the same room as other electronic equipment, such
as life-support equipment that has major effects on the life of the patient and
results of treatment, or any other measurement or treatment equipment that
involves small electric current.
10.1.5
Donotusecablesoraccessoriesthatarenotspeciedforthedevicebecause
that may increase the emission of electromagnetic waves from the device
and decrease the immunity of the device to electromagnetic disturbance.
Attention!
The pin of the lamp must be inserted into the guide
groove on the ophthalmoscope‘s instrument head.
Attention!
Never place the spiral cable / handle / instrument
heads in liquids! Make sure that no liquids penetrate
the housing interior!
The article is not approved for machine reprocessing
and sterilisation. This can lead to irreparable damage!
Warning!
-Disposable ear specula
Only use new ear specula to limit the risk of cross
contamination.
-Reusable ear specula
Only use cleaned / sterilized ear specula to limit the
risk of cross contamination
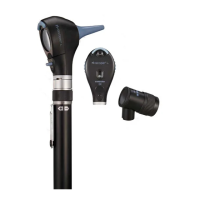
Attention!
More information about
ri-scope®L
ri-scope
are in the Instruction of use Art.No.99220