For detailed instructions on how to configure a specific
function block refer to this manual or you can click the
Help button.
NOTICE:
Different blocks have different properties that
require setting up, especially the special function blocks.
Please read relevant sections above for a detailed
explanation of the settings for the block you are using.
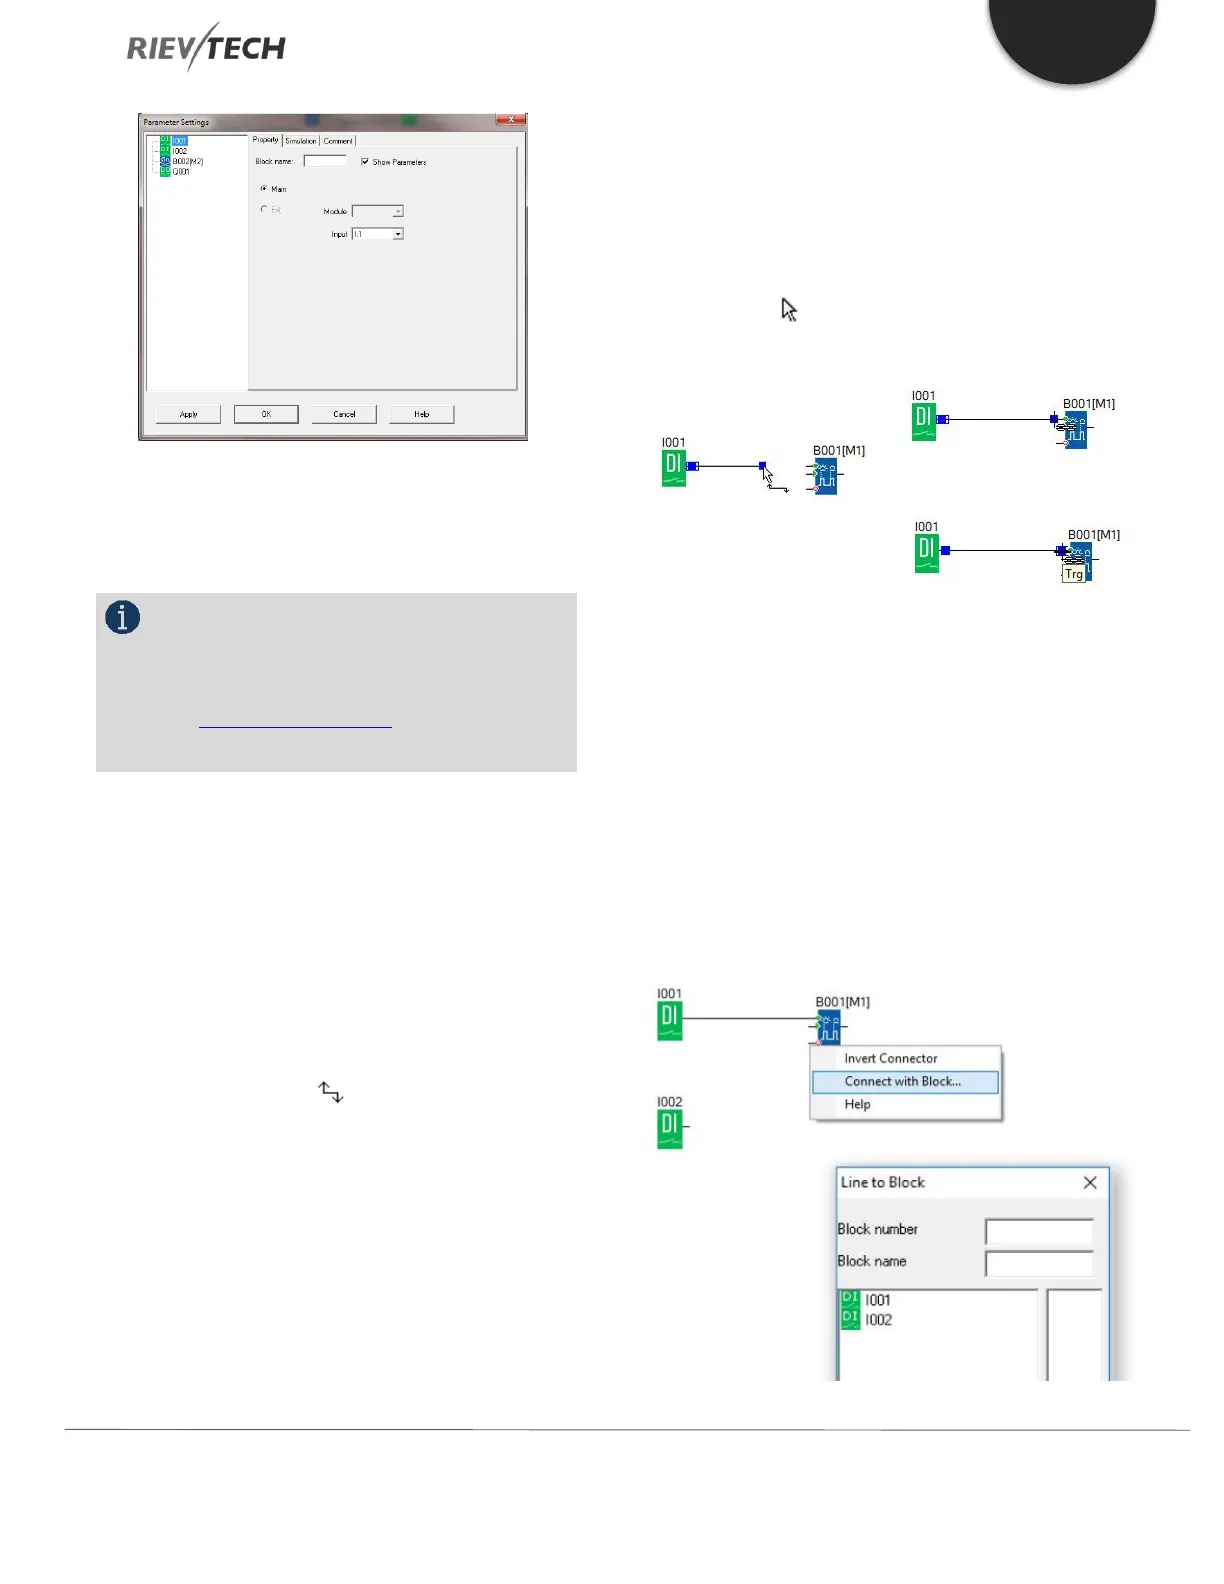
Connecting Blocks
After putting all the blocks needed into your workspace
and configuring each block’s settings are required, it’s
necessary to link your blocks together so as the program
flow performs the required logical steps for your program.
Operation Method:
1. Click on shortcut key on the left-hand side of
your workspace. When the mouse icon becomes the
shape of a pen, it can be used to link the blocks.
2. Move the mouse pointer to a block input or output pin
and press the left mouse button. Keep the mouse button
pressed down and then drag the mouse pointer from your
selected source terminal to the target terminal. Release
the mouse button to anchor the connecting line between
blocks. While the connecting line is being drawn, it is
shown as a straight line between the first terminal and the
mouse pointer. Once it is connected to its target block, it
appears as a combination of horizontal and vertical lines.
The connections can be tidied up if required by using the
Selection Tool and clicking on the connection line.
xLogicsoft offers you a further option of connecting blocks.
When you right-click on the input or output of a block a
shortcut menu appears, choose the Connect with Block
command. This calls a selection list that contains all blocks
available for your connection. Click on the relevant target
block to select the connection and xLogicsoft will draw the
connecting line. This method is especially useful for
connecting a source to a target block over a greater
distance on the programming workspace area.
 Loading...