6
7
Choose your screws.
Select a set of screws from the bags marked “A”
through “F” that fit your junction box to secure the
metal mounting bracket. One size does not fit all here,
so we sent several.
Save a screw from either Bag B or C. You will use it
on the next page.
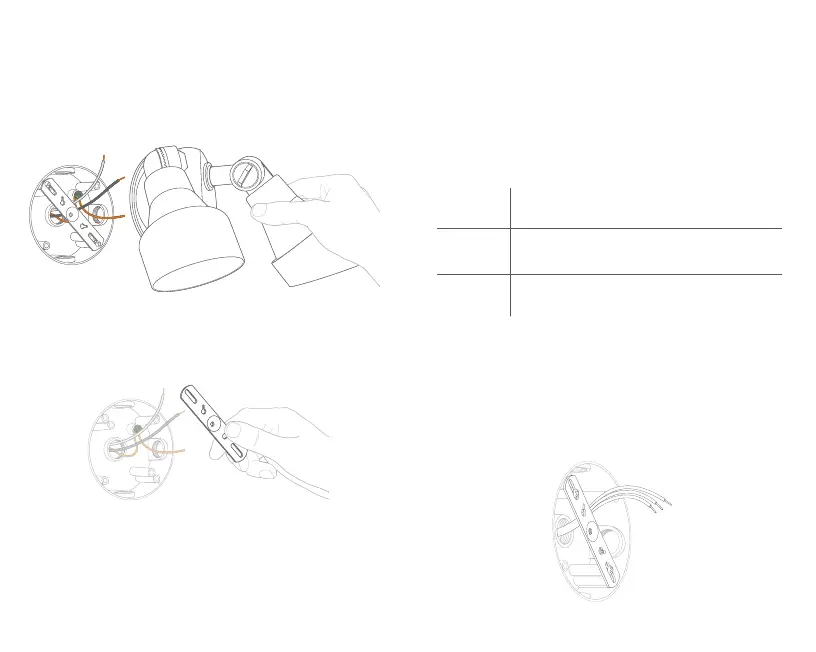
Attach the metal mounting bracket.
With the screws you selected in the previous step,
secure the metal mounting bracket to your junction
box using either pair of screw holes. Be sure to align
the bracket so that the “FRONT” text faces outwards.
Bag A
Standard screws. These should fit most
junction boxes.
Bag B & C
Longer screws to reach the screw holes
in recessed junction boxes.
Bag D, E & F Best for older boxes with smaller screw holes.
Remove your existing floodlight.
With power o at the breaker, remove your existing
floodlight from the junction box it’s attached to and
disconnect the wires.
If there is a metal bracket attached to your
junction box, remove that as well.