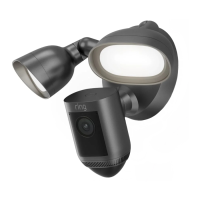
Do you have a question about the ring Floodlight Cam Wired Pro and is the answer not in the manual?
Open Ring app, select "Set Up a Device," and follow in-app instructions.
Scan the unique code to identify the Ring device for fast and easy setup.
Warnings for electrical shock, fire risk, and avoiding dimmer switches/timers.
Turn off power at the circuit breaker before starting installation for safety.
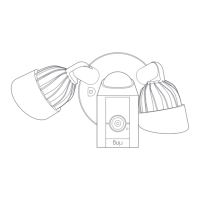
Rotate the light fixtures to the side for easier installation access.
Adjust camera position based on eave or wall mounting.
Remove the old floodlight, disconnect wires, and remove any attached metal bracket.
Select screws from bags A-F based on junction box type for secure mounting bracket.
Attach the metal mounting bracket to the junction box using selected screws, ensuring "FRONT" faces outwards.
Feed power wires through the plastic plate, center it over the bracket, and align the "UP" arrow.
Insert screw from Bag B or C into the center hole to secure the plastic mounting plate.
Loop the nylon strap buckle over the mounting plate hook and ensure it's secure before releasing the fixture.
Connect green to green, white to white, and black to black wires using wire nuts. Tug to ensure security.
Consult an electrician if unsure about wire identification or connection.
Tuck wires into the junction box, align fixture holes with posts, and slide into place.
Use hex cap nuts from Bag G to secure the fixture to the threaded posts.
Turn power back on at the breaker; lamps will flash to indicate power.
Follow in-app instructions to continue the setup process after powering on.
Device includes a free 30-day trial of Ring Protect video recording service.
Visit ring.com/protect-plans to continue subscription and save videos.
A subscription service for storing videos from Ring devices.
Interact with visitors and monitor property, review and share videos anytime.
Costs $3 USD/month or $30 USD/year per device, with CAD pricing also noted.
Log into your Ring account at ring.com/protect-plans and follow instructions.
Find help online at ring.com/help or by phone for US, Canada, and Worldwide.
Information on warranty, theft protection, and Ring Protect Plans is available at ring.com/legal.
| Type | IP security camera |
|---|---|
| Luminous flux | 2000 lm |
| Day/night mode | Yes |
| Color temperature | 3000 K |
| Placement supported | Outdoor |
| Connectivity technology | Wireless |
| Built-in HDD | - |
| Built-in siren | No |
| Mounting type | Ceiling/wall |
| Product color | Black |
| Country of origin | China |
| AC input voltage | 100 - 240 V |
| Power source type | AC |
| Number of lenses | 1 |
| Operating temperature (T-T) | -28 - 48 °C |
| Total megapixels | - MP |
| Maximum resolution | - pixels |
| Supported video modes | 1080p |
| Networking standards | IEEE 802.11ac, IEEE 802.11b, IEEE 802.11g, IEEE 802.11n |
| Harmonized System (HS) code | 85258900 |
| Depth | 202 mm |
|---|---|
| Width | 326 mm |
| Height | 217 mm |
| Package depth | 360 mm |
| Package width | 16.3 mm |
| Package height | 24.8 mm |