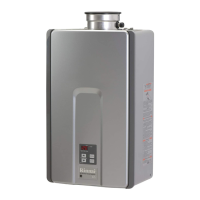
8 Rinnai Circ-Logic™ with Grundfos Kit
Wiring the Pump to the Water Heater
The Rinnai water heater has the ability to control a
recirculaon pump. Two modes are available,
Economy and Comfort, which recirculate the water in
the plumbing system to provide hot water more
quickly when a tap is opened.
Recirculaon mode is for residenal installaons only.
Recirculaon mode cannot be used with the Bath Fill
controller (BC-100V), or with an air handler.
The maximum Rinnai temperature seng while in
recirculaon mode is 140°F (60°C).
Installaon
1. Turn o the electrical power supply by unplugging
the power cord or by turning o the electricity at
the circuit breaker.
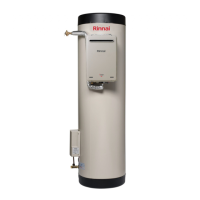
2. Install the GTK15 pump according to the System
Drawings and Pump Installaon instrucons.
3. Re-route the water heater power cord or wiring
from the smaller access hole to the larger access
hole as shown in Figure 4: Boom of Water
Heater.
4. Route the line cord (power cord) for the GTK15
through this larger access hole.
5. On VC series models, use a knockout or step drill
bit to enlarge the smaller hole to 3/4 inch
diameter. On KB series models the hole is already
the correct size. Aach the conduit from the
GTK15 to the smaller access hole using the
connector supplied.
6. Splice the brown, gray, and green wires from the
Grundfos unit to the line cord (black, white,
green) according to the wiring table. These splices
should be located inside the water heater cabinet.
Refer to Figure 5: Electrical Diagram.
7. The wire harness for the recirculaon pump is
bundled with the wire harness from the PC board.
The connector has a black and white wire with the
label “Cut wire to connect to pump”. To connect
to the pump, cut the connector and splice the
wires according to the wiring table and Figure 5.
Follow Electrical Code and pump manufacturers
recommendaons.
8. Adjust the dip switch in the water heater by
moving the 4th switch in the white set of switches
(SW2) to ON.
For Economy Mode, set the 8th switch in the
white set of switches (SW2) to OFF (default).
For Comfort Mode, set the 8th switch in the white
set of switches (SW2) to ON.
WARNING
Install the Rinnai water heater according to the Rinnai
Installaon and Operaon Manual.
The water heater must be electrically grounded in
accordance with local codes and ordinances or, in the
absence of local codes, in accordance with the
Naonal Electrical Code, ANSI/NFPA No. 70.
Indoor water heaters are equipped with a three-
prong (grounding) plug for your protecon against
shock hazard and should be plugged directly into a
properly grounded three-prong receptacle. Do not
cut or remove the grounding terminal from this plug.
To protect yourself from harm, before installaon:
• Turn o the electrical power supply by unplugging
the power cord or by turning o the electricity at
the circuit breaker. (The temperature controller
does not control the electrical power.)
• Turn o the gas at the manual gas valve, usually
located immediately below the water heater.
• Turn o the incoming water supply. This can be
done by turning o the water supply to the
building.
Settings for SW2
(bank of white switches)
Switch 4 Switch 8
Economy Mode ON OFF
Comfort Mode ON ON
 Loading...