WOT4-E Instructions / WOT4-E Anleitung
4
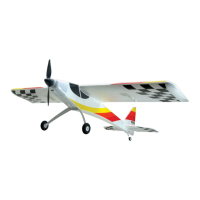
The wings and ailerons are supplied with the hinges loose
fitted, ready for installation. Remove both ailerons and ensure that
the hinges are inserted mid-way in their slots. Using thin cyano,
pour a couple of drops onto each hinge - above and below -
ensuring the glue soaks into the hinge and the surrounding wood.
Die Flügel und die Querruder werden mit lose montierten
Scharnieren geliefert, und sind fertig für die Montage. Entfernen
Sie beide Querruder, und achten darauf, dass die Scharniere mittig
in den Schlitzen ausgerichtet sind. Verwenden Sie dünnflüssigen
Sekundenkleber. Kleben Sie mit ein paar Tropfen Kleber jedes
Scharnier, -oben und unten- in die Fläche, und stellen Sie sicher,
dass sich der Klebstoff mit dem Scharnier und dem umgebenden
Holz verbunden hat.
Stage 1 / Schritt 1
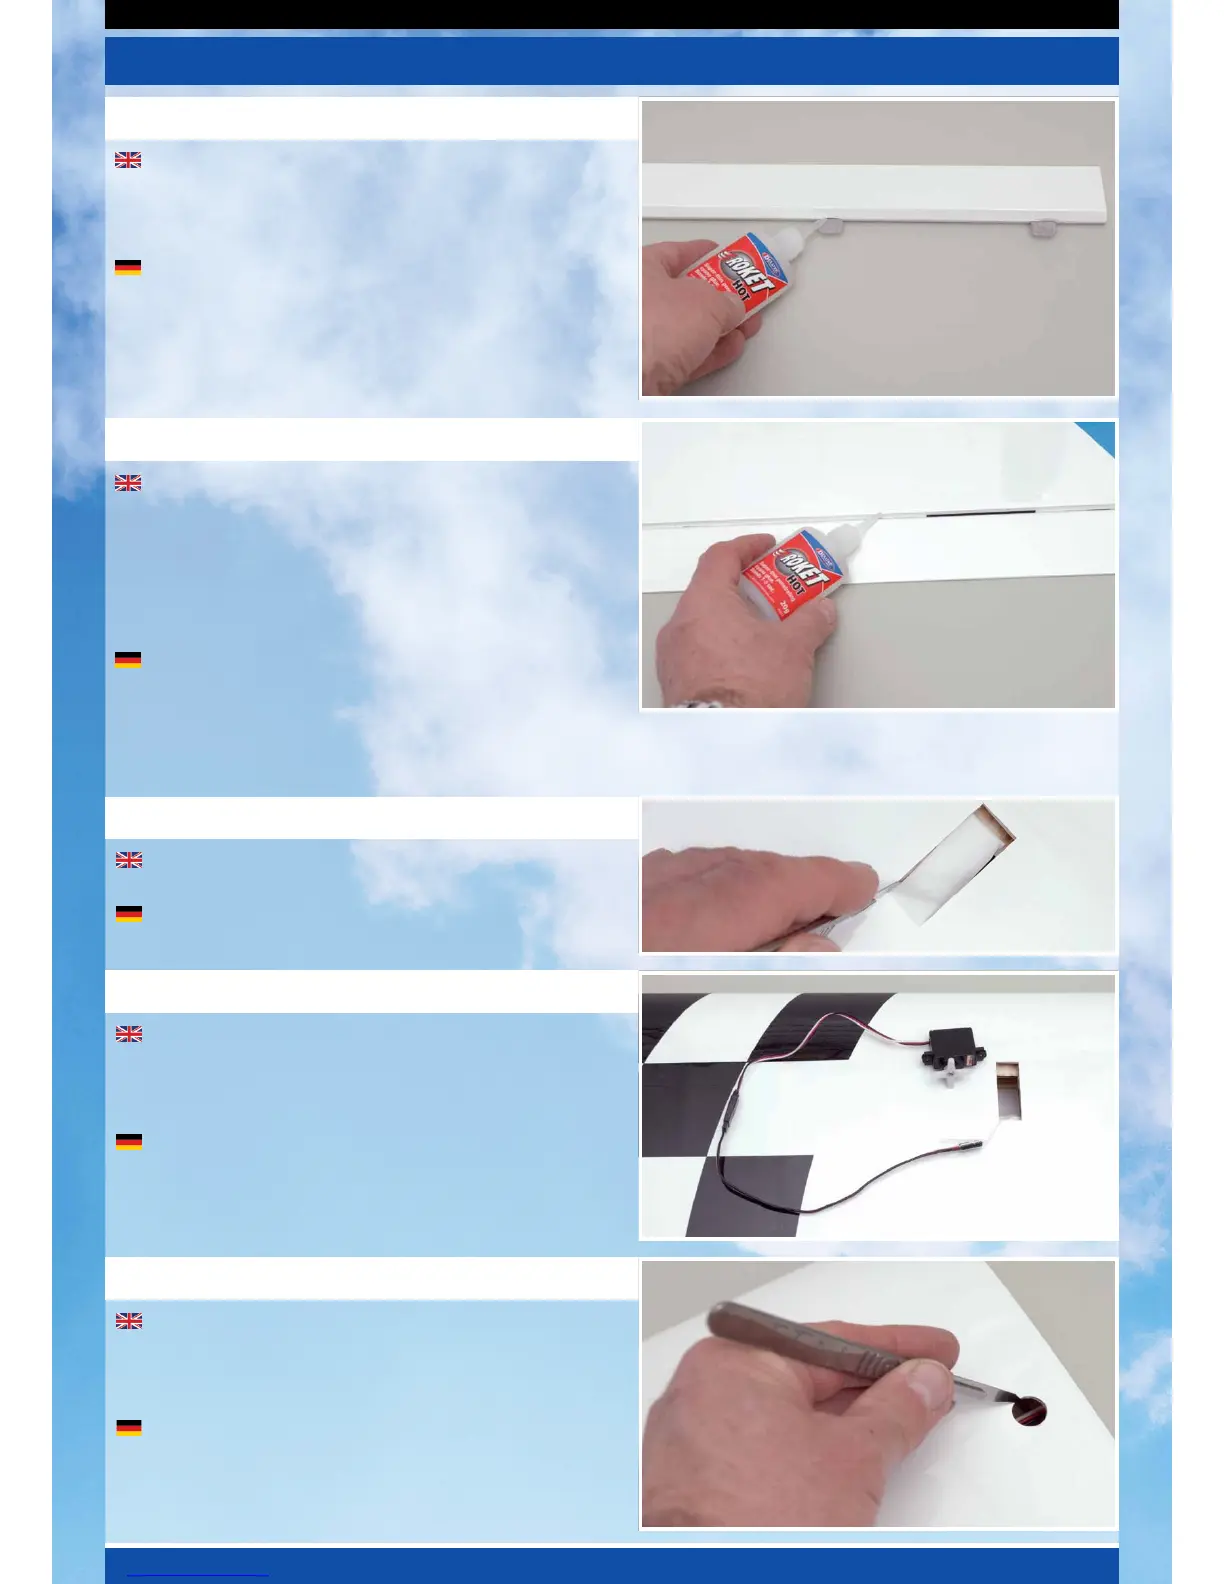
Carefully slide each aileron into position, ensuring a gap-free
hinge line. Make sure that each aileron lines up with the wing tips
and that they are free to move through their entire travel. Centre
each aileron between the root and tip so that there is an equal
gap at both ends. Minimise any hinge gap, then carefully add a
couple of drops of thin cyano to the top and bottom of each hinge
ensuring that the glue does not run through the hinge line onto
the bottom of the wing. Turn the wing over and drop more cyano
onto each hinge from the other side.
Schieben Sie jedes Querruder vorsichtig in Position, und stellen
Sie sicher, dass diese spaltfrei eingebaut sind. Vergewissern Sie
sich, dass jedes Querruder korrekt zwischen der Wurzel und der
Spitze zentriert wird, und dass sich diese zu jedem Zeitpunkt frei
bewegen können. Fügen Sie ein paar Tropfen Sekundenkleber auf die Ober - und Unterseite der Scharniere, und achten Sie
dabei darauf, dass der Klebstoff nicht in den Spalt an der Unterseite des Flügels läuft. Drehen Sie den Flügel anschließend
herum, und tropfen Sie nochmals Sekundenkleber auf diese Seite der Scharniere.
Stage 2 / Schritt 2
Locate the wing servo apertures through the covering on the
underside of the wing. Carefully trim away the covering as shown.
Schneiden Sie die vorsichtig die Folie für die Servoaufnahmen
an der Unterseite des Flügels aus, wie gezeigt.
Prepare your aileron servos by connecting a suitable 300mm
extension lead to each. It is a good idea to use a lead-lock, a turn
of insulation tape or heat shrink tube over the joint for additional
security. Carefully tie each aileron servo's lead to the length of
cotton already in the wing panels.
Bereiten Sie Ihre Querruder Servos vor, indem Sie ein
passendes 300mm Verlängerungskabel mit jedem Servo
verbinden. Es ist eine gute Idee eine Steckersicherung, Isolierband
oder einen Schrumpfschlauch zur zusätzlichen Sicherung zu
verwenden. Befestigen Sie an jedem Querruder Servokabel den
Baumwollfaden, der schon in der Flügelhälfte liegt.
Stage 3 / Schritt 3
Cut away the covering over the servo lead holes in the
underside of the wing panels and carefully pull the leads through
to the centre of the wing using the cotton thread. Lift out the servo
connector through the hole then retain the servo lead with a short
length of tape to stop the lead pulling back into the wing.
Schneiden Sie die Folie über den Servokabel Löchern,
an der Unterseite der Flügelhälfte, aus. Ziehen Sie vorsichtig
die Kabel durch die Mitte des Flügels, unter Verwendung des
Baumwollfadens. Heben Sie den Servo Stecker aus dem Loch
heraus, dann umwickeln Sie das Servokabel mit etwas Klebeband,
damit das Kabel nicht wieder in den Flügel rutscht.
Stage 5 / Schritt 5
Stage 4 / Schritt 4
 Loading...