10
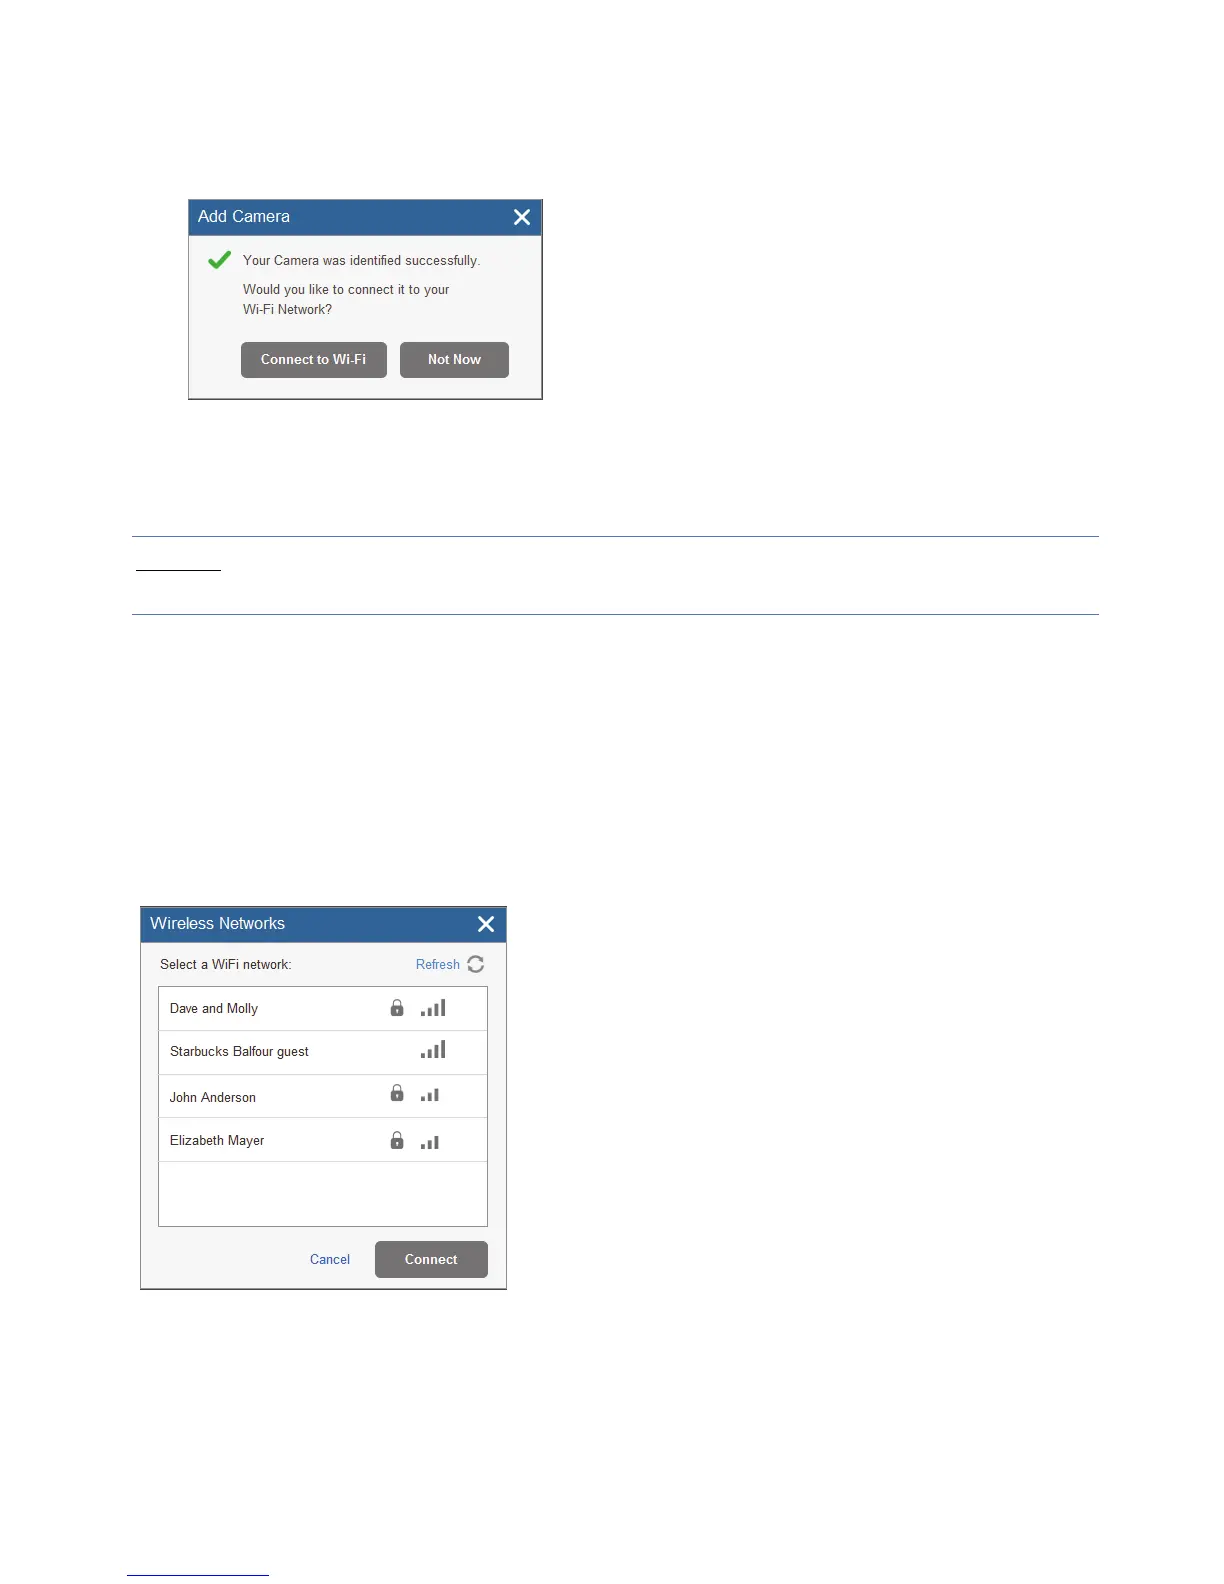
7. Click Add.
If the “Camera was identified successfully” message is displayed, go straight
to step 8.
Figure 9 Camera was identified successfully message
If an “unable to configure Internet Access”, “UPnP Client Error” or similar
message is displayed, refer to the Troubleshooting section.
NOTE
– This message is only relevant for IP cameras that are physically
connected to the LAN network via the router.
8. Select one of the following options:
Connect to Wi-Fi – to establish a wireless network connection (go to step 9 to
connect the IP camera to the wireless network).
Not Now – to establish a LAN network connection (skip the wireless network
connection steps 9, 10 and 11 and connect the IP camera to the LAN network).
9. If you selected the “Connect to Wi-Fi” option, a list of available wireless
networks is displayed.
Figure 10 List of available wireless networks
10. Select a wireless network from the available list and click Connect.
 Loading...