11
NOTE – If your network is password protected, a password must be entered into
the displayed password screen.
11. Click OK to establish the wireless connection (Refer to Connecting to a
Wireless Network using the RISCO Cloud).
IMPORTANT
– Once a wireless connection has been established, don’t forget to
disconnect the IP camera Ethernet cable from the router.
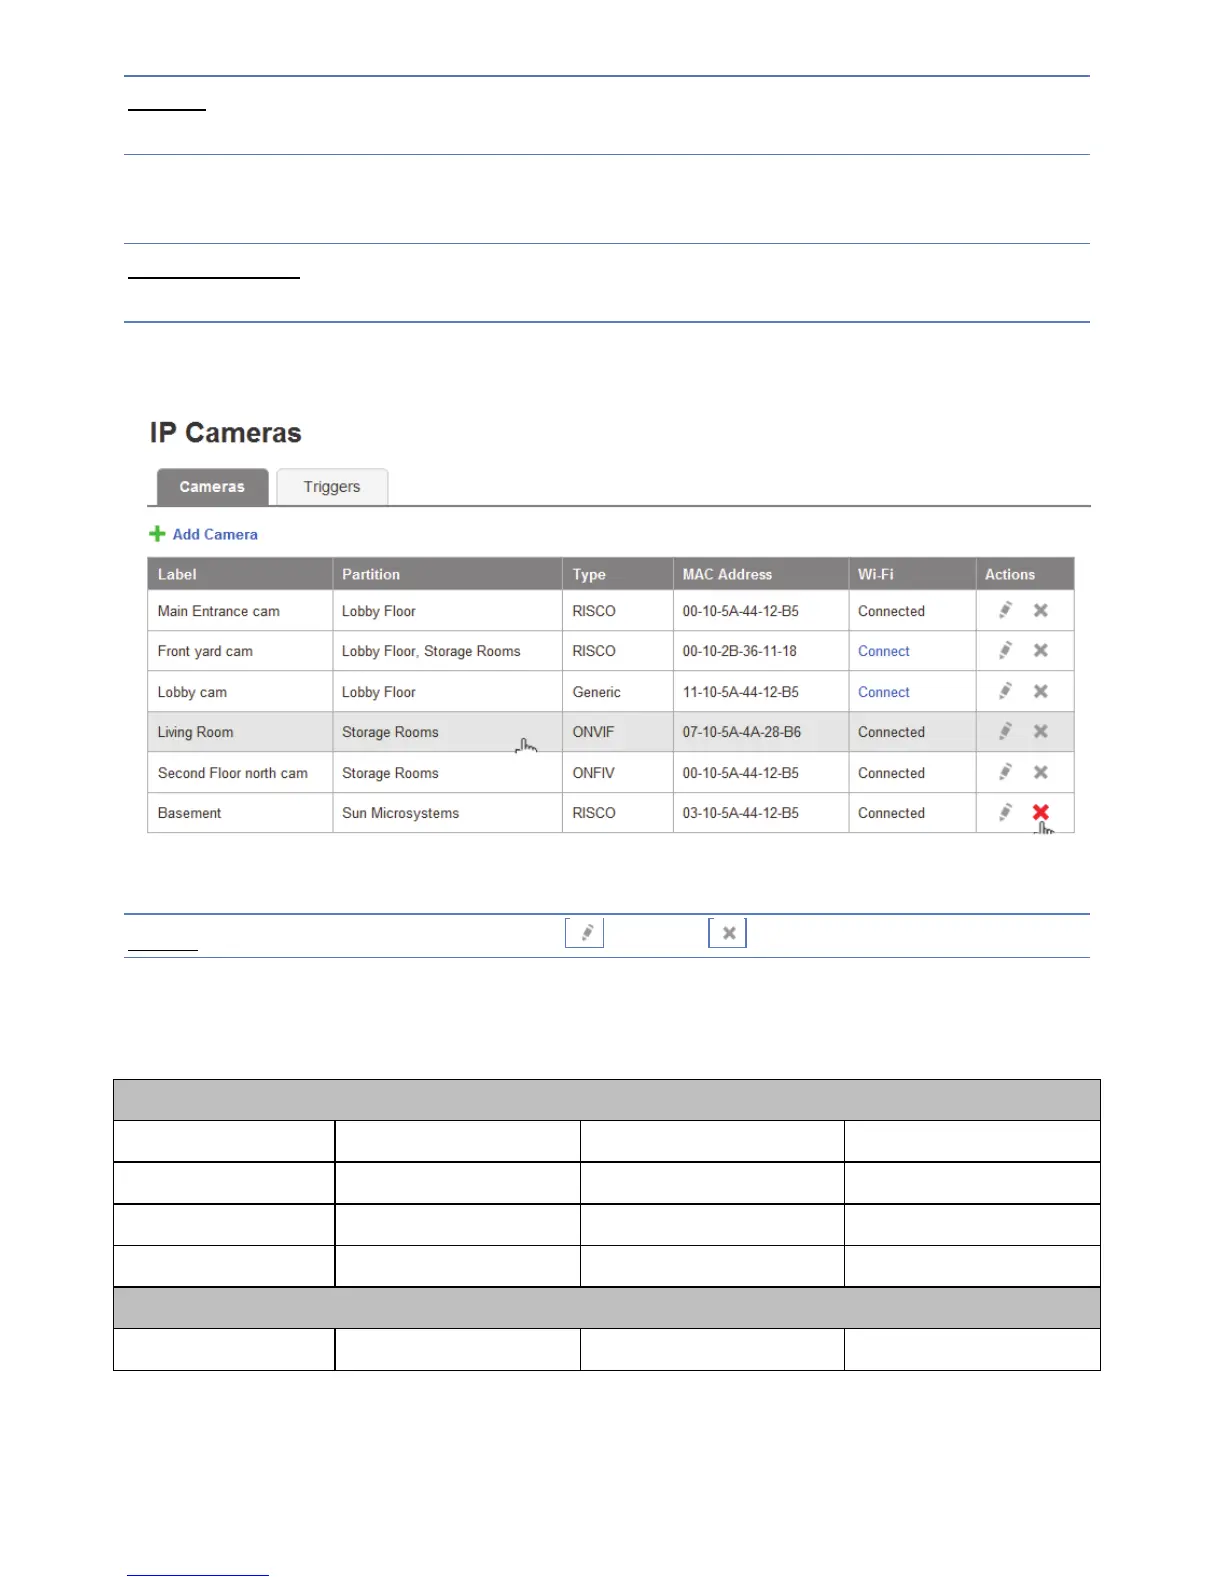
12. Once the “camera is ready for use” message is displayed, click OK. The
defined IP camera is displayed in the IP Cameras page.
Figure 11 IP Camera List
NOTE – You also have the option to edit or delete the selected IP camera.
Defining Camera Trigger Settings
Any event from the following list can be defined to trigger an alarm.
Partition Events
Fire Alarm Panic Alarm Medical Alarm Alarm
Full Arm Part Arm Disarmed Duress
Tamper 24 HR-X Alarm Water Alarm Gas Alarm
Environ. Alarm No Motion Alarm Exit Alarm Low Temperature
Detector Events
Alarm Zone Bypassed Zone Un-bypassed Zone Tamper
 Loading...