15
Troubleshooting
Internet Configuration/UPnP Client Error
Not all routers support UPnP and in some routers UPnP is disabled by default. If
you have tried configuring internet access automatically and get the message
“unable to configure Internet Access”, “UPnP Client Error” or similar, it should
possible to set your IP cameras and router up manually.
Step1: Login to your router
Use the router interface to identify the camera’s IP address. The Router Interface
can be opened using any standard web browser.
1. Enter the local IP address of the router into the web browser’s address
field. The Router Interface Login page is displayed.
2. Enter your username and password in the Login box that appears and
click OK/Login.
NOTE: For more information on how to navigate your specific router please
check the router’s User manual.
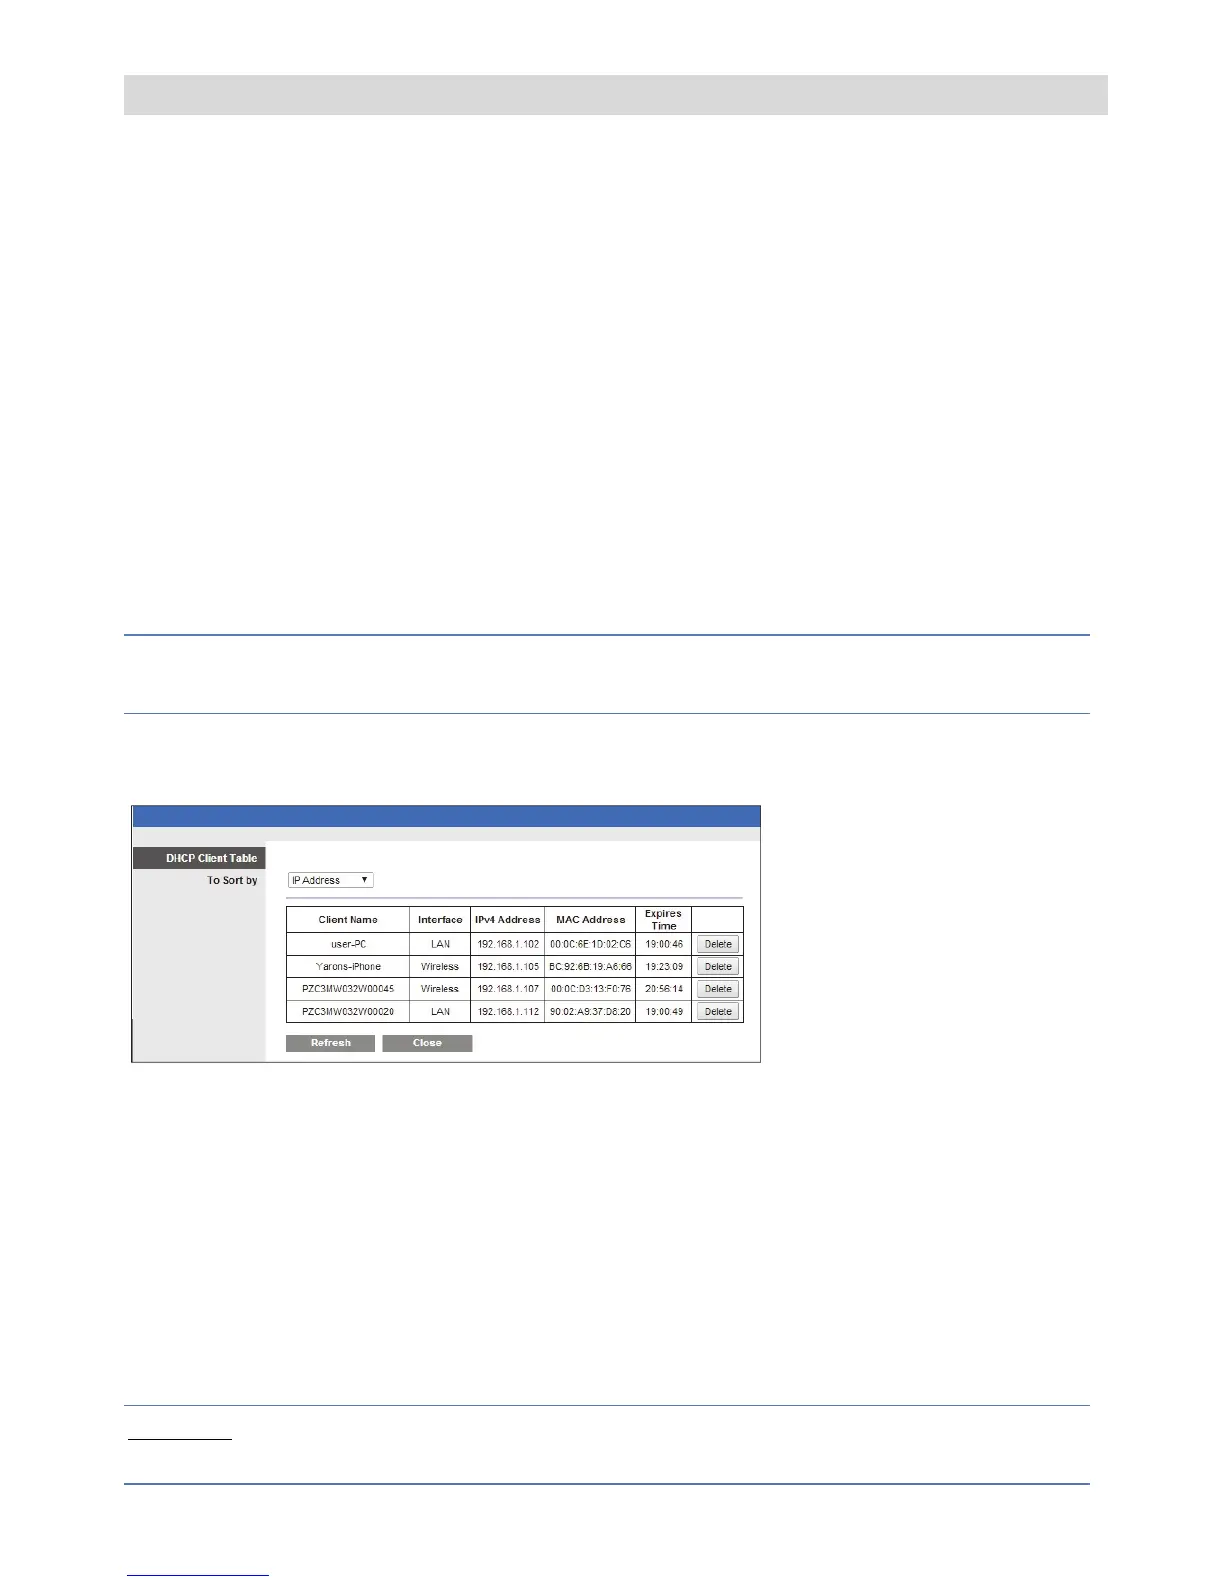
3. Navigate to the DHCP Client Table. The DHCP Client Table page is
displayed.
Figure 17 DHCP Client Table page
4. Make a note of the IP Address of the camera that you want to setup
manually.
Step 2: Camera Settings
Use the Camera Interface to setup the camera. The Camera Interface can also be
opened using any standard web browser.
1. Enter the IP address and the web port of the camera, for example
192.168.010.168:37080 (default web port is 37080).
NOTE –
When using more than one camera the default web port shouldn’t be
the same
 Loading...