Rittal CMC III online comfort handle VX 11
5 Installation
EN
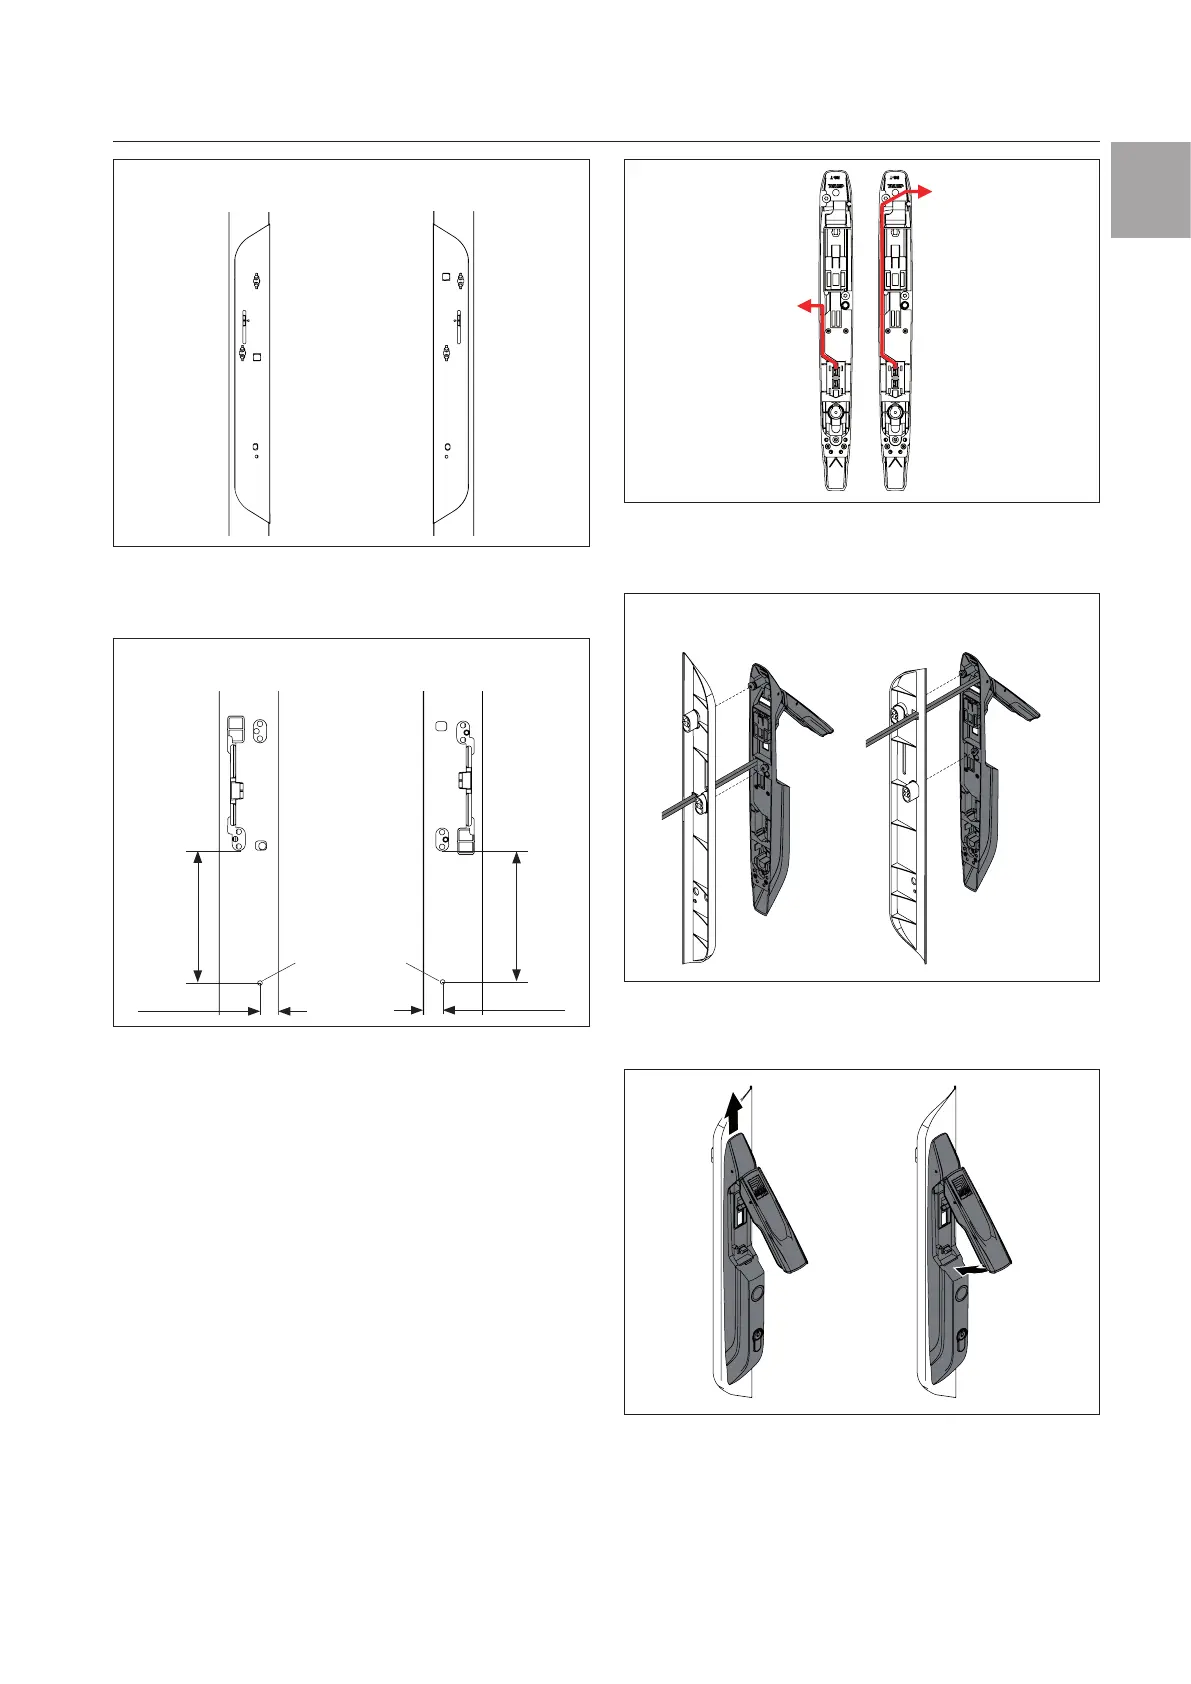
Hinge on right Hinge on left
Fig.17: Compensating panel
◾ Drill appropriately sized holes in the required position
in the frame of the VX IT glazed door (fig.18).
Hinge on right Hinge on left
20.6mm
156mm
20.6mm
156mm
Ø4.5
Ø4.5
Fig.18: Drilling the holes
◾ Debur all drilled holes with a 90° countersink.
◾ Remove any swarf from the attachment point of the
comfort handle.
◾ Pass the cable through the opening in the designer
compensating panel depending on the door hinge
(fig.19)
Hinge on right Hinge on left
Fig.19: Inserting the cable
◾ Attach the handle to the designer compensating
panel (fig.20).
Hinge on right Hinge on left
Fig.20: Attaching the handle to the designer compensating
panel
◾ Push the handle upwards and lock it (fig.21).
Fig.21: Locking the handle (right-hand hinge / left-hand hinge
accordingly)
◾ Screw the designer compensating panel including
comfort handle to the VX IT glazed door, depending
on the position of the hinge (fig.22 or fig.23, M
A
=
1.5±1Nm).