User's Guide AEB4/8-O
4
5. Hardware Installation
Important: Switch off the computer and remove the power cable from the power supply before
fitting the AEB.
1. Disconnect the power cable and all other cables from the computer.
2. Remove the PC housing; further information on how to do this can be obtained from your
computer´s instruction manual.
3. Neutralize the static build up by touching the PC metal-chassis before unpacking the AEB
from the protective bag.
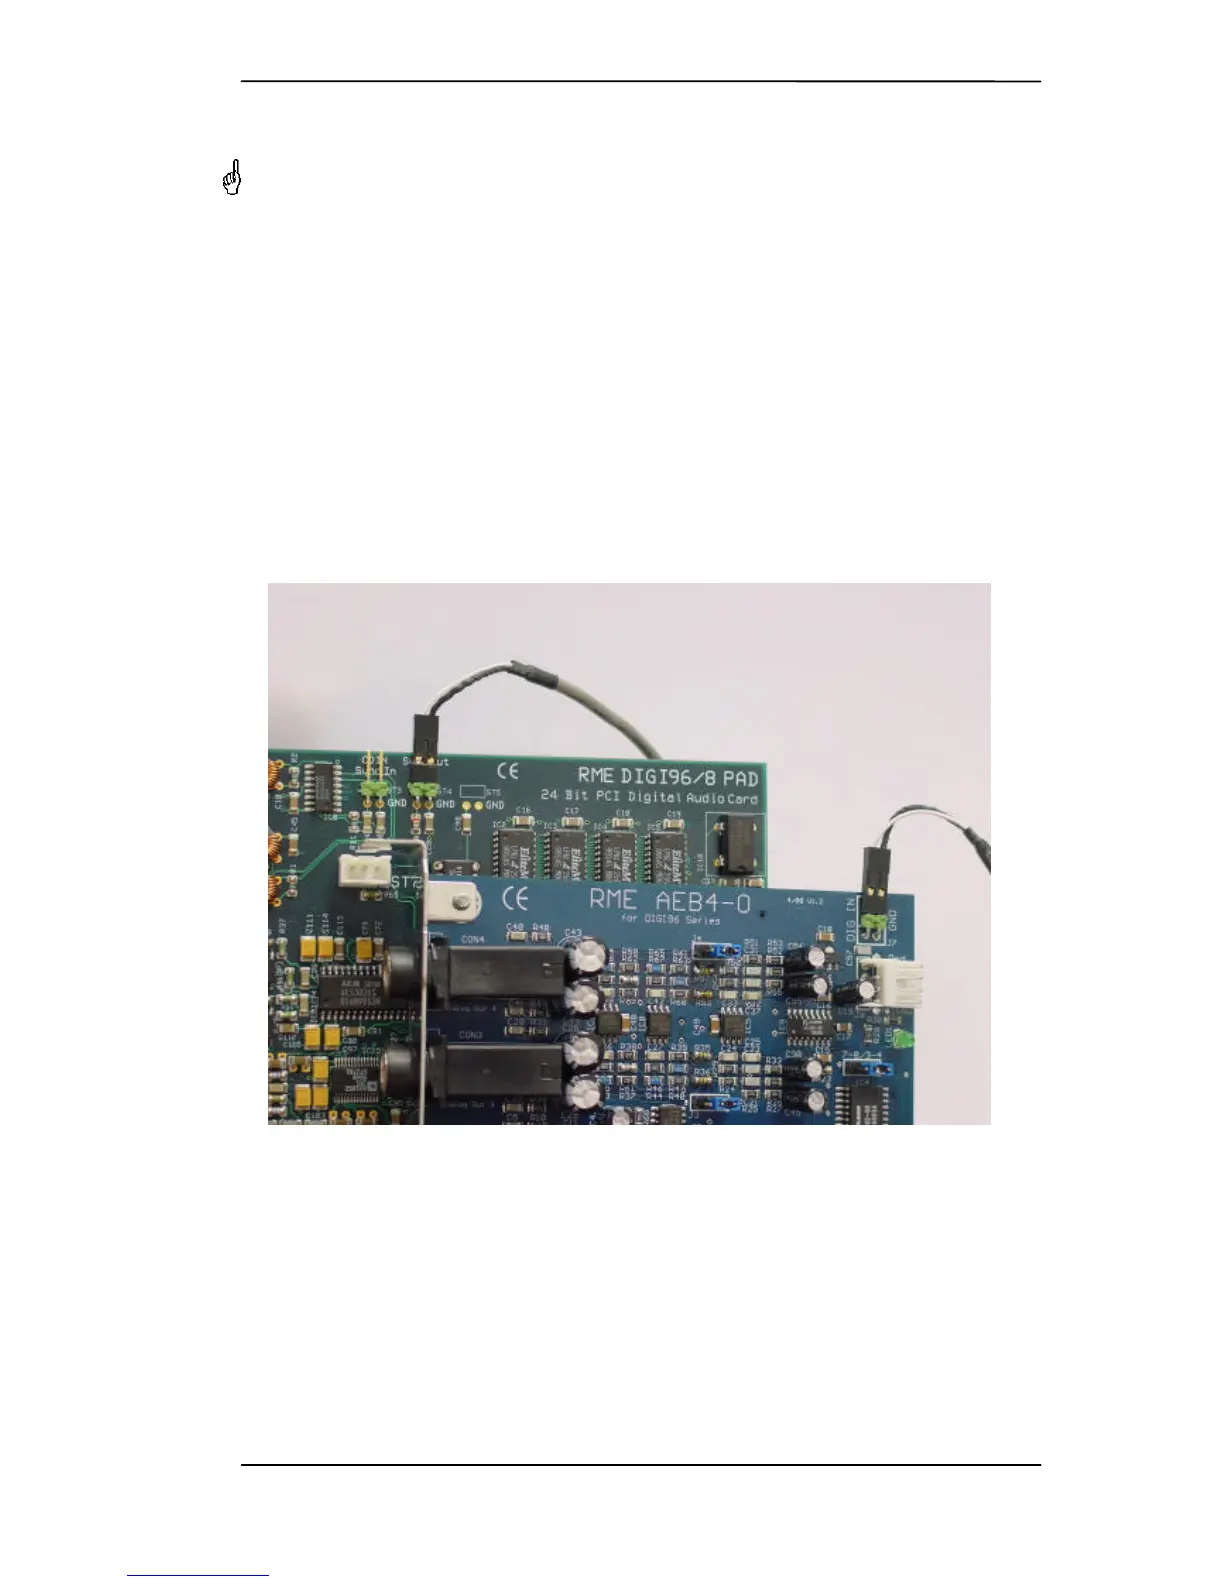
4. Connect the AEB's DIG IN and the DIGI's Sync-Out (Hammerfall: ADAT1/2 Out) using the
supplied 2-wire cable. Watch out for correct polarity: The shield wire is black, and must be
connected to the pin marked GND on the DIGI (the right one).
5. Connect power supply: The AEB uses a floppy power connector (3,5"). In case no such con-
nector is available use the supplied adapter cable to connect the AEB to any free 5 ¼" power
connector.
6. Insert the AEB into a free slot, press and fasten the screw. The AEB needs no slot on the
motherboard, but includes a stabilizing edge, which fits in both PCI and ISA slots.
7. Re-insert the DIGI in a PCI slot and fasten the screw.
8. Re-place the PC housing and tighten the screws.
9. Re-connect the power cable and all other cables/connections.
Connecting an AEBx-O to a DIGI96/8 PAD
 Loading...