Do you have a question about the ROBO R2 and is the answer not in the manual?
Provides a welcome message, support contact details, and essential safety and compliance information.
Lists all components, accessories, and software included in the Robo R2 box for setup and operation.
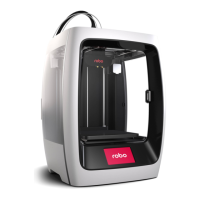
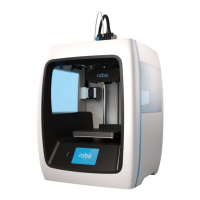
Details the various parts of the Robo R2 3D printer, with clear labels and descriptions for each component.
Instructions for registering your Robo R2 to activate the warranty and receive important updates.
Guidance on connecting the power supply and attaching the extruder face plate for initial printer setup.
Steps to connect the Robo R2 to a Wi-Fi network for firmware updates and app integration.
How to check for and install the latest software updates to ensure optimal performance of your Robo R2.
Detailed instructions for performing Z-Offset calibration to ensure accurate print bed leveling and first layer adhesion.
Step-by-step instructions on how to properly load filament into the Robo R2, including threading and securing.
Guide to selecting a file from local storage and initiating a test print to confirm printer functionality.
Instructions on safely removing prints from the heated bed, including cooling time and spatula use.
Compares Desktop Software, Web Dashboard, Mobile App, and Touchscreen control methods for the Robo R2.
Overview of the Robo App's capabilities, including remote control, monitoring, and cloud storage integration.
Information on web dashboard control, built-in hotspot, Chromebook integration, and accessing online resources and community forums.
The Robo R2 is a 3D printer designed for a wide range of users, from students and professionals to home hobbyists, enabling them to bring their imagined creations to life. This Quick Start Guide provides a comprehensive overview of setting up, operating, and maintaining the device, ensuring a smooth and productive 3D printing experience.
The Robo R2 is a Fused Deposition Modeling (FDM) 3D printer that creates three-dimensional objects by extruding heated thermoplastic filament layer by layer onto a print bed. It is engineered to unlock the full potential of its users, allowing for the creation of intricate designs and functional prototypes. The printer features an interactive touchscreen for easy navigation and control, and it supports various connectivity options for seamless file transfer and print management.
The Robo R2 offers a user-friendly experience with several features designed to simplify the 3D printing process:
Initial Setup: The setup process begins with registering your Robo R2 online to activate your warranty and receive updates. This involves visiting robo3d.com/register and locating the serial name on the device. Once registered, the physical setup involves magnetically attaching the Extruder Face Plate to the extruder assembly, connecting the power supply and cable, and then plugging it into a power outlet. The device is then powered on using the power switch.
Connectivity: The Robo R2 can connect to Wi-Fi, allowing for software updates and printing from the Robo App, web dashboard, or Chromebook. Users can also connect to their network using an Ethernet cable. For those without internet access, the printer has a built-in hotspot for direct wireless printing.
Software Updates: Regular software updates are crucial for optimal performance and access to the latest advancements and functionalities. The printer allows users to check for and install updates through the "Utilities" and "Update" sections on the touchscreen.
Calibration (Z-Offset): Before printing, calibrating the Z-Offset is essential to ensure the correct print bed height. This process involves using the Z-Offset wizard found in the "Utilities" and "Wizards" sections. The Z-Offset Tool (or a standard sheet of paper) is used to set the print bed height by sliding it between the extruder nozzle and the print bed. Users adjust the Z+ and Z- settings until the nozzle lightly touches the tool with slight resistance. It's important to ensure the extruder nozzle is clean before calibration.
Filament Loading: Loading filament is a straightforward process. First, press to open Filament Spool Holder 1. Cut at least 30 cm of filament and hang the spool onto the holder with the loose end facing counter-clockwise. Thread the filament through the bottom base of the Filament Sensor Block and out Filament Hole 1, ensuring the exposed filament above the sensor block is covered by the Filament Feed Tube. Finally, feed the filament all the way through the Filament Feed Tube and into Filament Feed Hole 1. The "Filament Load" wizard, found under "Wizards," guides users through the final steps, where the gears grab and pull the filament down.
Test Printing: To initiate a print, users select "Files" from the main menu, then "Local Storage" (or "USB Storage" if printing from a USB drive). From there, they choose a file to print, such as "R2_Test_Print.gcode," and select "Start." The printer will then go through an automatic leveling sequence before beginning the print. Users can pause or cancel a print at any time through the touchscreen interface.
Print Removal: After a print is complete, it's crucial to wait 5-10 minutes for the print bed to cool down to avoid burns, as it can reach high temperatures. Once cooled, the print can be removed from the heated print bed. If the print is difficult to remove by hand, the heated print bed can be carefully removed from the printer by unclipping the cable at the back. The print bed can then be placed on a flat surface outside the printer, and the print can be gently lifted off using the provided spatula. Caution is advised as spatula edges can be sharp. Prints should be removed by lifting from one of their corners, not directly upward, to prevent damage.
Control Options: The Robo R2 offers four main ways to control the printer:
While the manual primarily focuses on usage, it highlights a key maintenance aspect:
Software Updates: Regularly updating the printer's software is a critical maintenance task. This ensures the printer operates with the most up-to-date advancements and functionalities, preventing potential issues and enhancing performance.
Nozzle Cleaning: Before calibration, it is explicitly stated to ensure the extruder nozzle is clean. This implies that regular cleaning of the nozzle is a necessary maintenance step to ensure accurate printing and prevent clogs.
The Robo R2 is designed to be a versatile and accessible 3D printer, supported by a comprehensive ecosystem of software and support resources to empower users in their creative endeavors.
| Layer Resolution | 20-300 microns |
|---|---|
| Filament Diameter | 1.75 mm |
| Nozzle Diameter | 0.4 mm |
| Connectivity | Wi-Fi, USB |
| Heated Bed | Yes |
| Bed Leveling | Automatic |
| Print Material | PLA, ABS, HIPS |
| Frame | Aluminum |
| Print Technology | FDM |
| Operating Voltage | 110-240 V |