• VEGETABLE PREPARATION ATTACHMENT
The vegetable slicer attachment comprises of two
removable parts: the vegetable cutter bowl and lid.
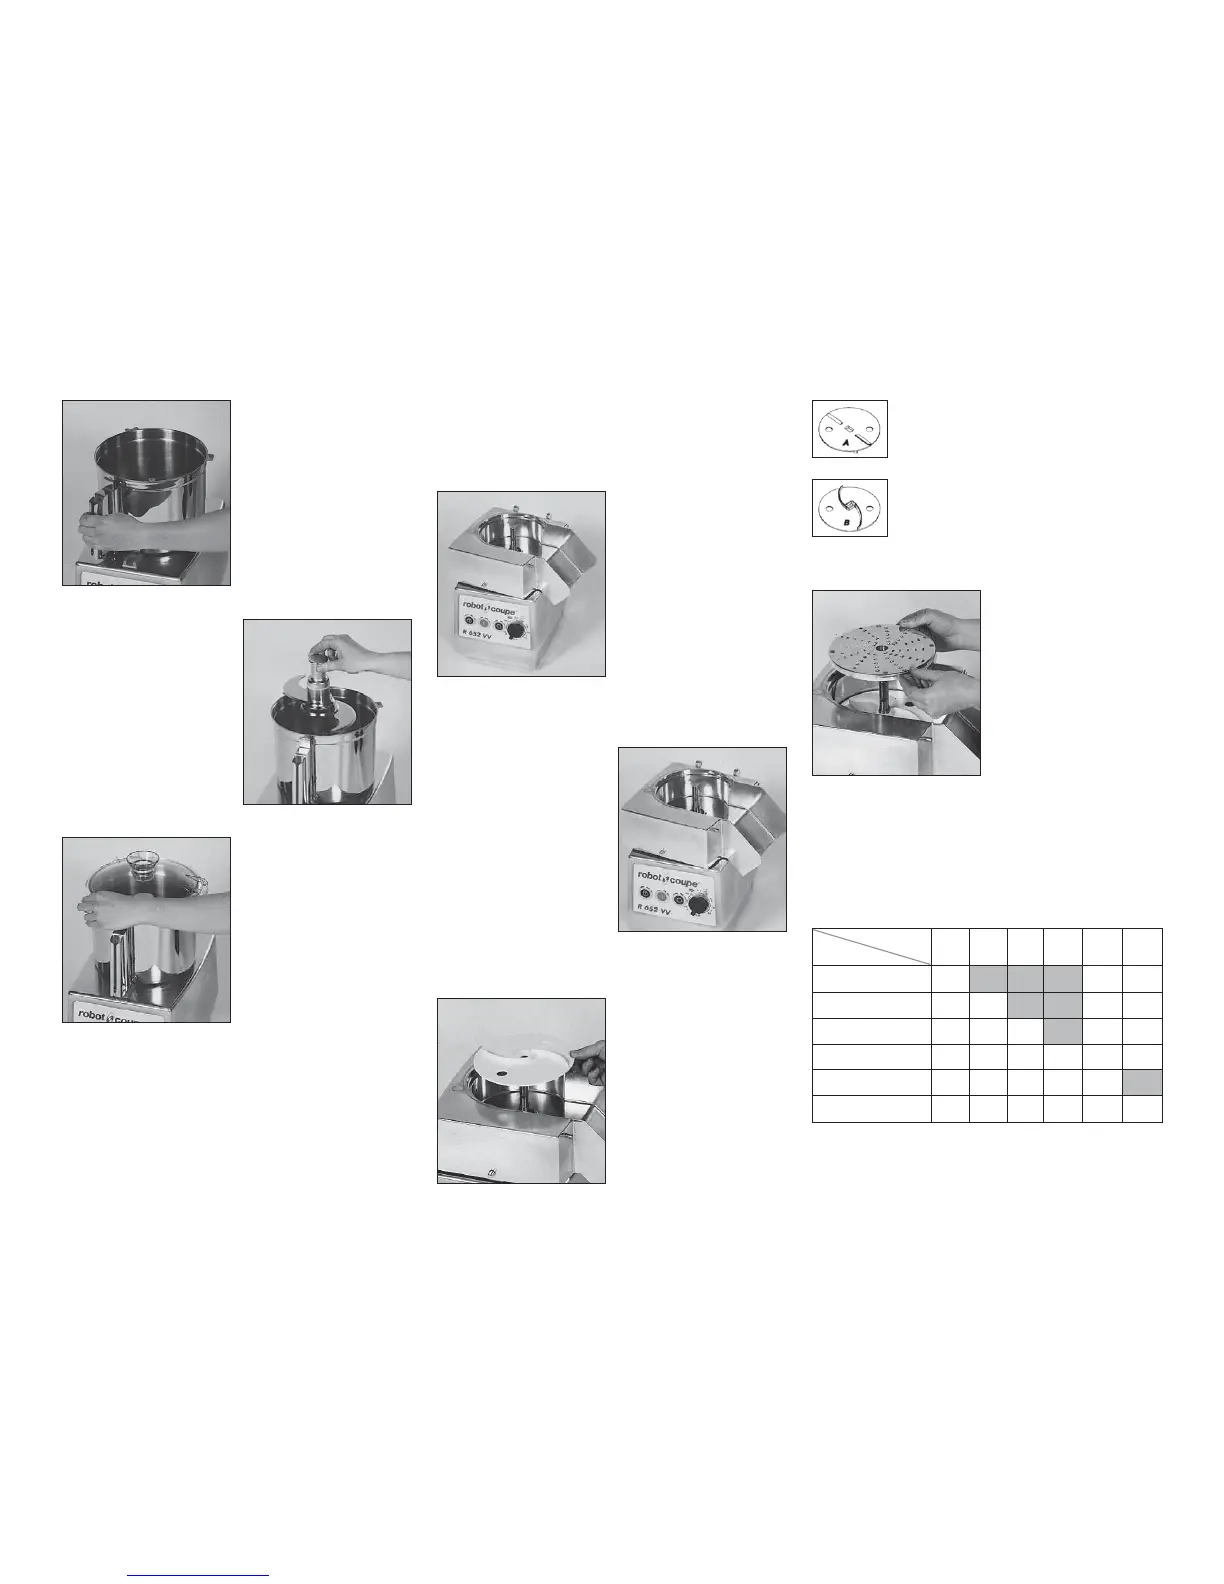
1) With the motor base
unit facing your, fit the
vegetable cutter bowl
onto the motor base unit
so that the bowl juts out
slightly on the left, with
the injection cute on
your right.
2) Tur n the bowl to the
right, until it locks. In or-
der to dismount this ve-
getable preparation
bowl, we only need to
push on the stainless
steel button.
3) Fit the white plastic
sling plate onto the mo-
tor shaft and check that
it is correctly positioned
at the bottom of the
bowl.
2) Tur n the bowl to the
right until it locks.
3) Engage the blade on
the motor shaft and lo-
wer it right to the bottom
of the bowl.
Make sure that it is
correctly positioned, by
rotating it in the bowl.
4) Place the lid on the
bowl and rotate to the
right until it clicks.
The device is now ready
for use. The green light
should therefore be
illuminated.
For the R 502 and R 652 models, in cutter
version, place the speed selector on the blade dra-
wing in order to operate at 1,500 rpm. For the R
502 V.V. and R 652 V.V. models, the
electronic speed variation automatically selects the
permitted speed range, which varies between 300
to 3,500 rpm.
SIDE A facing upwards (low ejection
rib) for any vegetables or citrus fruit
which require careful handling (toma-
toes, mushrooms...).
SIDE B facing upwards (high ejection
rib) for all other types of fruit or vege-
tables.
4) Position your chosen disc:
a) If you have opted for
a slicing, grating or ju-
lienne disc:
position the disc on the
motorshaft. To ensure
that it is correctly posi-
tioned, turn it in a clock-
wise direction.
b) You have chosen a dicing unit:
i.e. a grid and a special slicing disc for diced
vegetables.
Slicing discs and dicing grids can be mounted in
the following combinations:
5x5
mm
8x8
mm
10x10
mm
14x14
mm
20x20
mm
25x25
mm
5mm •
•
•
•
•
•
Dicing grid
Slicer
8mm
10 mm
14 mm
20 mm
25 mm
The combinations in the shaded areas can be
supplied on request.
22