Do you have a question about the Rock Shox 2014 Pike and is the answer not in the manual?
Advises wearing safety glasses and protective gloves during service procedures.
Provides critical safety guidelines to follow when performing maintenance on the fork.
Outlines maintenance frequency based on service hours for optimal performance.
Completely removes the bottom bolts and separates the lower leg from the fork.
Uses a tire lever to carefully pry out the dust wiper seal.
Installs the new dust wiper seal flush with the lower leg surface and replaces the wire spring.
Chart detailing fork travel options and compatible Bottomless Tokens for Solo Air.
Chart detailing fork travel options and compatible Bottomless Tokens for Dual Position Air.
Uses tools to push the DPA seal head and remove the retaining ring.
Uses tools to push the SA seal head and remove the retaining ring.
Installs Bottomless Tokens into the Solo Air top cap using an 8 mm hex wrench.
Installs the top cap into the upper tube and tightens it to the specified torque.
Attaches the DPA adjuster knob and retaining nut, tightening to the specified torque.
Uses a 30 mm socket to loosen the damper top cap and remove the assembly.
Uses wrenches to loosen the damper seal head and remove the rebound assembly.
Applies grease to the new seal head seals and installs it onto the rebound damper shaft.
Uses a chart to arrange shims for Soft, Medium, or Firm rebound tunes.
Threads and tightens the main piston nut to the specified torque.
Tightens the seal head clockwise using a torque wrench and specific wrenches.
Cycles the syringe and shaft to create vacuum and purge air bubbles from the damper.
Rotates the compression adjuster cam clockwise to the locked position to test.
Installs the Charger Damper into the upper tube and tightens the compression top cap.
Places and turns the compression mode or low speed adjuster knobs to engage detents.
Tightens the RCT3 knob retaining nut to the specified torque while holding the knob.
Tightens the RC knob retaining nut to the specified torque while holding the knob.
Installs the low speed adjuster knob and tightens its retaining screw to the specified torque.
Injects 10 mL of RockShox 0w-30 suspension oil into each lower leg.
Threads and tightens the bottom bolts to 7.3 N-m (65 in-lb).
Installs the rebound adjuster knob and tightens its set screw to 1.1 N-m (10 in-lb).
Pressurizes the air spring to the appropriate pressure based on rider weight.
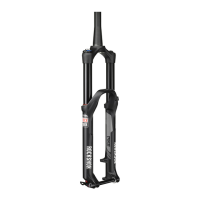
| Wheel Size | 26", 27.5", 29" |
|---|---|
| Spring Type | Solo Air |
| Damper | Motion Control |
| Steerer Tube | Tapered |
| Stanchion Diameter | 35mm |
| Max Rotor Size | 200mm |
| Intended Use | All Mountain/Trail |
| Travel | 140mm, 160mm |
| Axle | 15mm |
| Adjustments | Rebound, Low Speed Compression |