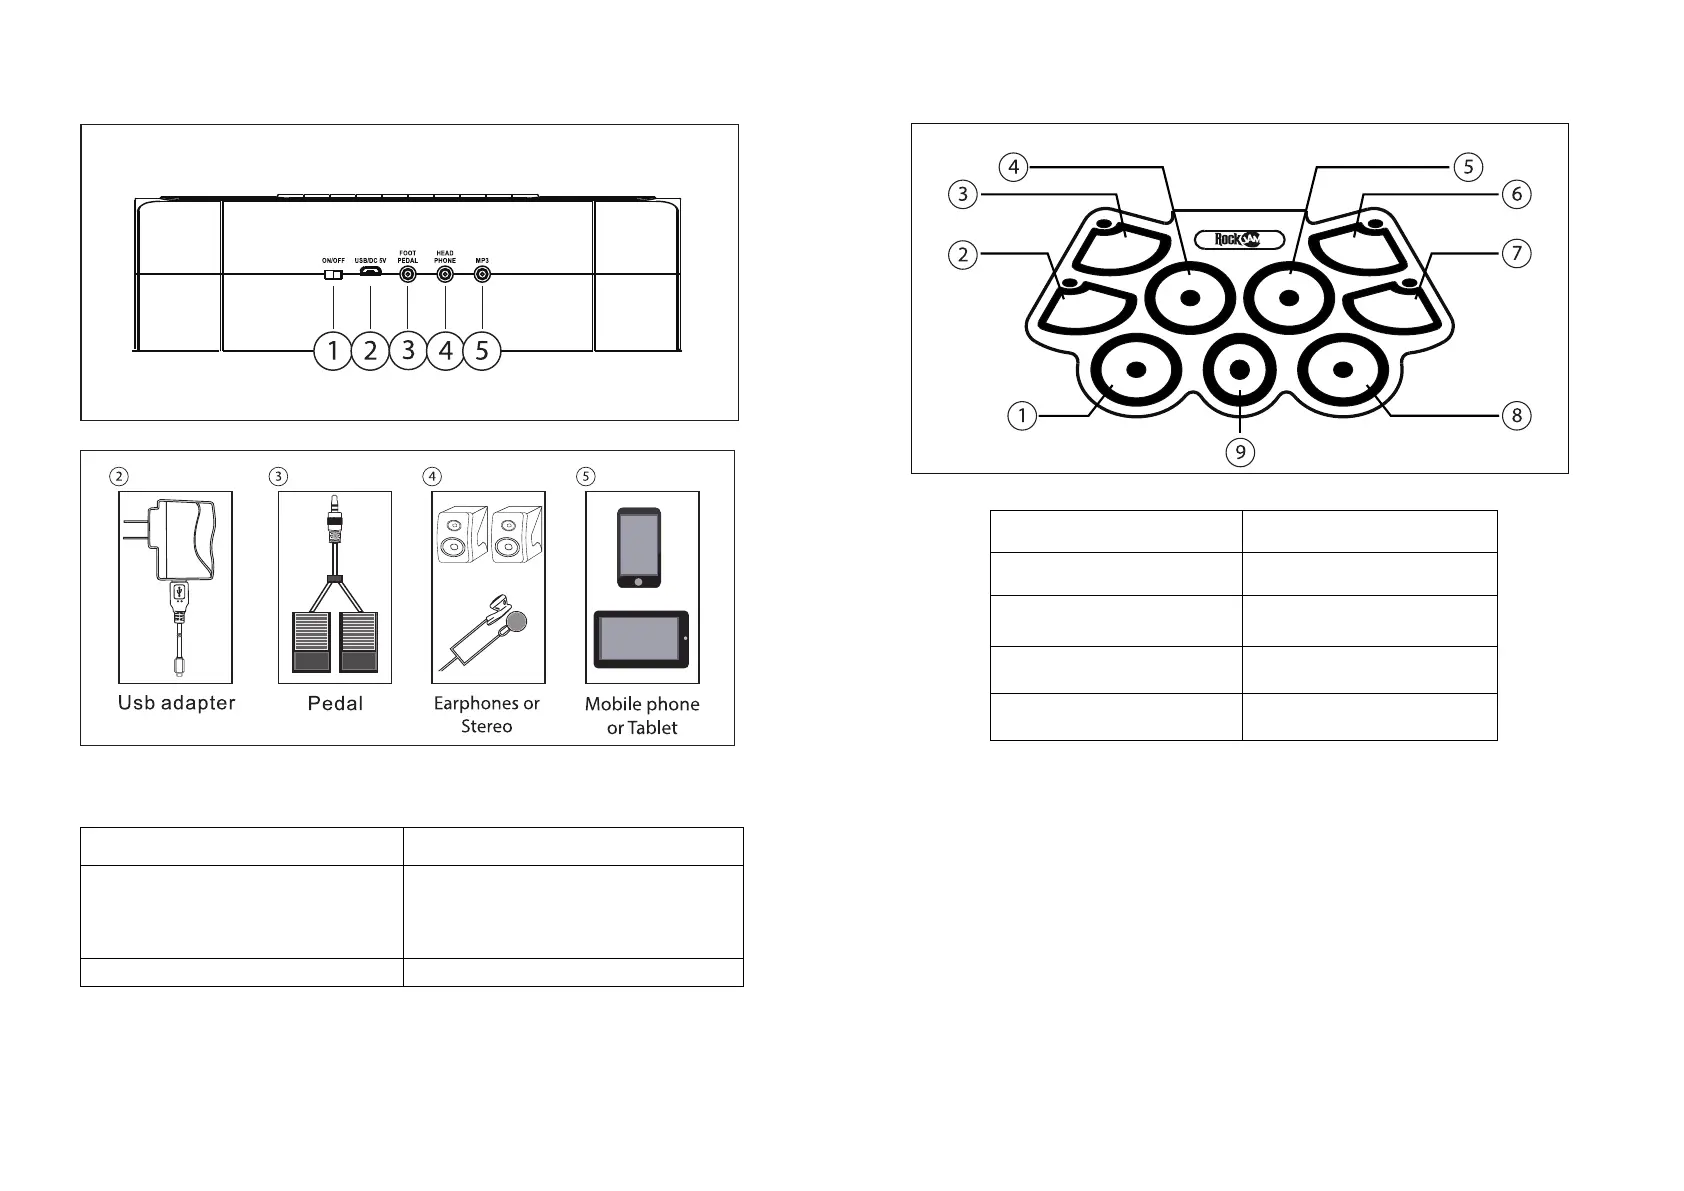
5. Rear panel switches and connections
Make connections to the rear of the drum kit as follows before switching on:
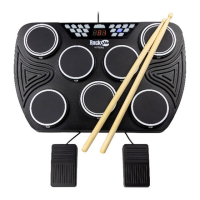
6. Drum pad layout
7. Operation
Switching the unit on
Slide the on/off switch at the rear of the drum kit to the left to switch on. The power indicator LED will light up red.
Volume control
Press the VOL-/VOL+ buttons to adjust the volume of the drum sounds, demo songs and rhythms. There are 9 Volume
settings available plus an off setting. The default setting at power up is level 6.
Drum kit selection
Press the STYLE button to cycle through the 7 different drum kit sounds. Hit the drums to test out the sounds available
until you find the one that you like. The default setting at power up is STYLE 1.
1 – Power On/Off Switch. Used to switch the drum
kit on or off.
4 – Connect Headphones, Earphones or to amplified
speakers.
2 – Power adapter connection. Use the USB power
adapter supplied or power from a computer USB
port.
NOTE: Also used for MIDI connection to host
computer
5 – Auxiliary input for iPod, iPhone, Smartphone or
MP3 player. Use the 3.5mm cable supplied to connect
the external device.
3 - Pedals for Bass Drum and Hi-hat.
2 – Open/Close Hi-hat 7 – Ride cymbal
4 – High tom 9 - Bass drum
5 – Low-mid tom