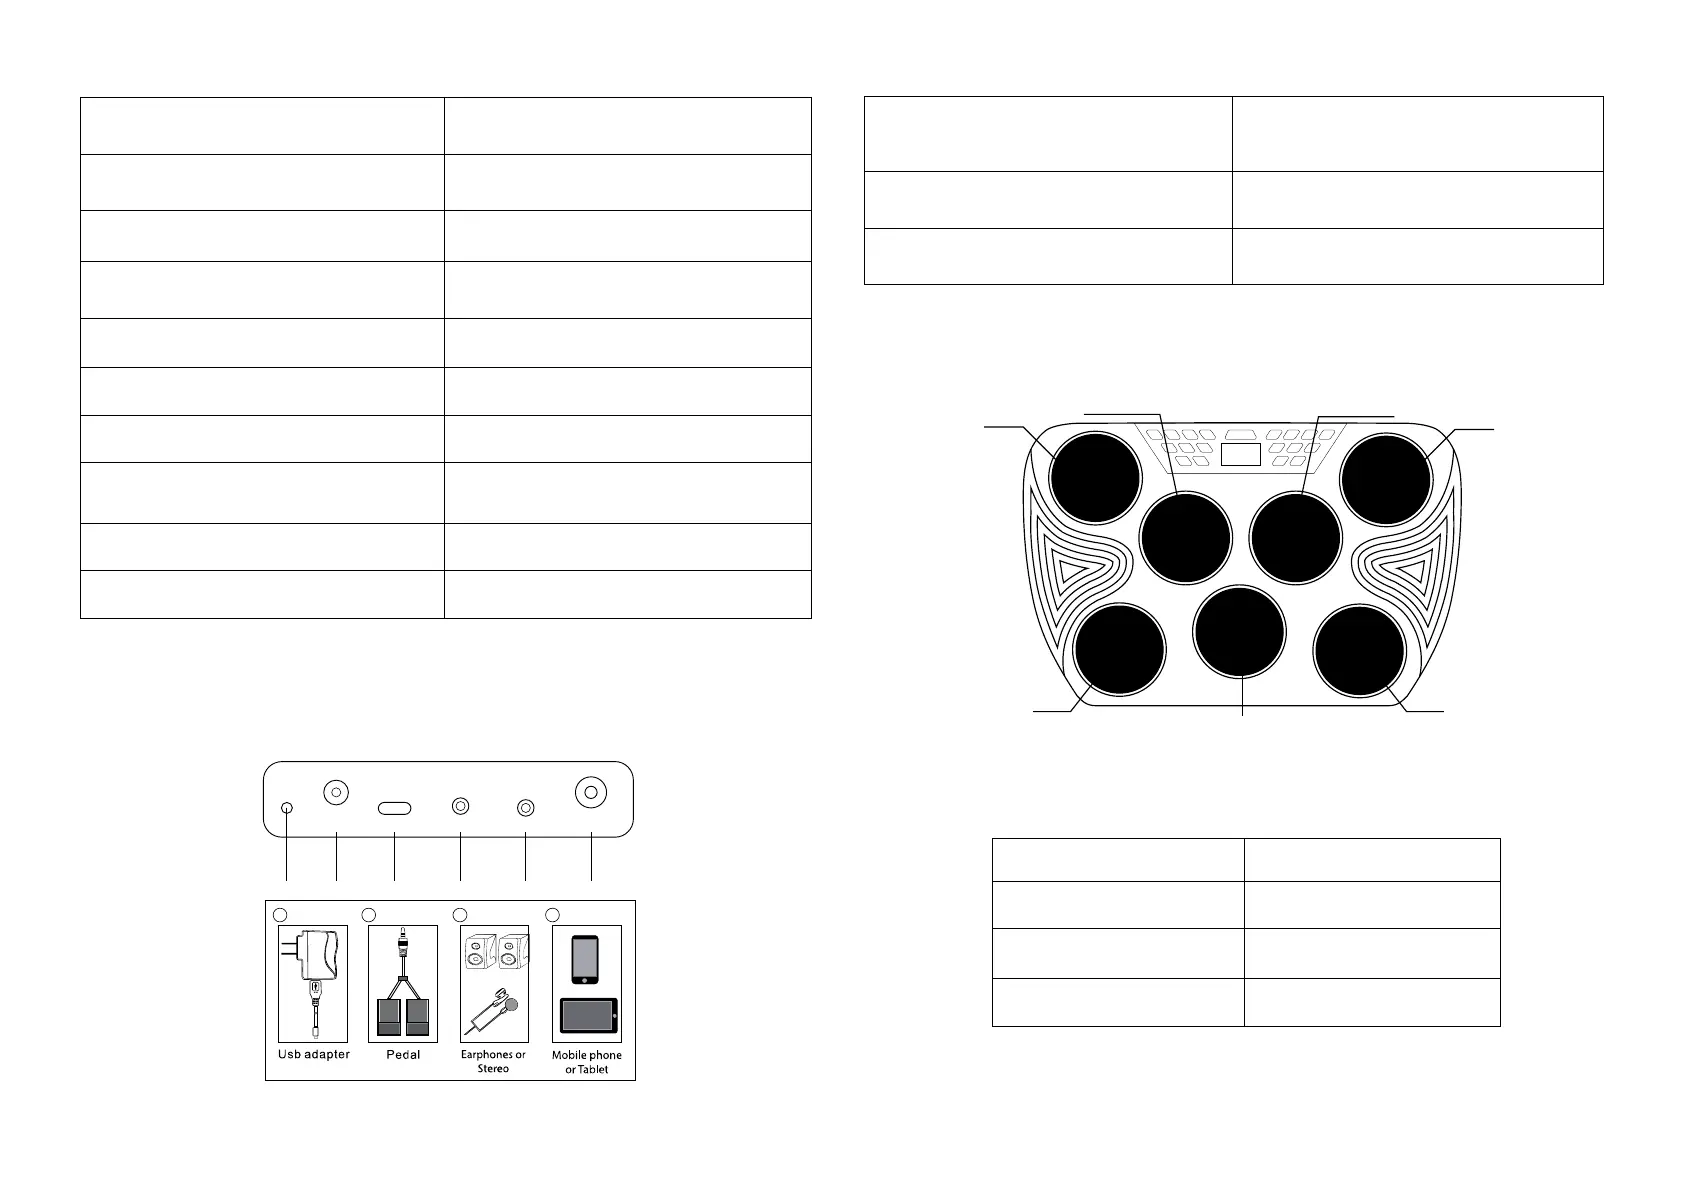
6. Rear panel switches and connections
Make connections to the rear of the drum kit as follows before switching on:
7. Drum pad layout
PEDAL
DC
9V2A USB-C LINE IN PHONES
20 21 22 23
24
25
21 25
23
24
1 – POWER: Press to switch the drum kit on or off.
11 – DEMO: Press to start/stop the DEMO song. Cycle
between the 30 demo songs available using the + and -
2 – DRUM: Drum track button. Used to turn the drum
track on/off in Demo mode .
12 – CLICK: Press to start/stop the metronome.
3 – PERC: Percussion track button. Used to turn the
percussion track on/off in Demo mode.
13- REVERB: Press to select the reverb level.
4 – BASS: Bass track button. Used to turn the bass track
on/off in Demo mode.
14 –VOLUME: Press to enter output volume adjustment.
5 – CHORD: Chord track button. Used to turn the chord
track on/off in Demo mode.
15 – VOICE: Press to enter output voice adjustment.
6 – SONG: Press before selecting Drum, Percussion,
Bass and Chord tracks during DEMO Song playback.
16 – KIT: Press to enter drum kit selection. 16 drum kits
are available.
7 – LAMP: Lamp button. Used to turn the LED at the front
of each drum on/off.
17 – TEMPO: Press to enter tempo selection. Tempo can
be set between 30 and 250 BPM.
8 – HAND PERC: Press to enter hand percussion mode.
Drum kit number 15 will be selected.
18 – DECREASE - : Press to decrease the value of the
selected feature.
9 – SAVE/REC: Press to start and stop the recording of
the drum beats.
19 – INCREASE + : Press to increase the value of the
selected feature.
10 – PLAY/STOP: Press to start or stop the playback of
the recorded beats.
20 – Power indicator: Lights up red to indicate power
connected and charging. Light goes out when fully
charged. Light flashes when battery is low.
23 – Auxiliary Line input for iPod, iPhone, Smartphone
or MP3 player: Use the 3.5mm cable supplied to connect
the external device.
21 – Power adapter connection: Use the USB power
adapter supplied (9V @ 2A).
24 – Phones connection: Connect Headphones,
Earphones or to amplified speakers.
22 – USB-C connection: Used for MIDI connection to host
computer
25 – Pedal Input: Connect pedals for Bass Drum and Hi-
hat.
 Loading...