6
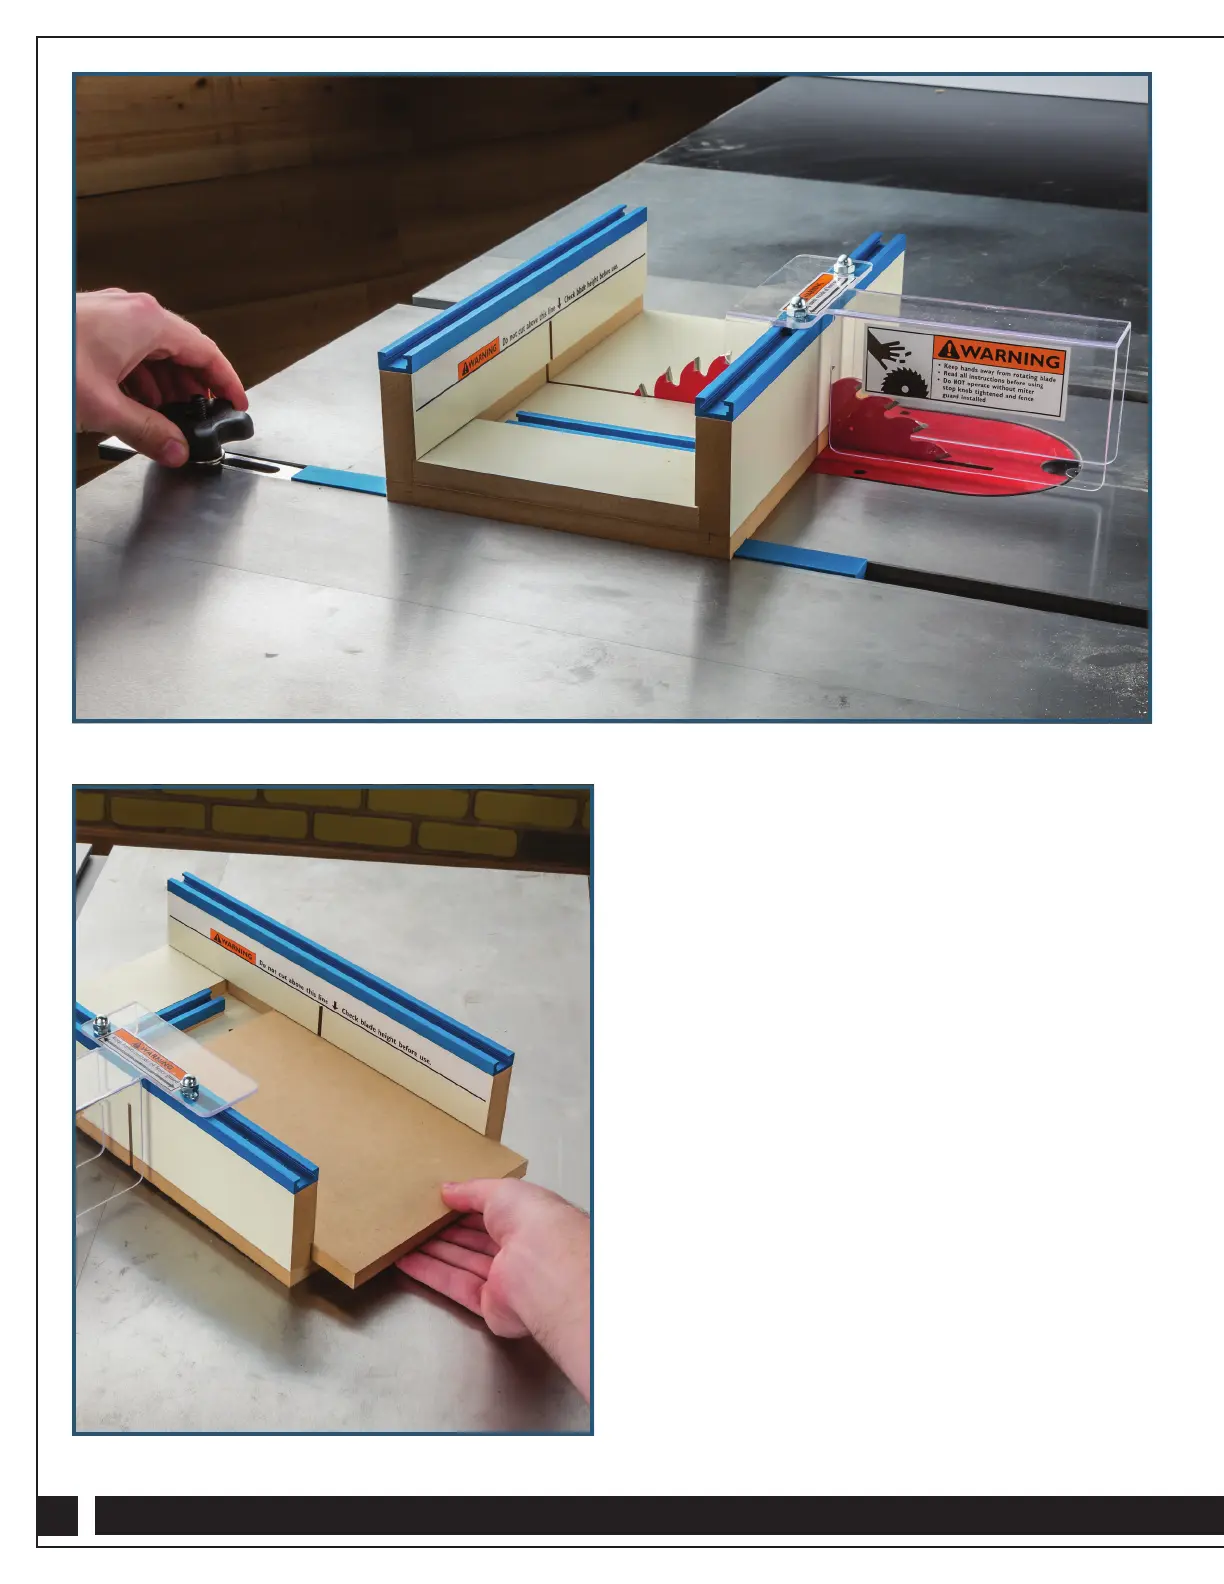
10. Position the Safety Miter Stop (9) in the table’s miter slot
at the back of the table saw so that it contacts the sled.
Tighten securely. Exact positioning depends on the specific
dimensions of your saw; you want to position the stop so it
prevents the sled from advancing so far that the blade
emerges out the back of the plastic Blade Guard (6). Fig. 5.
11. Return the Sled Body (1) to the starting point at the front
of the saw. Insert the MDF Zero-Clearance Insert (2) in the
grooves in the Sled Body fences and slide it until it contacts
the T-track. Fig. 6.
12. Flip the Sled Body (1) and secure the MDF Zero-Clearance
Insert (2) in place by driving two 8-32 x 1" Flat-Head
Screws (5) through the predrilled holes in the underside
of the Sled Body and into the MDF Zero Clearance
Insert (2). Fig. 7. If, by chance, you cut through the
predrilled holes because of the position of the miter slot on
your saw, drill new through holes in the Sled Body (1).
13. Return the Sled Body (1) to upright and position it at the
front of the saw, clear of the blade.
14. Turn on the saw and push the Sled through the blade until it
cuts through the MDF Zero-Clearance Insert (2). Fig. 8.
15. Turn off the saw and allow the blade to stop spinning,
then remove the offcut piece of the MDF Zero-Clearance
Insert (2).
16. Place the plastic Drop-Off Ramp (3) in position on the Sled,
opposite the MDF Zero Clearance Insert (2), with the flat
Fig. 5
Fig. 6
 Loading...