2. Before each use (and with the saw OFF), make sure that the
Sled Body (1) can slide in the miter track and that the blade
height is set to no more than 2".
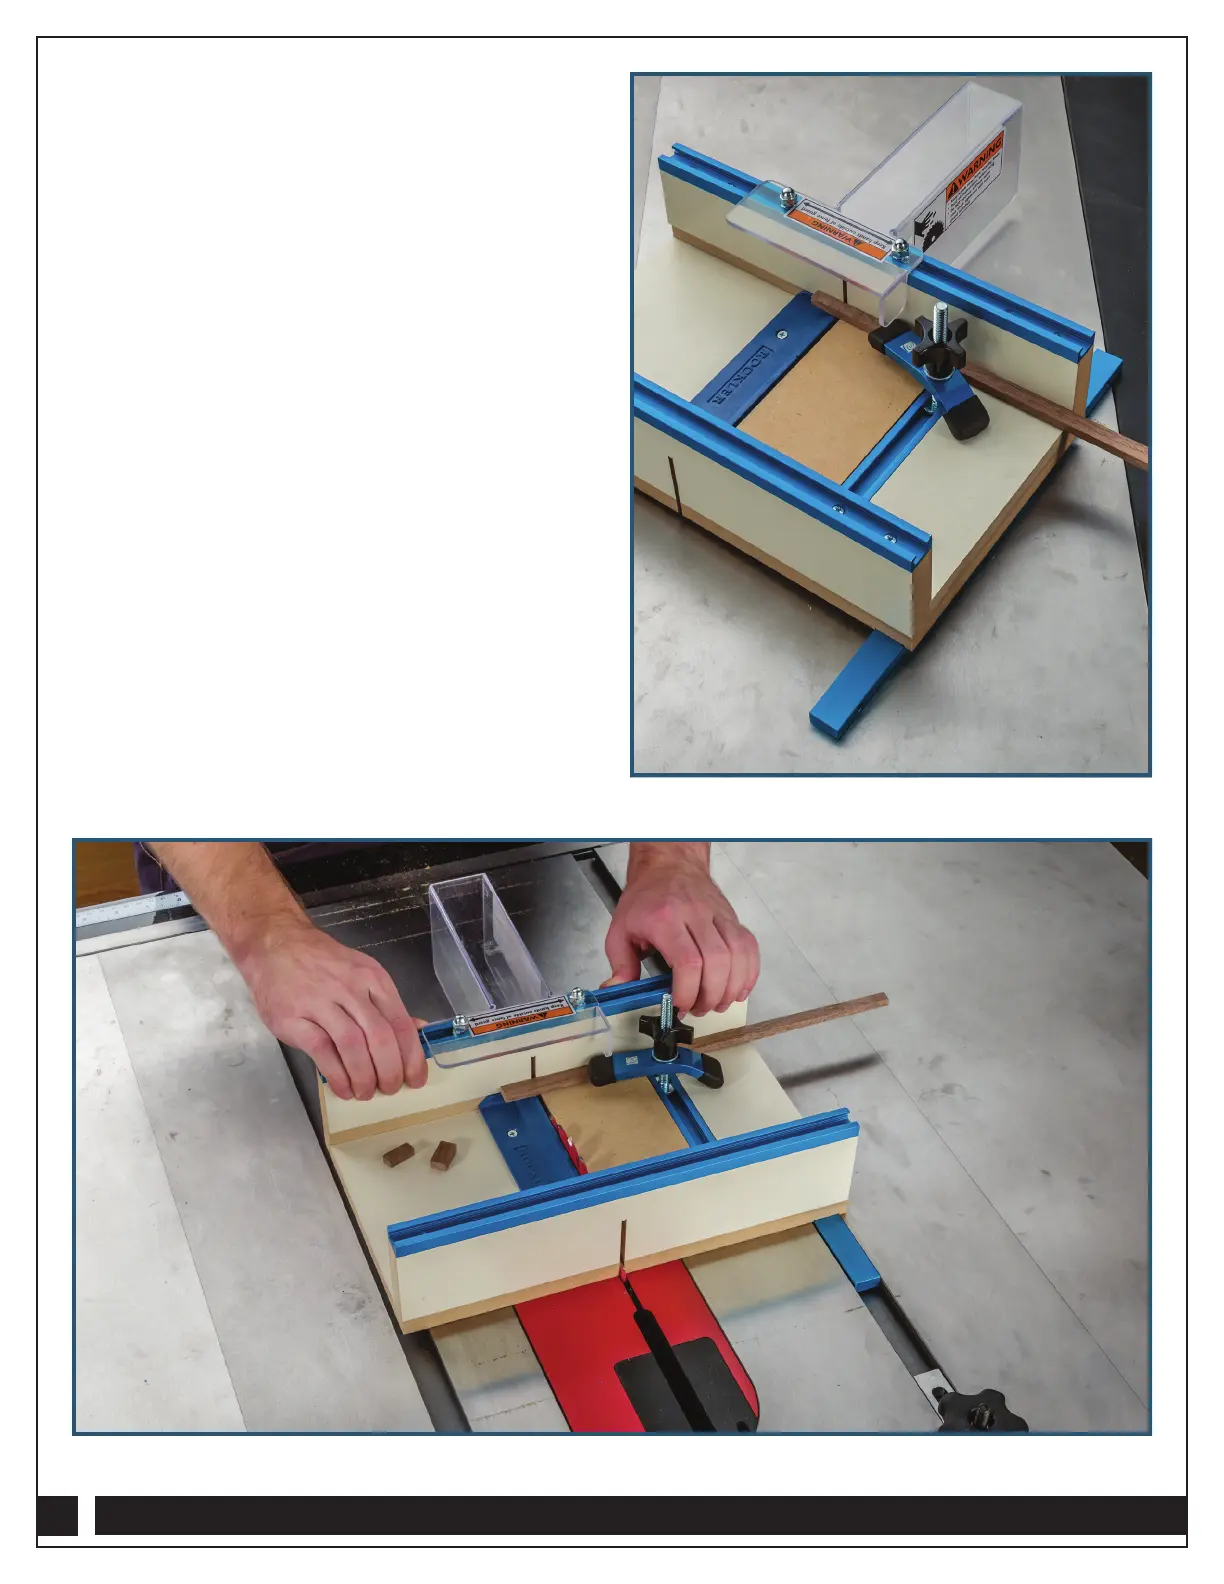
3. Pull the Sled Body (1) to the front of the saw and position
your workpiece against the back fence, aligning your cut
mark with the edge of the saw kerf. Hold the workpiece
securely with your left hand or use a hold-down
clamp (sold separately) in the T-track on the left side
of the blade to secure it. Fig. 10.
4. Turn on the saw. Position your right hand on the sled,
making sure your hand and fingers are to the right of the
Blade Guard (6) and left hand is to the left of the Blade
Guard. Push the sled forward to make the cut, stopping when
the Safety Miter Stop (9) is contacted. Fig. 11.
5. If making repeated cuts, the sled may be pulled back to the
starting point while the saw is still running, but ONLY if:
• The offcut piece has fallen away so that it will not contact
the blade. If it has NOT fallen away, turn off the saw and
wait for the blade to stop moving before removing the
offcut and retracting the sled; and
• Your stock to the left of the blade has not shifted; and
• You maintain downward pressure on the Sled while pulling
it back to prevent the miter bar on the Sled Body (1) from
slipping out of the saw’s miter slot.
6. After using the Table Saw Small Parts Sled; reinstall the
riving knife and guard on your table saw.
7. Store this instruction booklet with your Table Saw Small
Parts Sled or in another place for easy reference.
8
Distributed by Rockler Companies, Inc.
©2017 Rockler Woodworking and Hardware
55916
Rev 05/17
Fig. 11
Check Rockler.com for updates. If you have further questions, please
contact our Technical Support Department at 1-800-260-9663
or support@rockler.com
Fig. 10
Shown with optional
Mini-Hold Down Clamp
(45692, sold separately)
Shown with optional
Mini-Hold Down Clamp
(45692, sold separately)
 Loading...