8 950-006760-00, REV. A01
E
NGLISH
R
OCK
S
HOX
, I
NC
. • 2003 SID O
WNER
’
S
M
ANUAL
ROCKSHOX, INC. • MARCH 2002 9
R
OCK
S
HOX
, I
NC
. • 2003 SID O
WNER
’
S
M
ANUAL
E
NGLISH
M AINTENANCE
To maintain the high performance, safety, and long life of your fork, periodic maintenance is
required. If you ride in extreme conditions, maintenance should be performed more frequently.
*WE RECOMMEND THIS SERVICE BE PERFORMED BY A QUALIFIED BICYCLE MECHANIC. TO OBTAIN SERVICE
INFORMATION OR INSTRUCTIONS, VISIT OUR WEBSITE AT WWW.ROCKSHOX.COM OR CONTACT YOUR LOCAL
ROCKSHOX DEALER OR DISTRIBUTOR.
Torque Tightening Values
Top Caps 60 in-lb
Brake Posts 80 in-lb
Cartridge Sleeve Retainer 20 in-lb
Air Shaft Nut 45 in-lb
Damper Shaft Bolt 50 in-lb
Remote Lockout clamp bolt 8 in-lb
Pure top cap clamp screw 8 in-lb
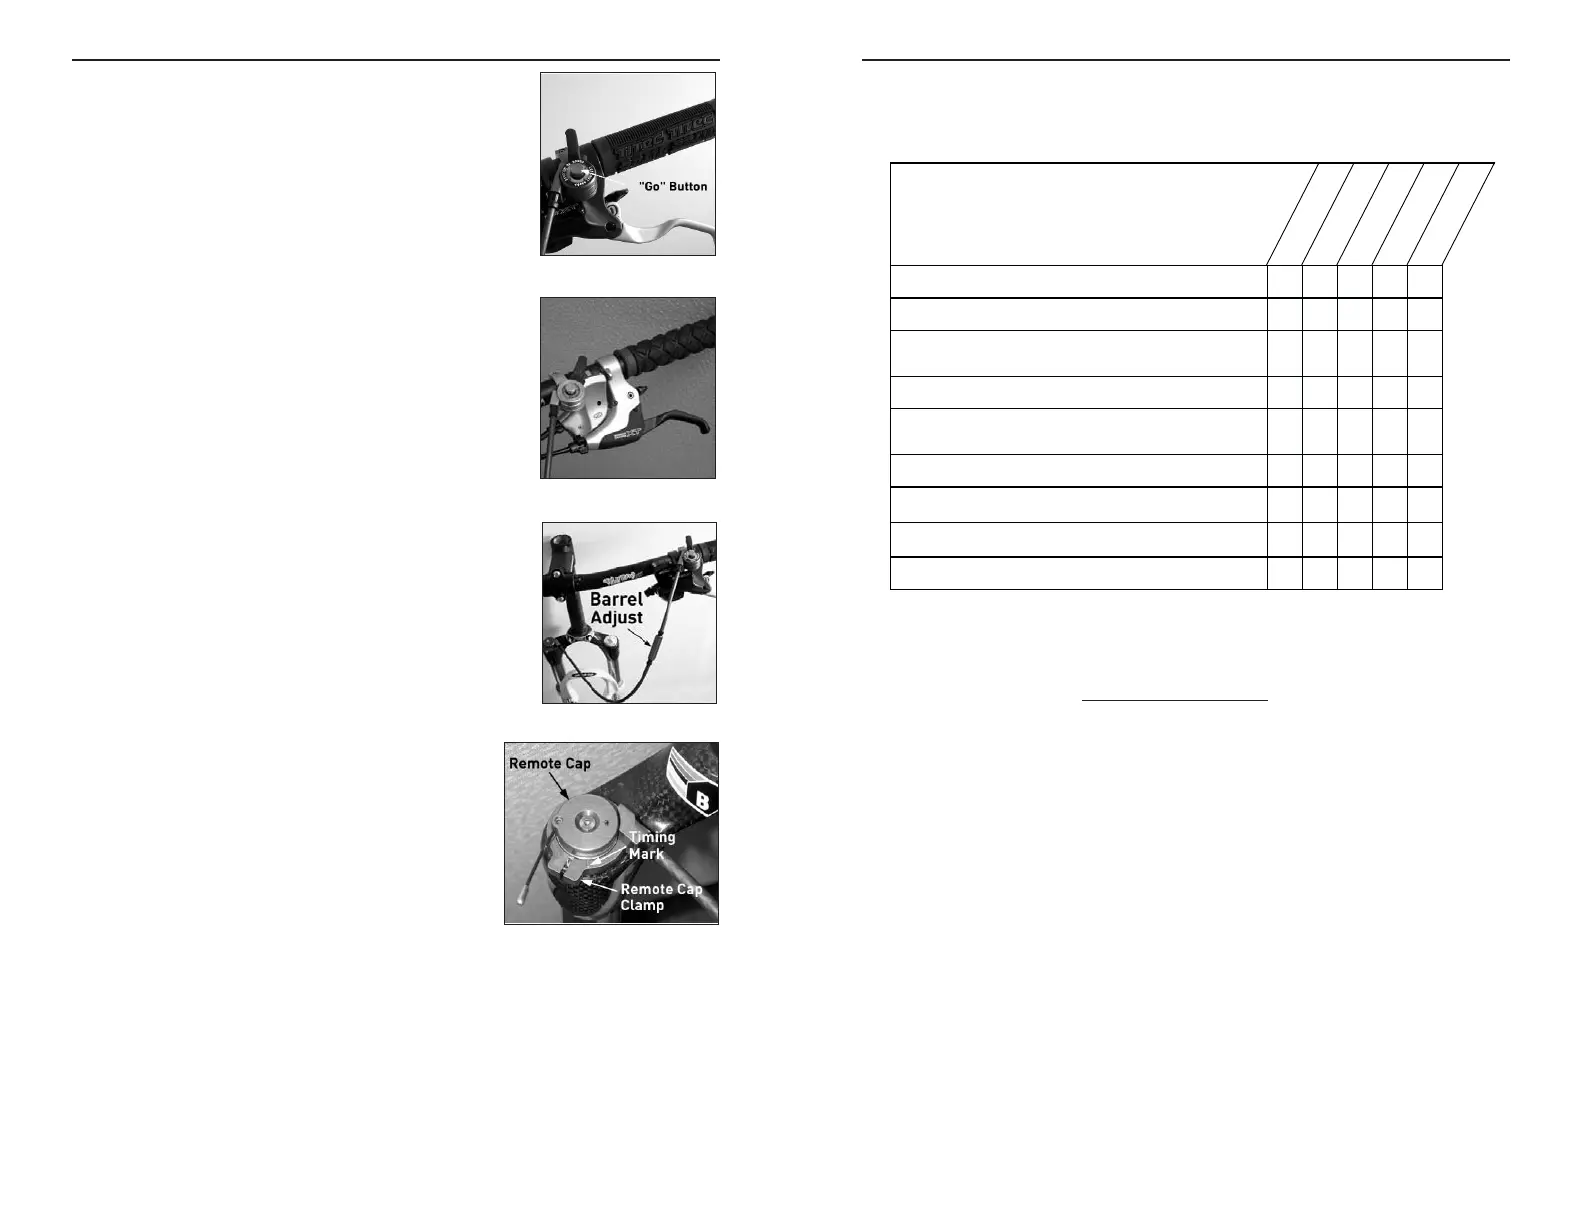
Remote Lockout (World Cup)
The Remote Lockout lever allows incremental compression
adjustment and lockout of your fork without removal of your hands
from the handlebars. The lever offers approximately 130 degrees of
adjustment from fully active to the lockout position. In the center
of the Remote Lockout lever is the "go" button. Depress the "go"
button to return your fork to the active position.
MOUNTING
The Remote Lockout is mounted on the left-hand side of the
handlebar. With separate brake lever and shifter setups, mount the
Remote Lockout between the brake lever and shifter (fig. 1). With
integrated designs, mount the Remote Lockout outboard or inboard
(fig. 2) of the brake lever-shifter setup.
SETUP
1. Clamp the Remote Lockout lever in the appropriate mounting orientation (see fig
1 and 2). Torque to 8 in-lb.
2. Depress the “go” button and rotate the lever to the open position.
3. Feed the housing into the remote clamp and route the cable (fig. 3).
4. Orient the Remote Cap 60 degrees counterclockwise from the timing mark (fig.
4). This is the default open position. For a stiffer feeling fork, rotate the remote
cap less than 60 degrees from the default “open” position.
5. Set the barrel adjuster in the middle of the range.
6. Tighten the remote clamp screw and torque to 8 in-lb (fig. 4).
7. Ensure proper function.
NOTE: THE CABLE IS TEFLON COATED.
PURE DELITE SYSTEM (RACE)
Pure DeLite offers a wide range of rebound damping adjustment.
In addition, adjusting the air pressure in this chamber (right fork
leg) helps fine-tune the small bump ride (threshold or break-away) of
the fork. This chamber should be inflated to a minimum of
10 psi and a maximum of 60 psi. Less air pressure will
make the fork feel softer and helps absorb smaller bumps,
while more air pressure will make the fork feel stiffer.
We recommend adjusting the positive and negative air
pressures before you adjust the air pressure in the Pure Delite
chamber (right side, rider’s perspective).
NOTE: AIR PRESSURE IN THE PURE DELITE SYSTEM SHOULD NOT BE
USED TO TUNE THE SPRING RATE OR BOTTOM OUT FORCE REQUIRED FOR
THE FORK.